The Conditional Content block allows you to display content only when specific conditions are met. It’s a wrapper block that renders its child blocks only if the defined logic evaluates as true. If the condition is not fulfilled, no output is generated — meaning no markup is rendered at all, not even hidden via CSS. This block supports a wide range of condition types, including checks against URL parameters, cookies, dates and times, and even custom logic via a filter.
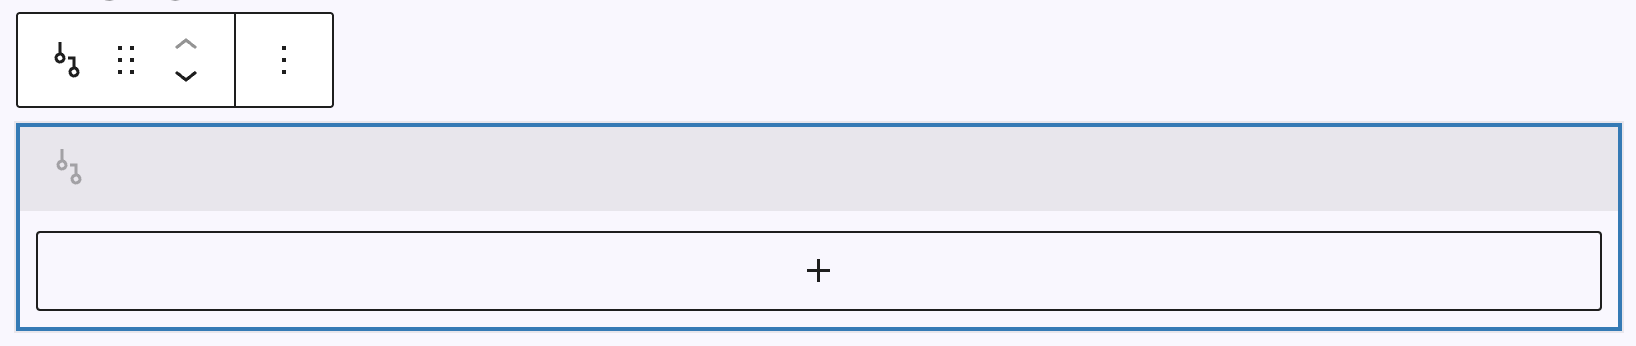
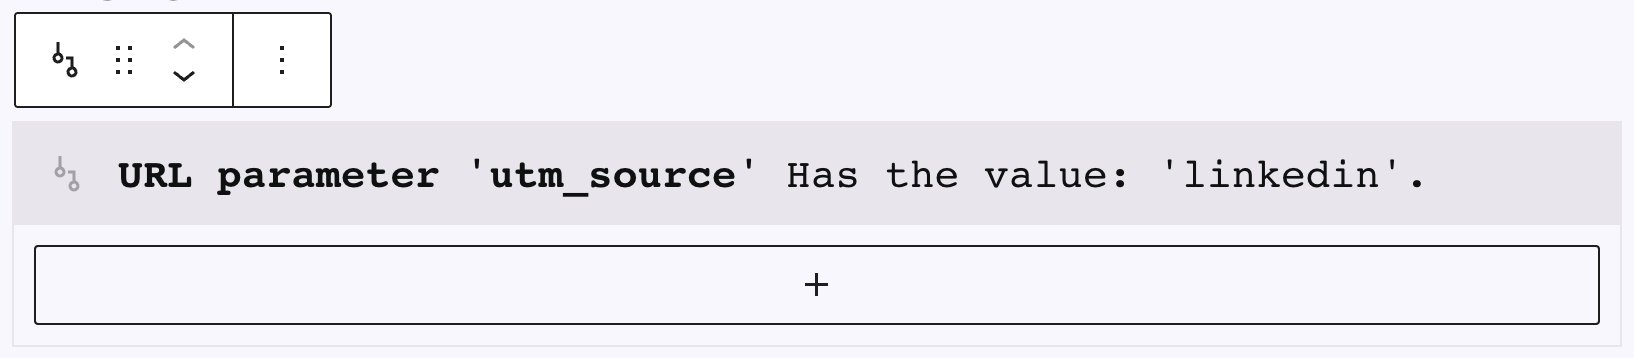
In the editor, the Conditional Content block appears as a simple wrapper box. You can insert any other blocks inside it, similar to how a Group block works. At the top of the box, there’s a label showing a short summary of the conditions set, helping you quickly identify when the content will be shown, if these have been configured already. For detailed setup and configuration, use the block sidebar.
Settings
In the sidebar, the Conditional Content block is divided into two panels: Conditions and Behaviour.
Conditions
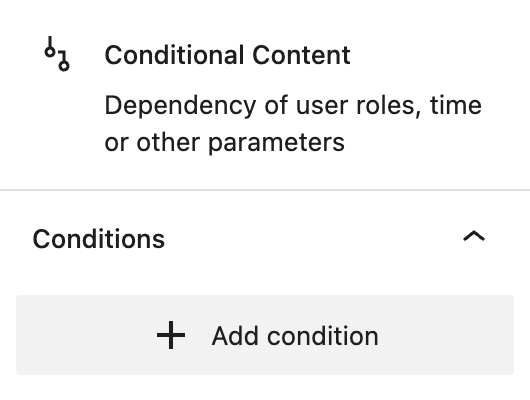
In the Conditions panel, if no conditions are currently defined, you’ll only see a single “Add condition” button. Clicking this button adds a new, empty condition row. You can then define the condition by selecting its type, available options, a condition rule (like “Is”, “Is not”, etc.), and the desired comparison value. To add additional conditions, click the + button. Any condition can be removed using the X icon next to it.

You define the rules that must be true for the block’s content to be displayed. There are 14 different types of conditions available. Each condition type comes with its own context-aware settings, including value inputs, logic options, and comparison types. You can combine multiple conditions for advanced display logic. The available condition types are:
- URL parameter conditions check whether a specific query parameter exists in the page URL and what value it holds. You can choose a predefined (e. g. Google Campaign or Forms parameters) or custom parameter name and define rules like “Has the value”, “Contains the value”, “Is set” or the opposite rules. If using “Is set” or “Is not set”, no value input is required.
- Cookie conditions work the same way as URL parameters but evaluate the value of a cookie set by the site. You can choose from predefined cookies or define your own. All standard comparison operators are available, including “Is set” and “Contains the value”.
- Local Storage conditions let you check the value of items stored in the browser’s local storage. Only individual keys are supported. You can define whether the key is set, has a specific value, or contains a string.
- Time conditions allow you to show content depending on the time of the visit. You can select from predefined times of day (like “morning” or “night”) or enter a specific hour or timeframe manually, instructions are given in the description text if selected.
- User role conditions check the role of the current user. You can use this to target logged-in users with specific roles or show content to non-logged-in users. Options include “is” or “is not” with a dropdown for selecting roles.
- Post conditions are based on the current post context. You can choose a post type and then define whether the post being displayed matches one or more specific post IDs. This works well for targeting single pages or posts.
- Post taxonomy conditions evaluate the taxonomy terms of a post. This only works in archive templates. You can select a taxonomy and compare whether it includes or excludes specific terms. Terms can be selected from a list or entered manually.
- Post meta conditions use meta field values of the current post to determine visibility. This feature only works with custom post types created via the Post Types feature. You can choose from various numeric and textual comparisons — like “Smaller than”, “In the future (date)”, or “Contains the value”.
- Post type conditions display content depending on the post type being rendered. There’s no need for additional configuration aside from selecting which post type should match or not match.
- Post index conditions check the index of the current post in a Query Loop. This only works inside a Query Loop block. The first item has index
1, second is2, and so on. You can check for exact matches, ranges, or even/odd positions. - Number of posts found lets you render content depending on how many posts are returned by a query — specifically for search or archive templates. You can check for no results, a single result, or multiple ones. No input values are needed.
- Archive taxonomy conditions let you display content based on the archive’s taxonomy term. These only work in archive templates. You can check if the current archive is for specific terms or exclude certain terms.
- Location (Template Type) conditions are based on the WordPress template being rendered. You can select from standard locations like the front page, blog page, or 404 page. Multiple values can be selected and checked using “is” or “is not”.
- Custom Filter conditions offer the most flexibility. These are defined by developers using the
greyd.conditional-content.conditionsfilter. You can choose a registered custom condition and configure it similarly to cookie or parameter conditions. Refer to the developer documentation for implementation details.
Behaviour
The Behaviour panel lets you control how the block evaluates multiple conditions and how it behaves in the frontend.
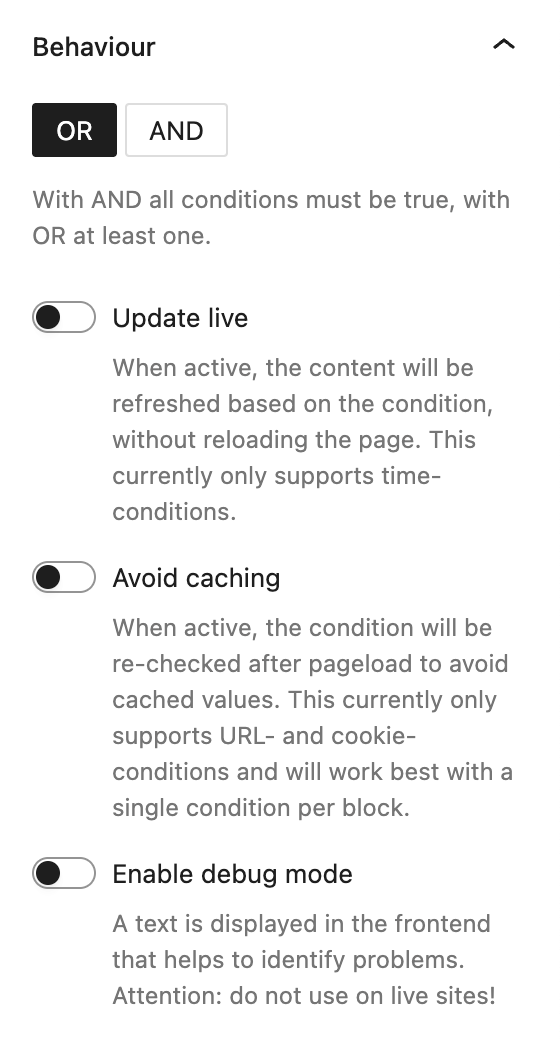
When multiple conditions are defined, the Operator setting (AND / OR) determines how the block evaluates them. With AND, all conditions must be true. With OR, just one matching condition is enough. If only one condition exists, the operator has no effect.
The Update live toggle enables real-time updates in the frontend without reloading the page. This currently works only for time-based conditions. Note that while the content is already rendered in the DOM, it remains hidden via display: none until the condition becomes true.
With Avoid caching enabled, the block re-evaluates its condition(s) on the client side after the initial page load. This ensures accurate behavior even with cached HTML. Currently, this feature supports only URL and cookie conditions and works best when the block contains a single condition. Keep in mind: the block’s content is rendered initially but removed from the page if the condition is false.
Finally, Enable debug mode shows a debug message in the frontend. This message helps identify configuration issues during development. Important: this option should never be enabled on production websites.
Video
Hi, this is Sandra from GREYD. In this video I am going to show you how to make your content dynamic with our conditional content block. With this block you’ll be able to show your visitors different contents depending on certain parameters like how, when and from where a visitor gets to your website. You could for example show different prices on your site depending on whether someone comes from Google or is already a newsletter subscriber. Or you could also display different support forms depending on the current time, for example with different service levels or contact persons, thereby easily managing a 24/7 support without coding. To make your content dynamic, start with adding the block conditional content to your website.
Now you can define one or several conditions. Here on the right at first decide on whether all parameters which you will define now have to be true — which would be “and” — or whether it’s sufficient if one of them is true — which would be an “or” condition. When you now define your conditions, please make sure not to create any contradicting conditions.
As an example I’d like to display different welcome texts depending on whether a website visitor is an admin or not. Therefore I use “user role” as the condition and set it to “is administrator”.
Now I put the content into the container that is to be displayed for this condition.
Then I do the same for “is not admin”, so I just copy the entire block and change the content and condition.
Let’s check the result in the frontend. This is how the page looked before. When I now refresh, I should be greeted with the admin text as I am an admin. And it worked! According to the same principle, you can also vary your content depending on URL parameters and cookies.
You can work with various Google campaign parameters or also with form parameters, for example to show visitors different content depending on whether they have just confirmed a double opt-in or maybe clicked an opt-out link. You can also take a look at the default thank you page, which comes with every GREYD.SUITE installation. On this page, we have used exactly this feature and condition. And of course you can also define your own parameters that you use for example in newsletter links.
I’d like now to present a special price to all visitors coming from my newsletter and also a different image, so I select “URL parameter” as a condition, set it to “individual” and name my parameter “newsletter”. So let’s just change the content — for the example different text, another image, this one I’m just going to delete — and then update the website.
If I now refresh my website, I don’t see anything. Why? I’ve just set the condition for “is newsletter”, which is currently not true. So nothing is shown. But if I now change the URL and include my newsletter source parameter, my new content is visible. With this, you can save a lot of time since you don’t have to build your pages several times and just make your content dynamic with our conditional content block.
This also works with time as a condition. And before we finish, a tip from me: this debug mode here is very handy to test your conditions as it tells you why certain content is displayed or not displayed. So let’s just activate it and refresh the page. Here it now says the parameter has to be “newsletter” for the content to be shown and it is true, so my content is shown. And if we try exactly the same and delete the URL parameter before, we will see that the debug mode exactly informs us what happens. So let’s just delete it here, refresh the page. Exactly: here it says “URL parameter has to be newsletter source”, but it’s false because there’s no parameter set. You only need to make sure that the debug mode is disabled again before publishing your website.
For more videos and information please visit our Helpcenter.