The Post Types feature allows you to define your own structured content types with individual layouts and field definitions — all from within the WordPress backend. In addition to custom Post Types, you can also enhance existing core Post Types like Posts and Pages and create Taxonomies, either specific for one post type or make them available site-wide.
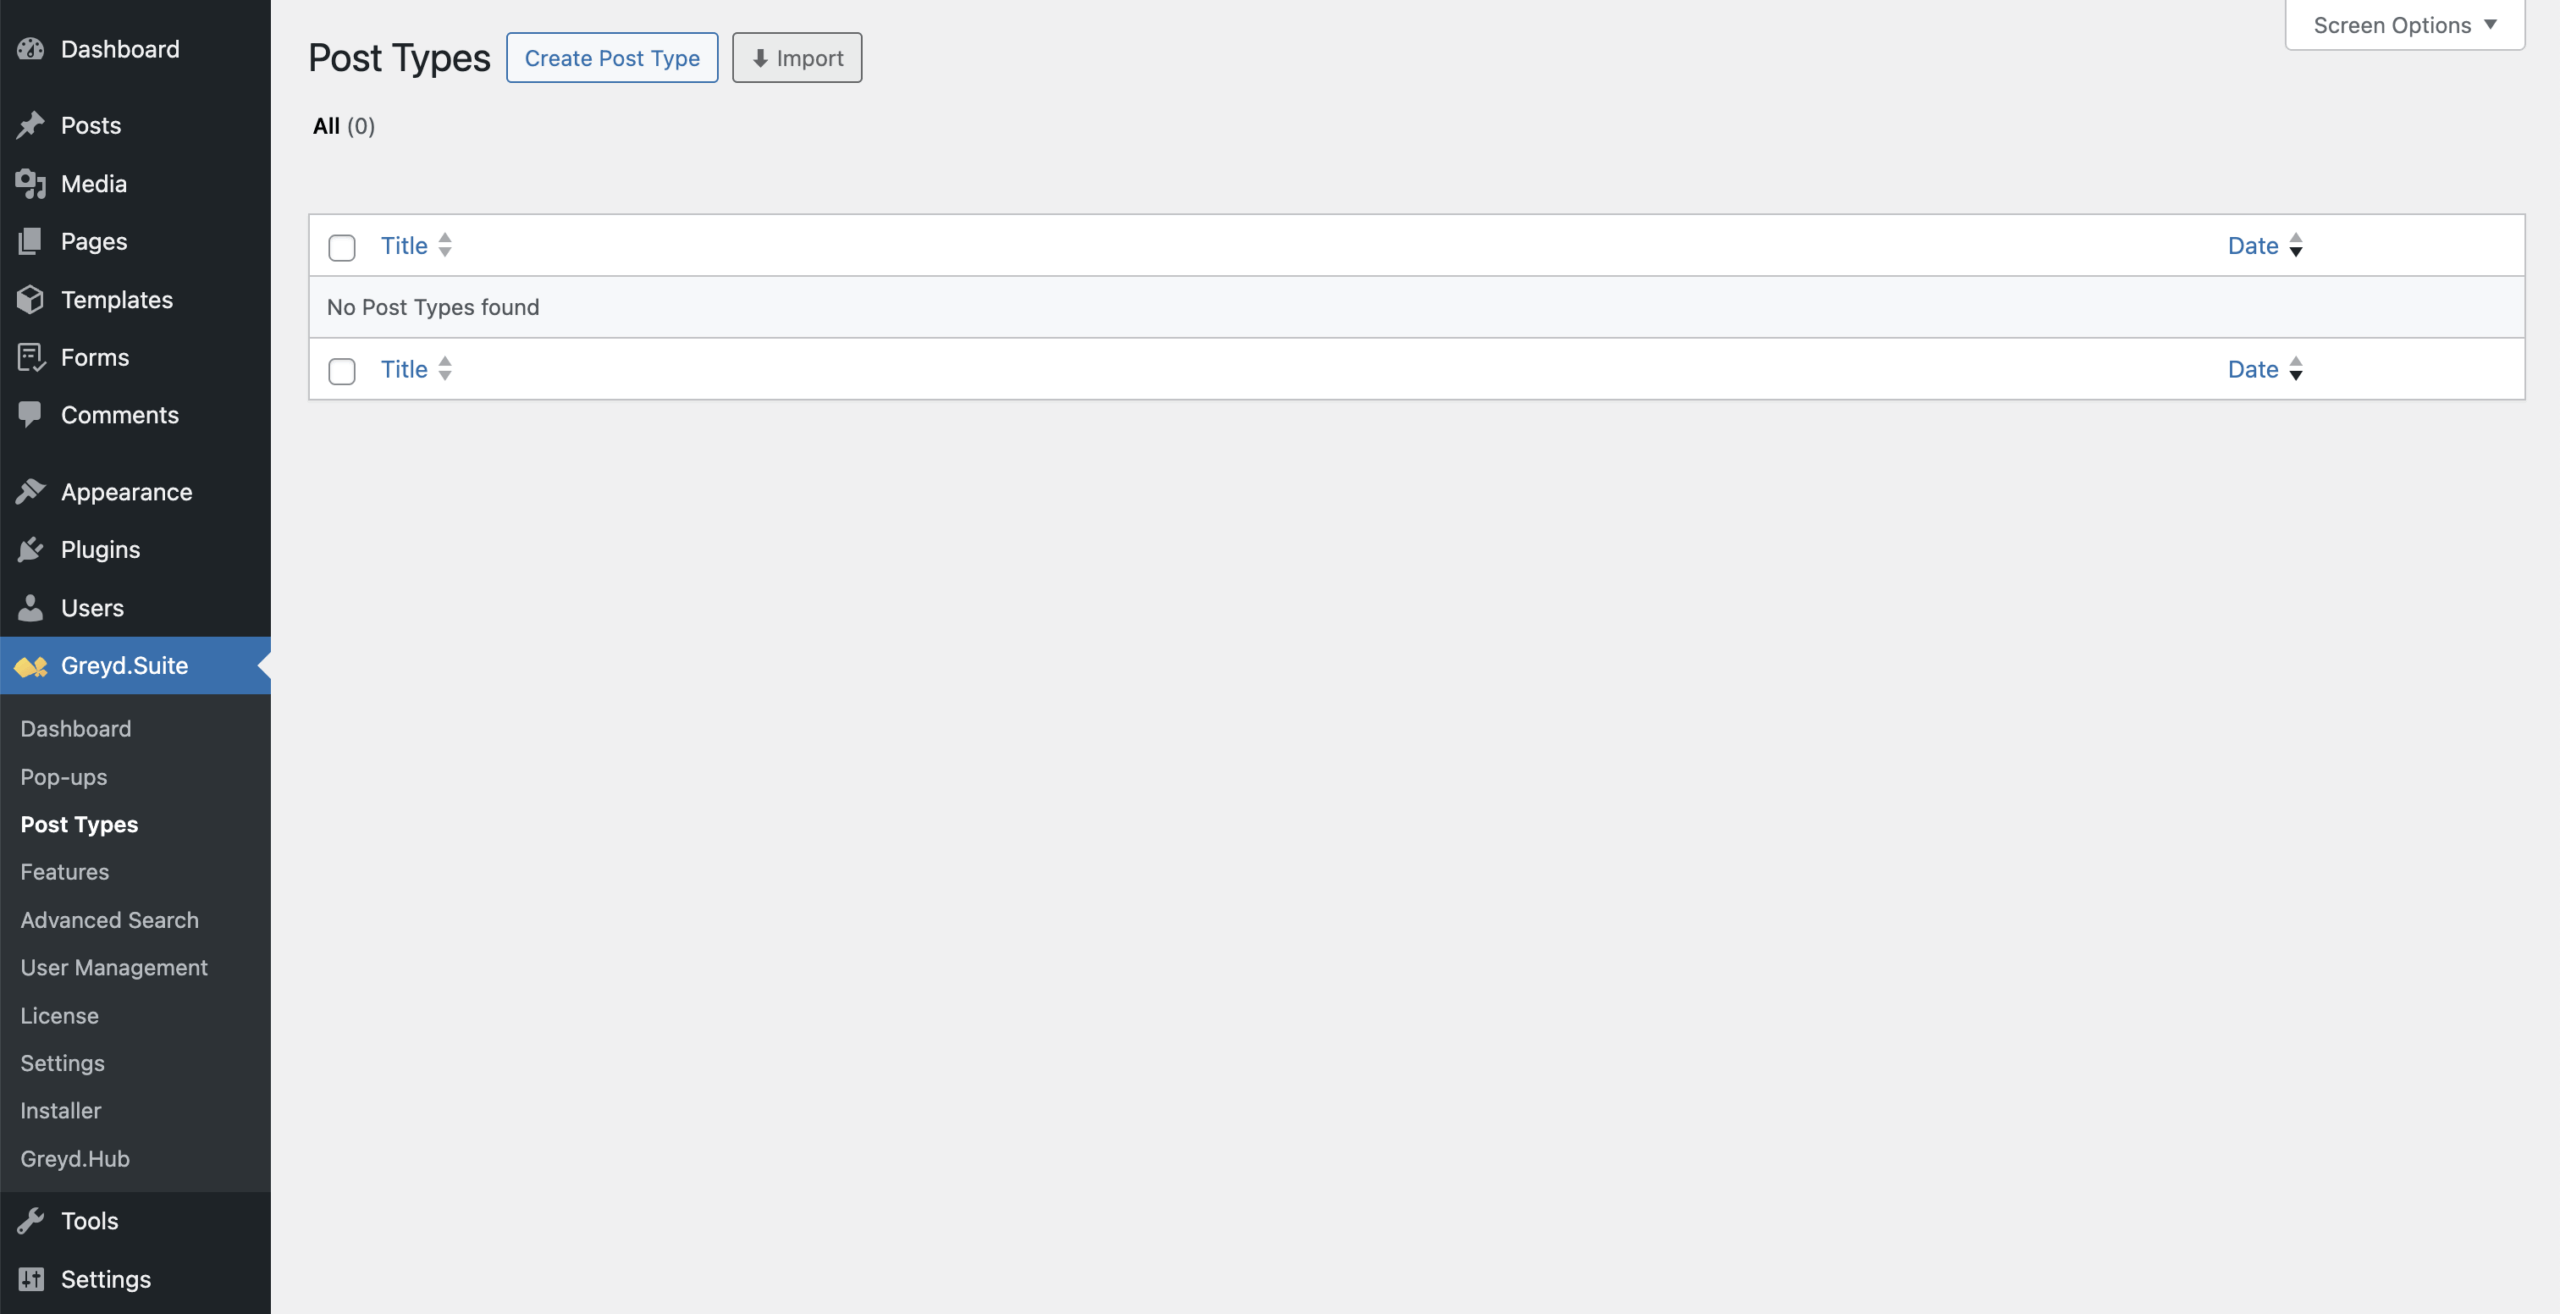
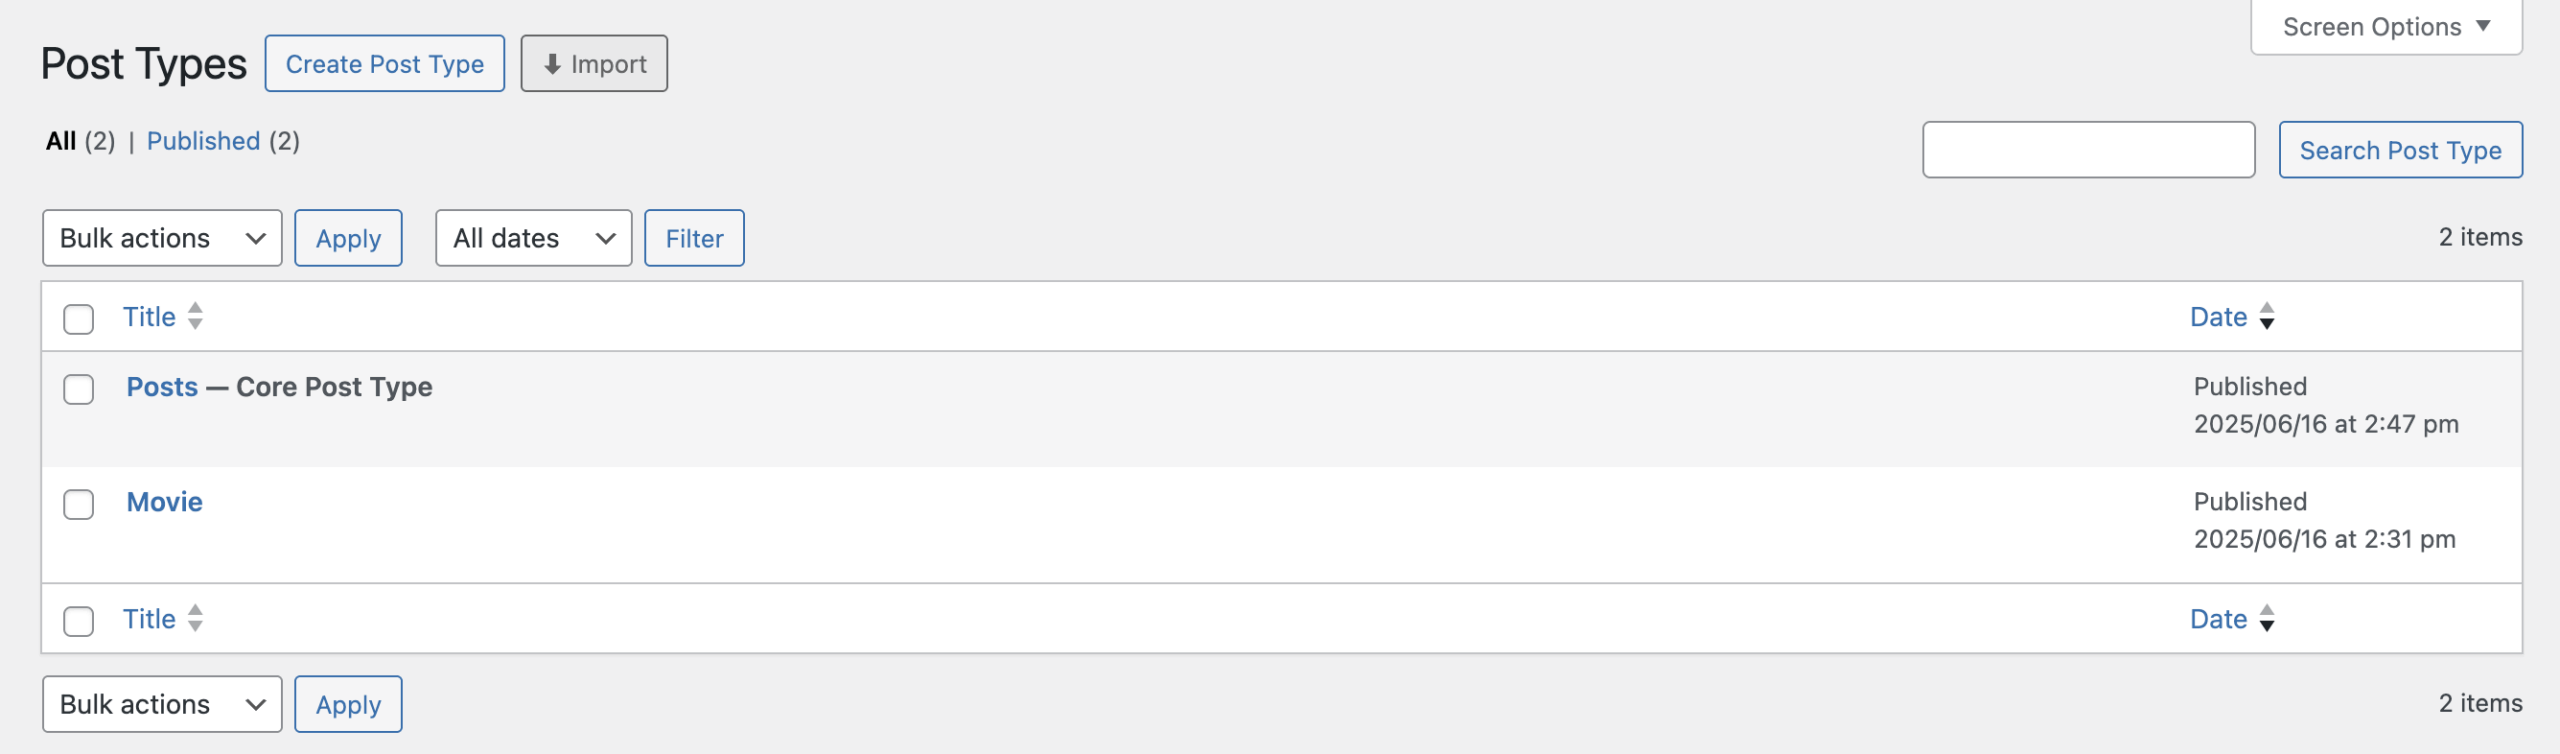
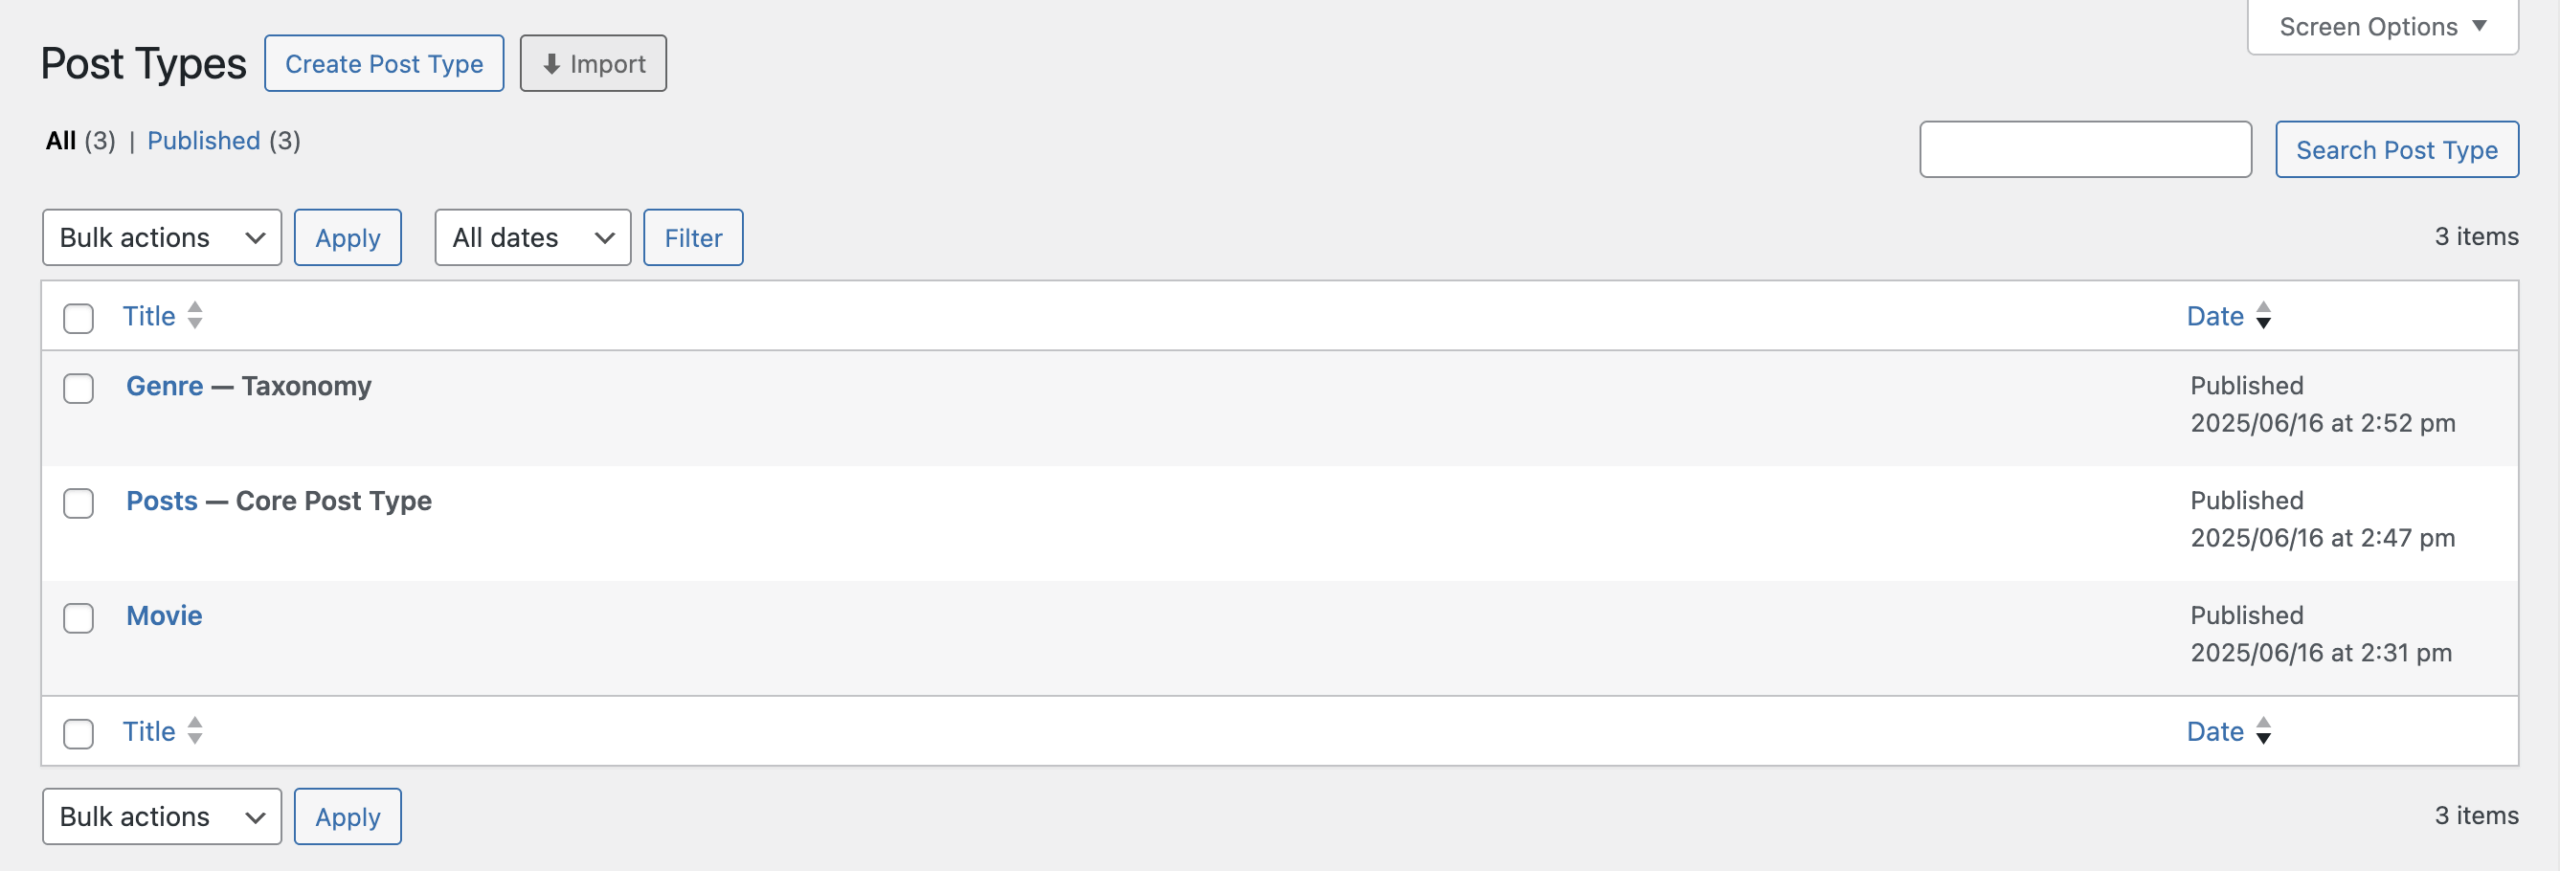
Once the feature is enabled under Greyd.Suite → Features, you’ll find the new Post Types section. This page presents a typical WordPress table view that lists all available Post Types on your website. Each entry in the table can be edited just like any other content item in WordPress.
Create Post Type Assistant
Clicking Create Post Type opens a modal where you can choose between three options: New Post Type, Core Post Type, or Taxonomy.
New Post Type
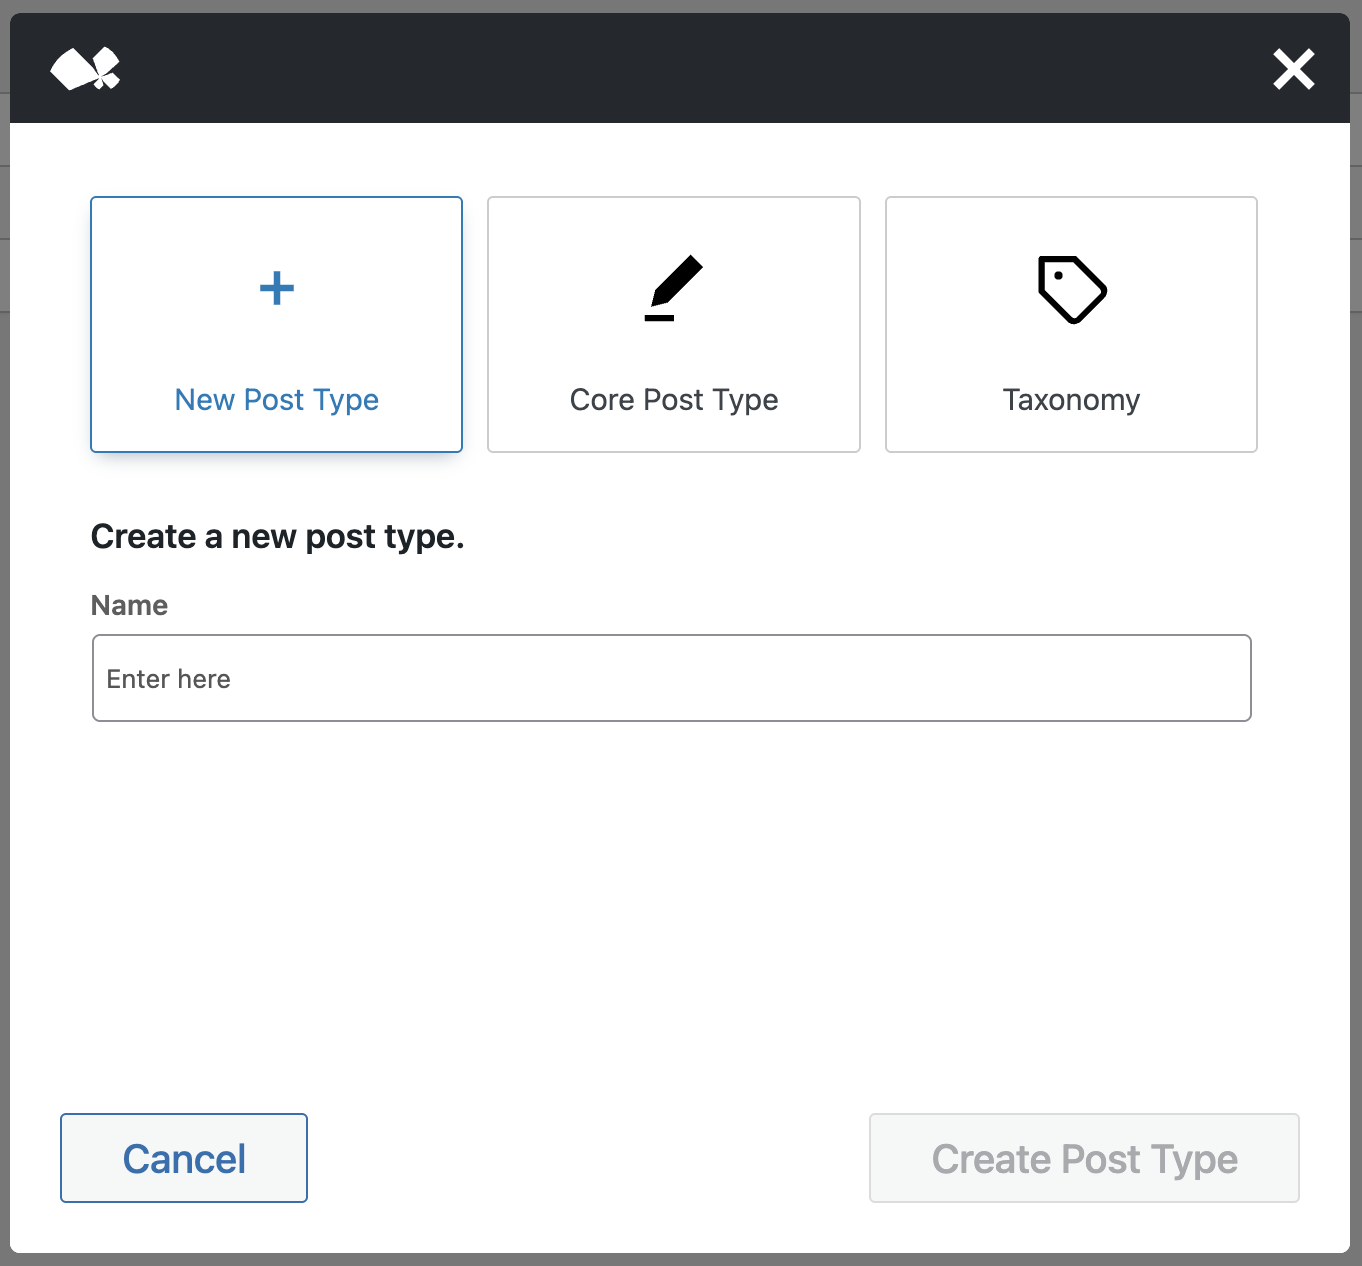
To create a new Post Type, enter a name in the input field. For the name, choose the singular form, as the plural form will get created automatically. If the name already exists, an info box appears with a link to edit the existing type. Once you’ve chosen a valid name, click Create Post Type.
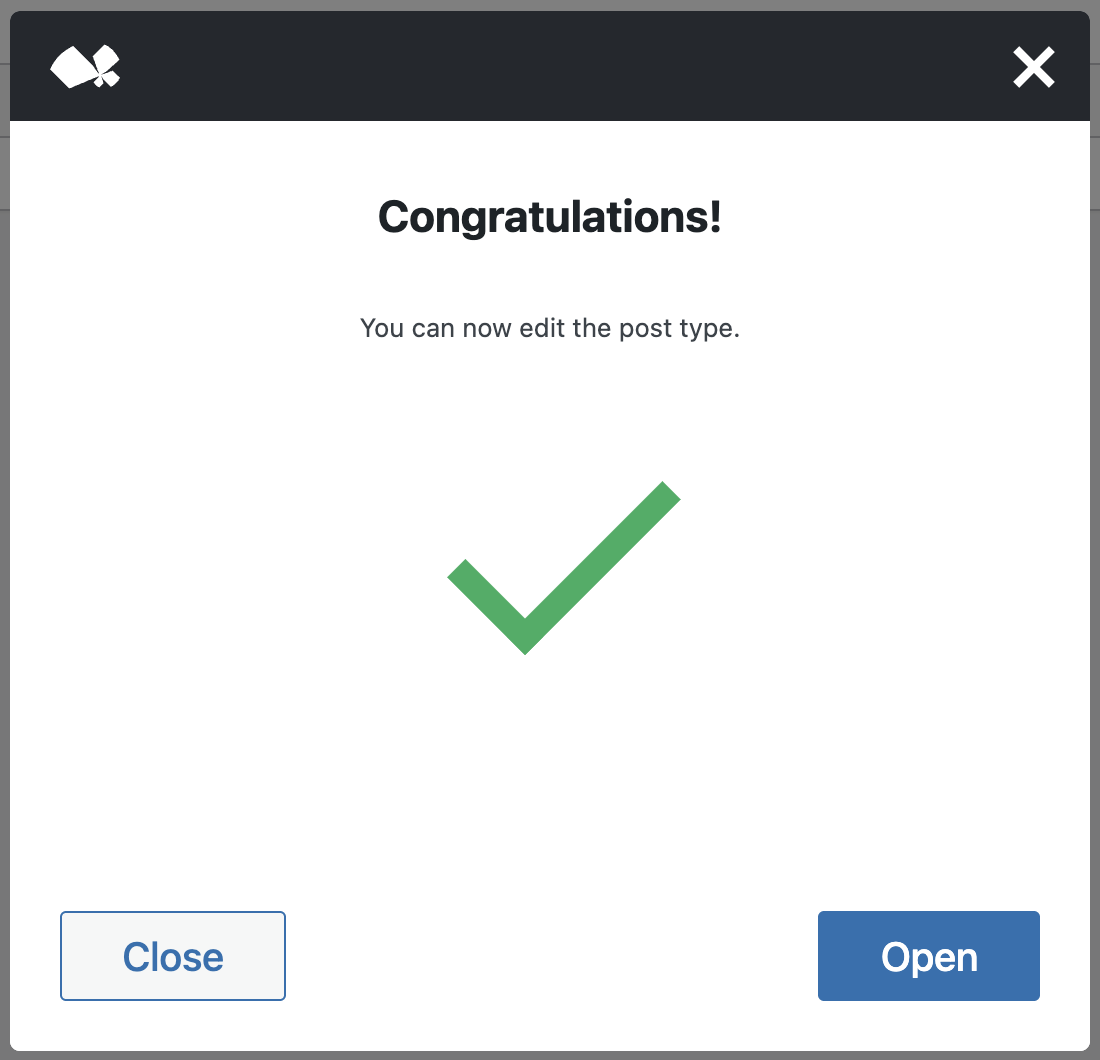
A confirmation dialog appears, and by clicking Open, you’ll be taken to the editing screen. There you can manage the title, general settings, and define custom fields for the Post Type.
More details are explained in the sections Post Type Settings and Post Type Fields.
Core Post Type
Core Post Types include native types like Post and Page, along with any public Post Types registered by other plugins (e.g., Product if WooCommerce is installed).
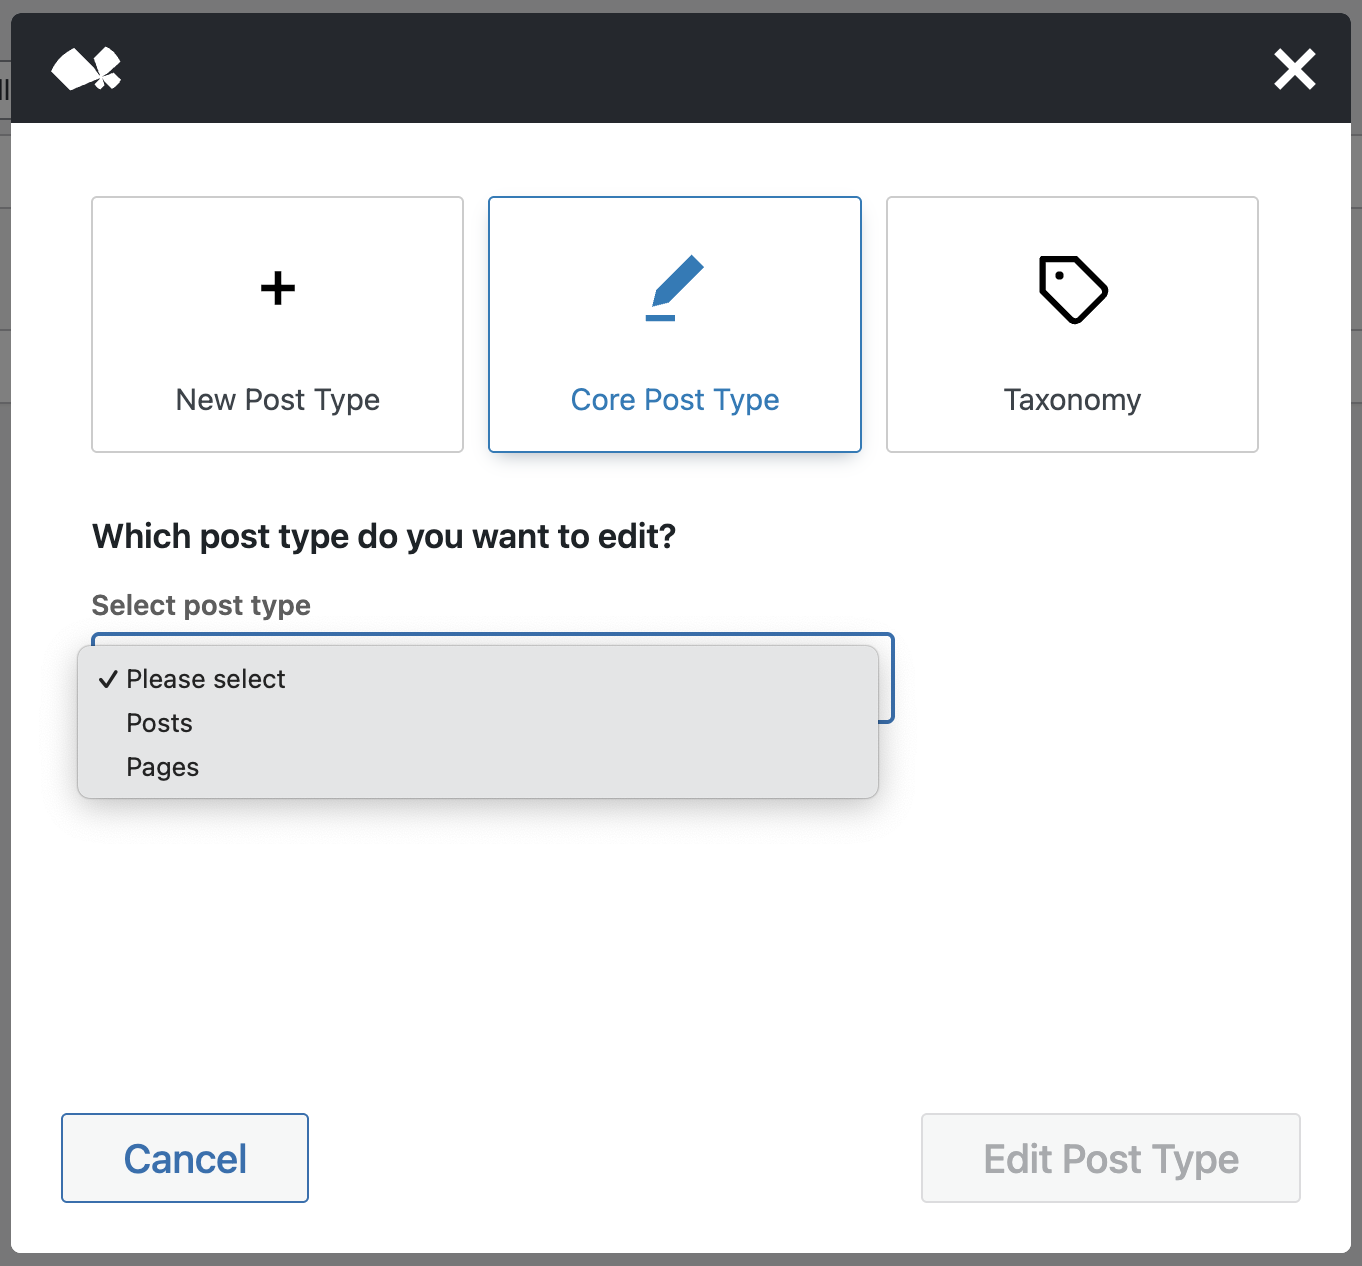
After selecting a core Post Type and clicking Edit Post Type, the confirmation dialog appears. Click on Open and you’re directed to an editing screen similar to that for new Post Types.
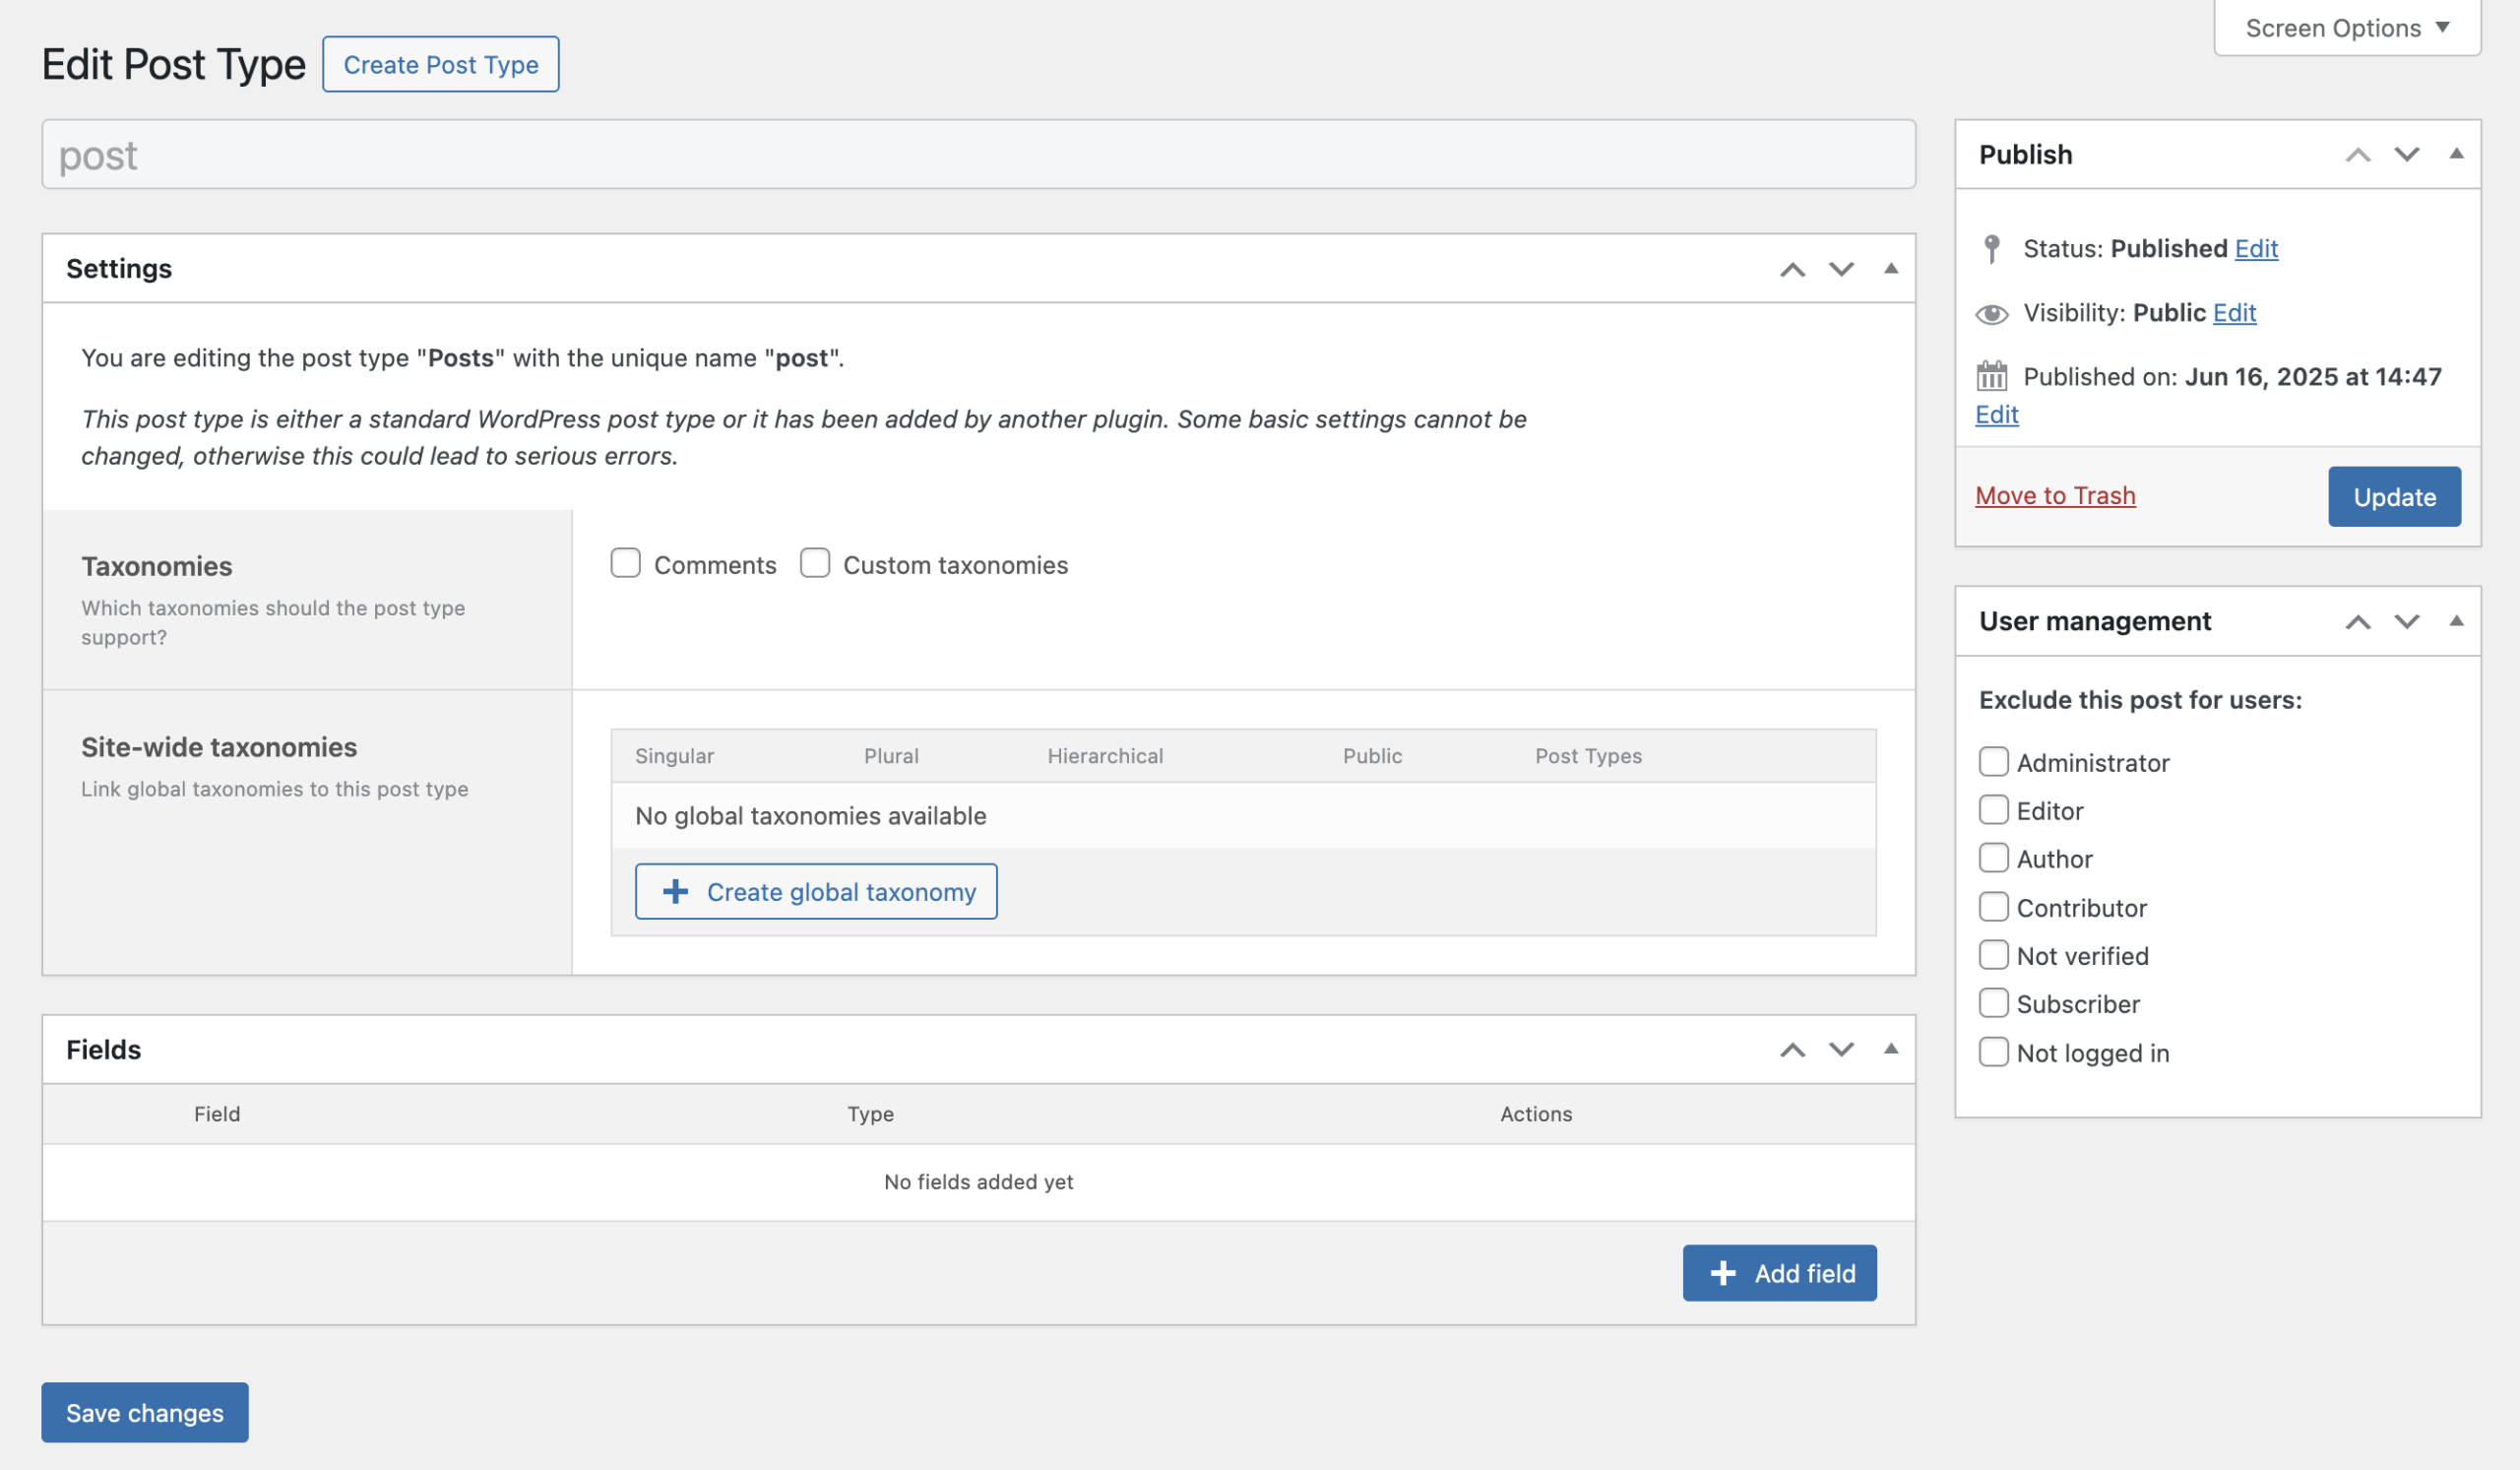
The title of the Post Type cannot be changed. In the Settings section, only options for activating custom taxonomies and adding site-wide taxonomies are available.
The fields tab behaves identically to the one for new Post Types. Back on the overview page, edited core Post Types are marked with a suffix for easy identification.
Taxonomy
To create a new taxonomy, choose the Taxonomy option in the modal and provide a name in singular form. If a taxonomy with that name already exists, you’ll get an info box with a link to its editor.
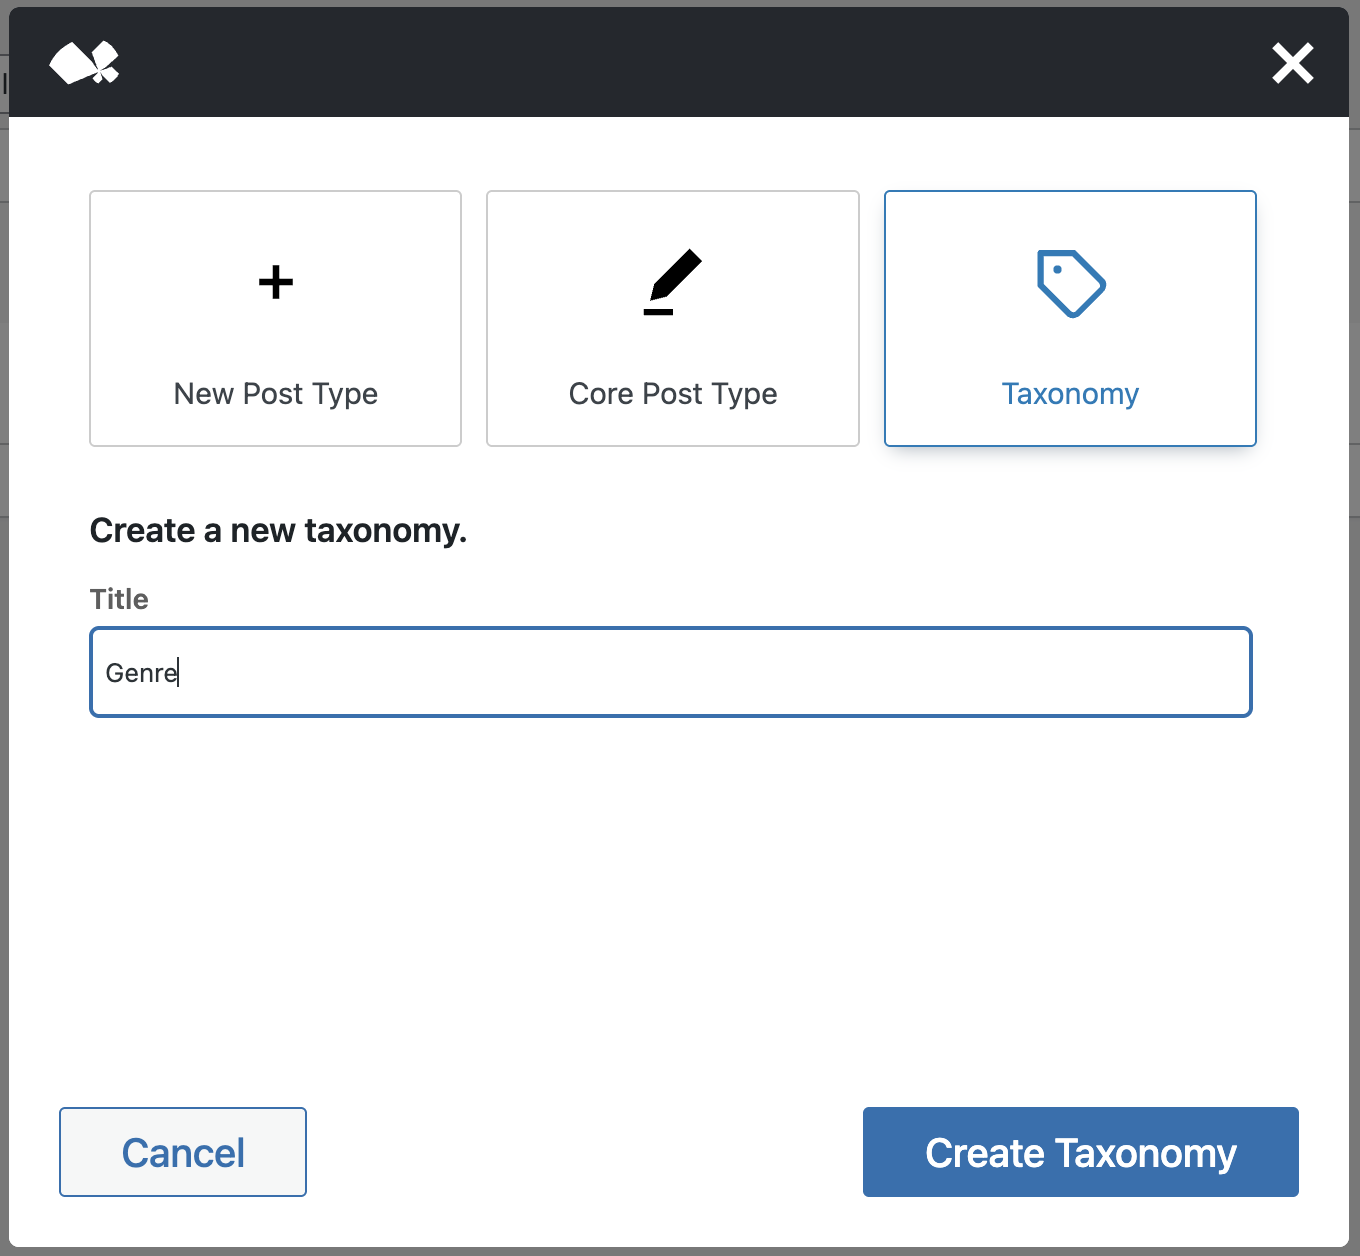
Clicking Create Taxonomy shows the confirm dialog, where you have to click on Open to be redirected to the taxonomy editor. All taxonomies created through this method are treated as site-wide and can be attached to any public Post Type.
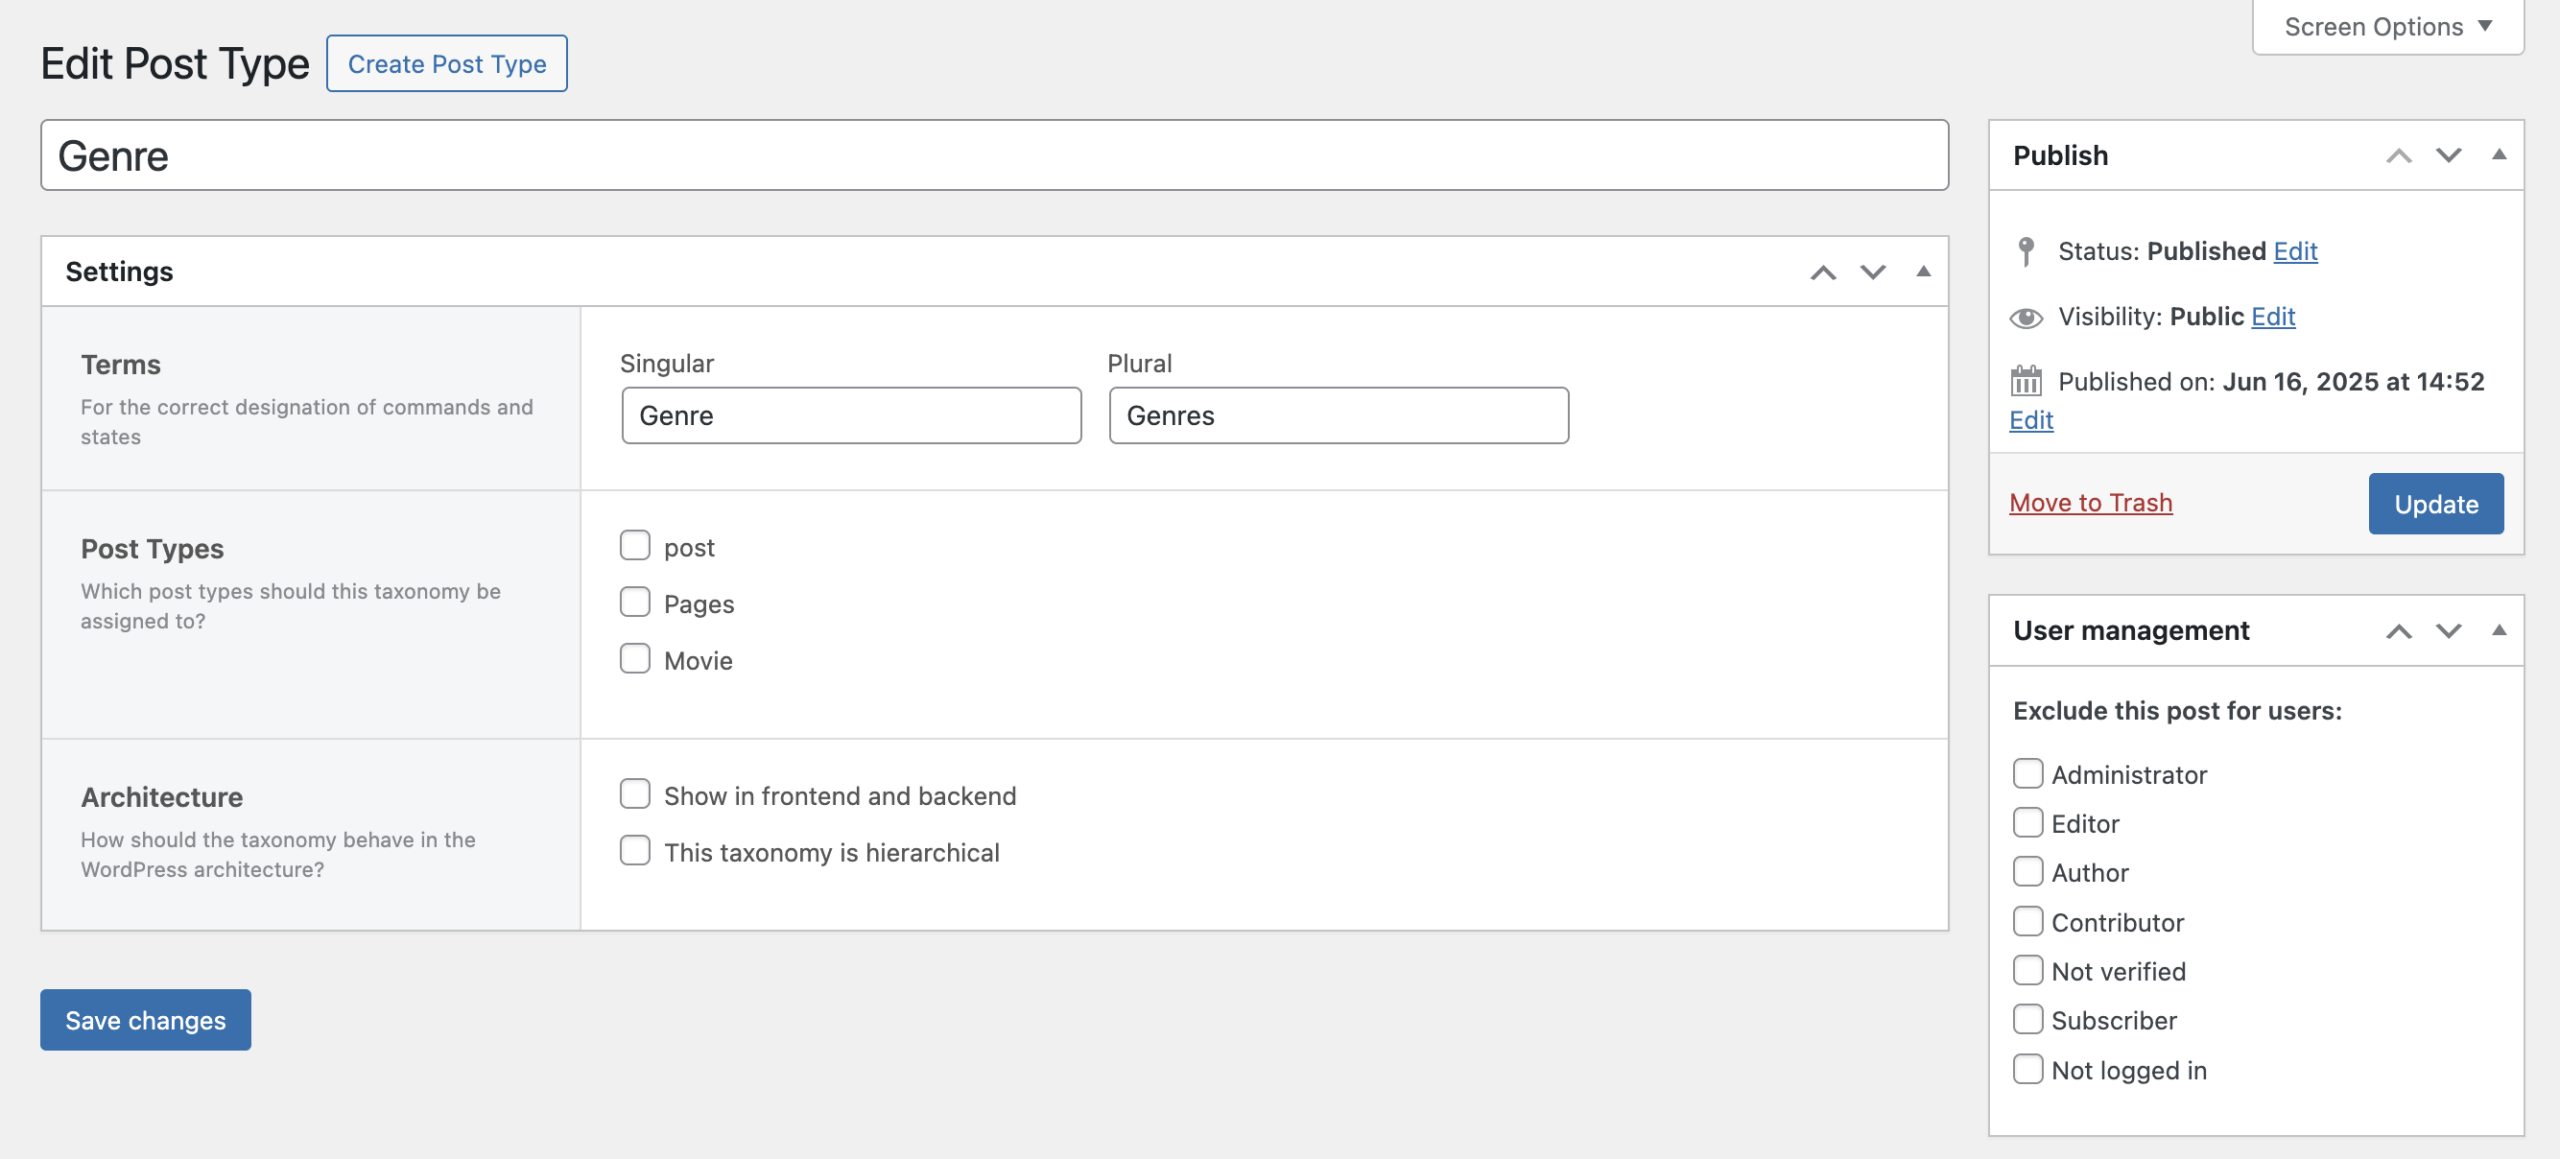
In the editor, you can change both singular and plural labels, assign the taxonomy to any Post Type, and configure how it behaves. Under Architecture, you can choose to show the taxonomy in the frontend and backend, and whether it should behave hierarchically like categories or non-hierarchically like tags.
As with core Post Types, taxonomies are labeled with a suffix in the overview list.
Post Type Settings
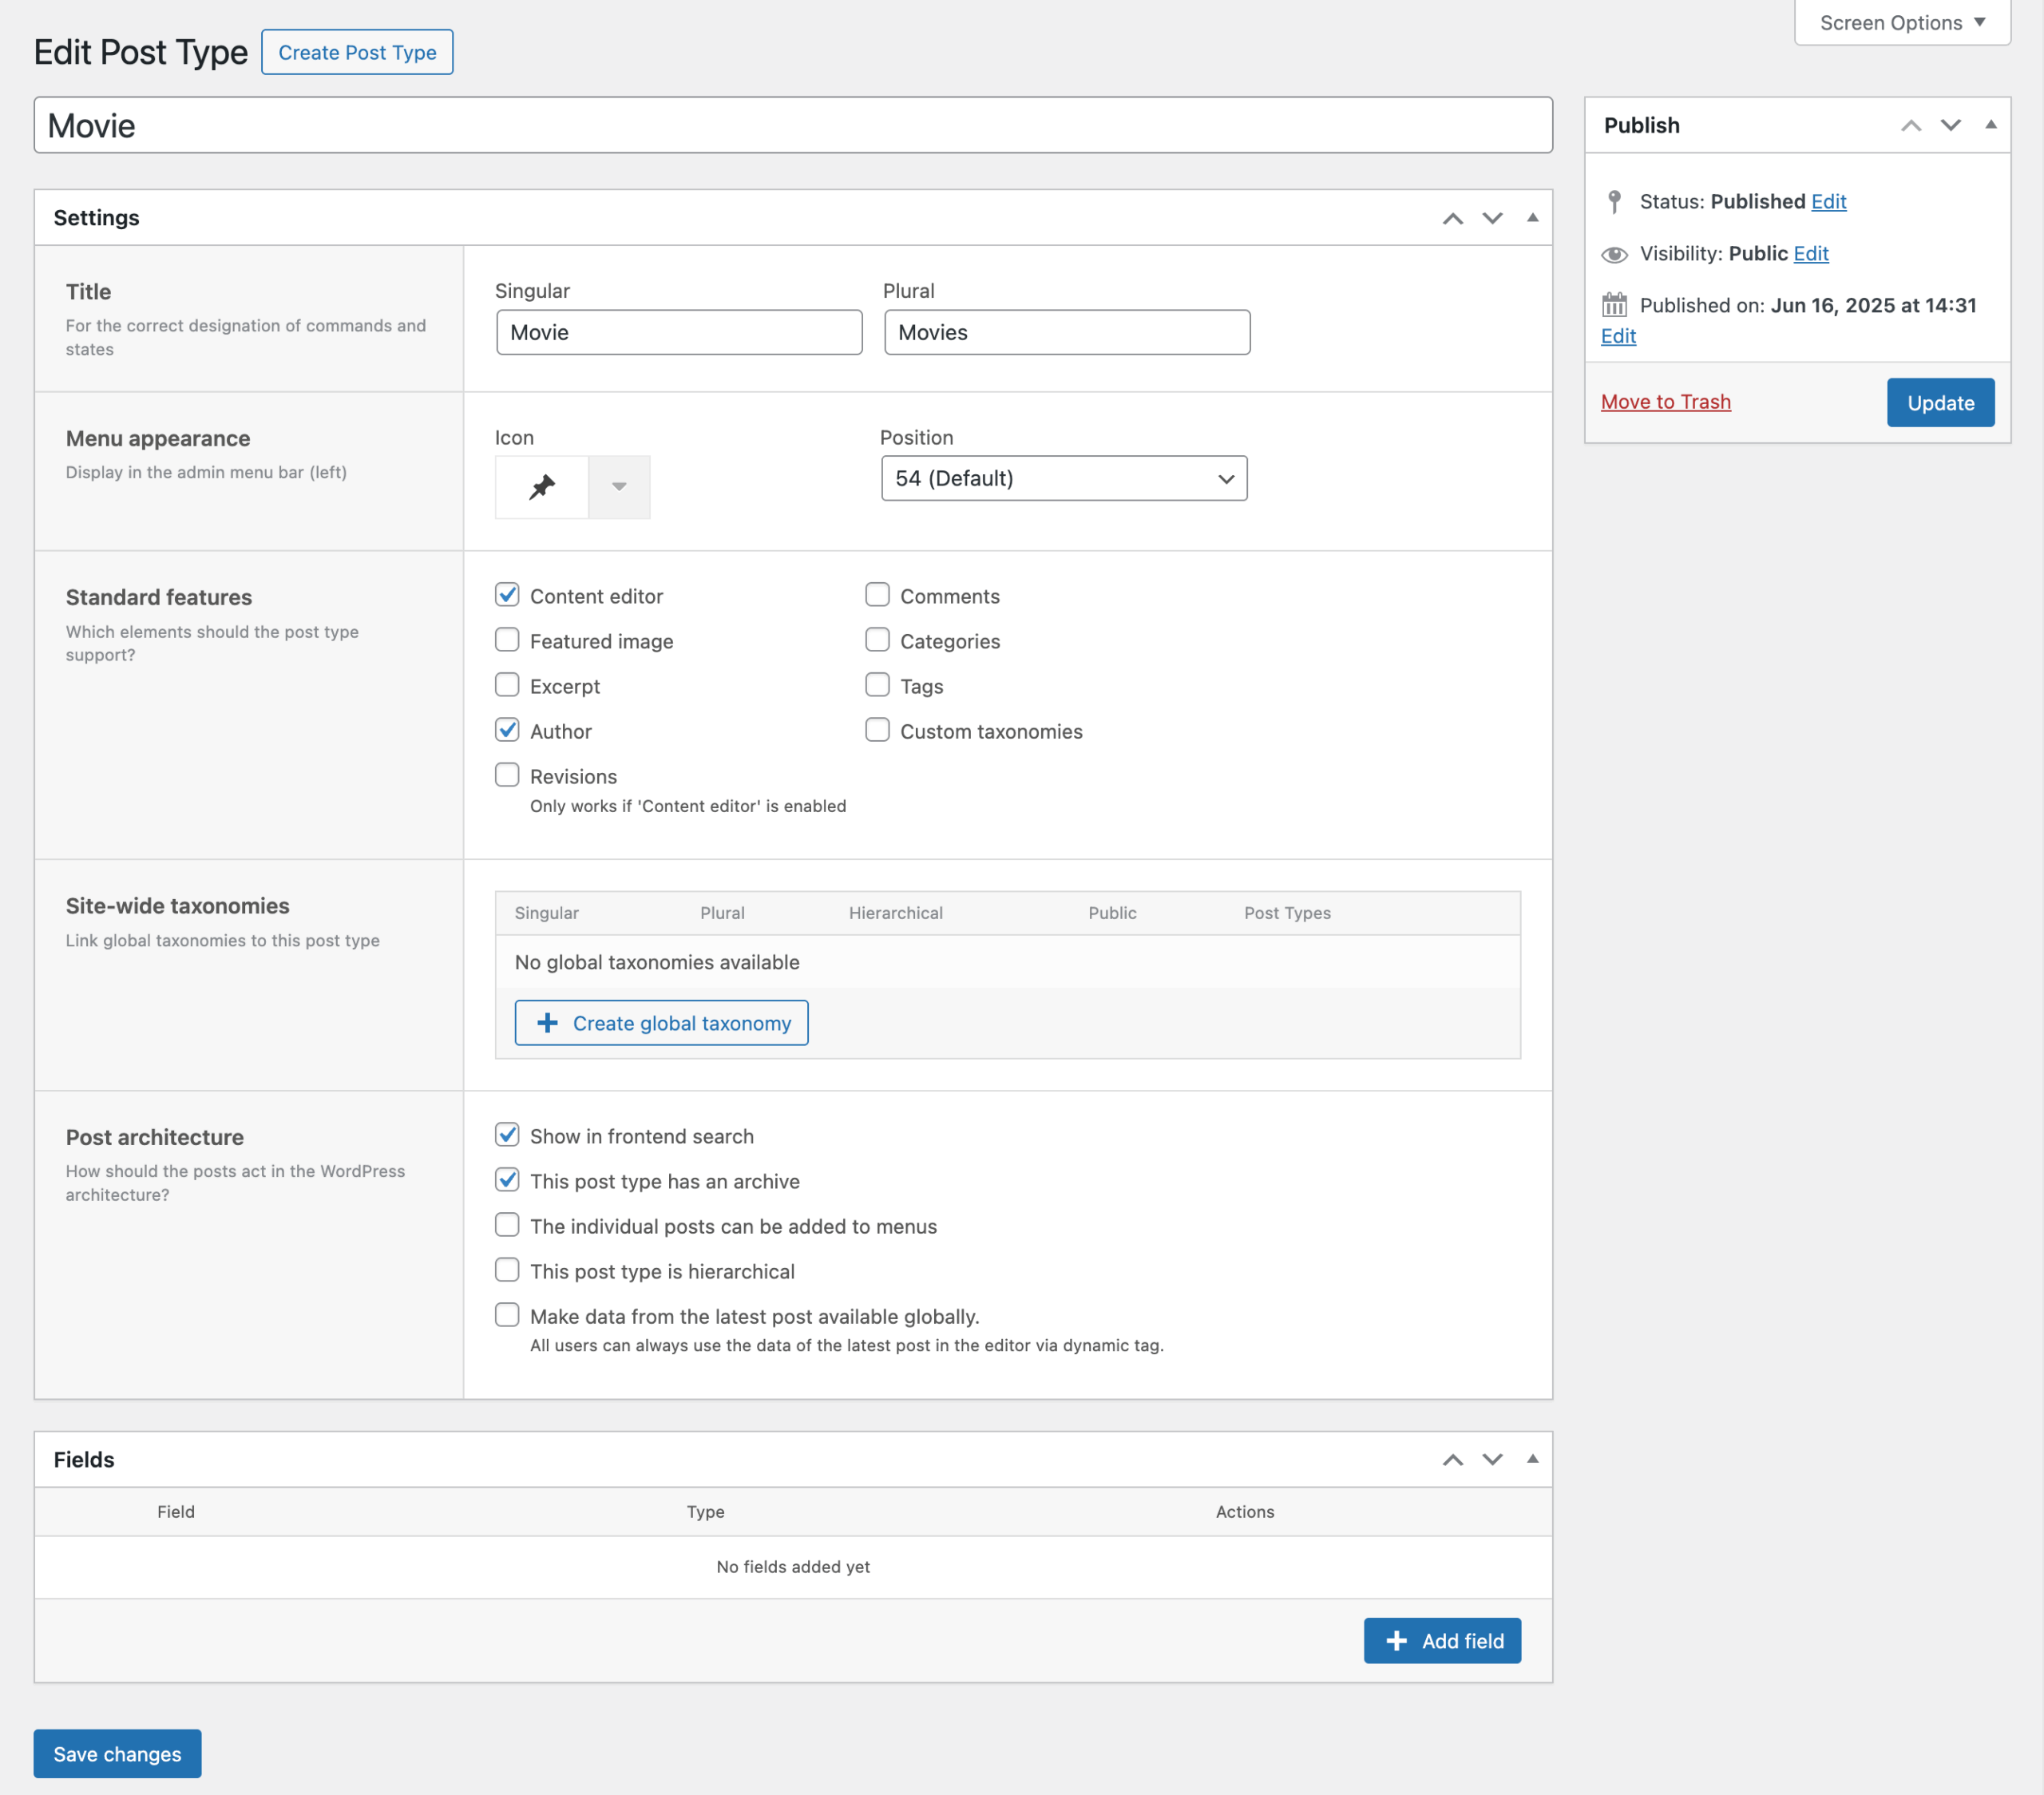
The settings of a Post Type define its structure, labels, and behavior across the WordPress backend and frontend. This includes appearance in menus, available features, taxonomies, and how the content is treated in the site architecture.
Terms
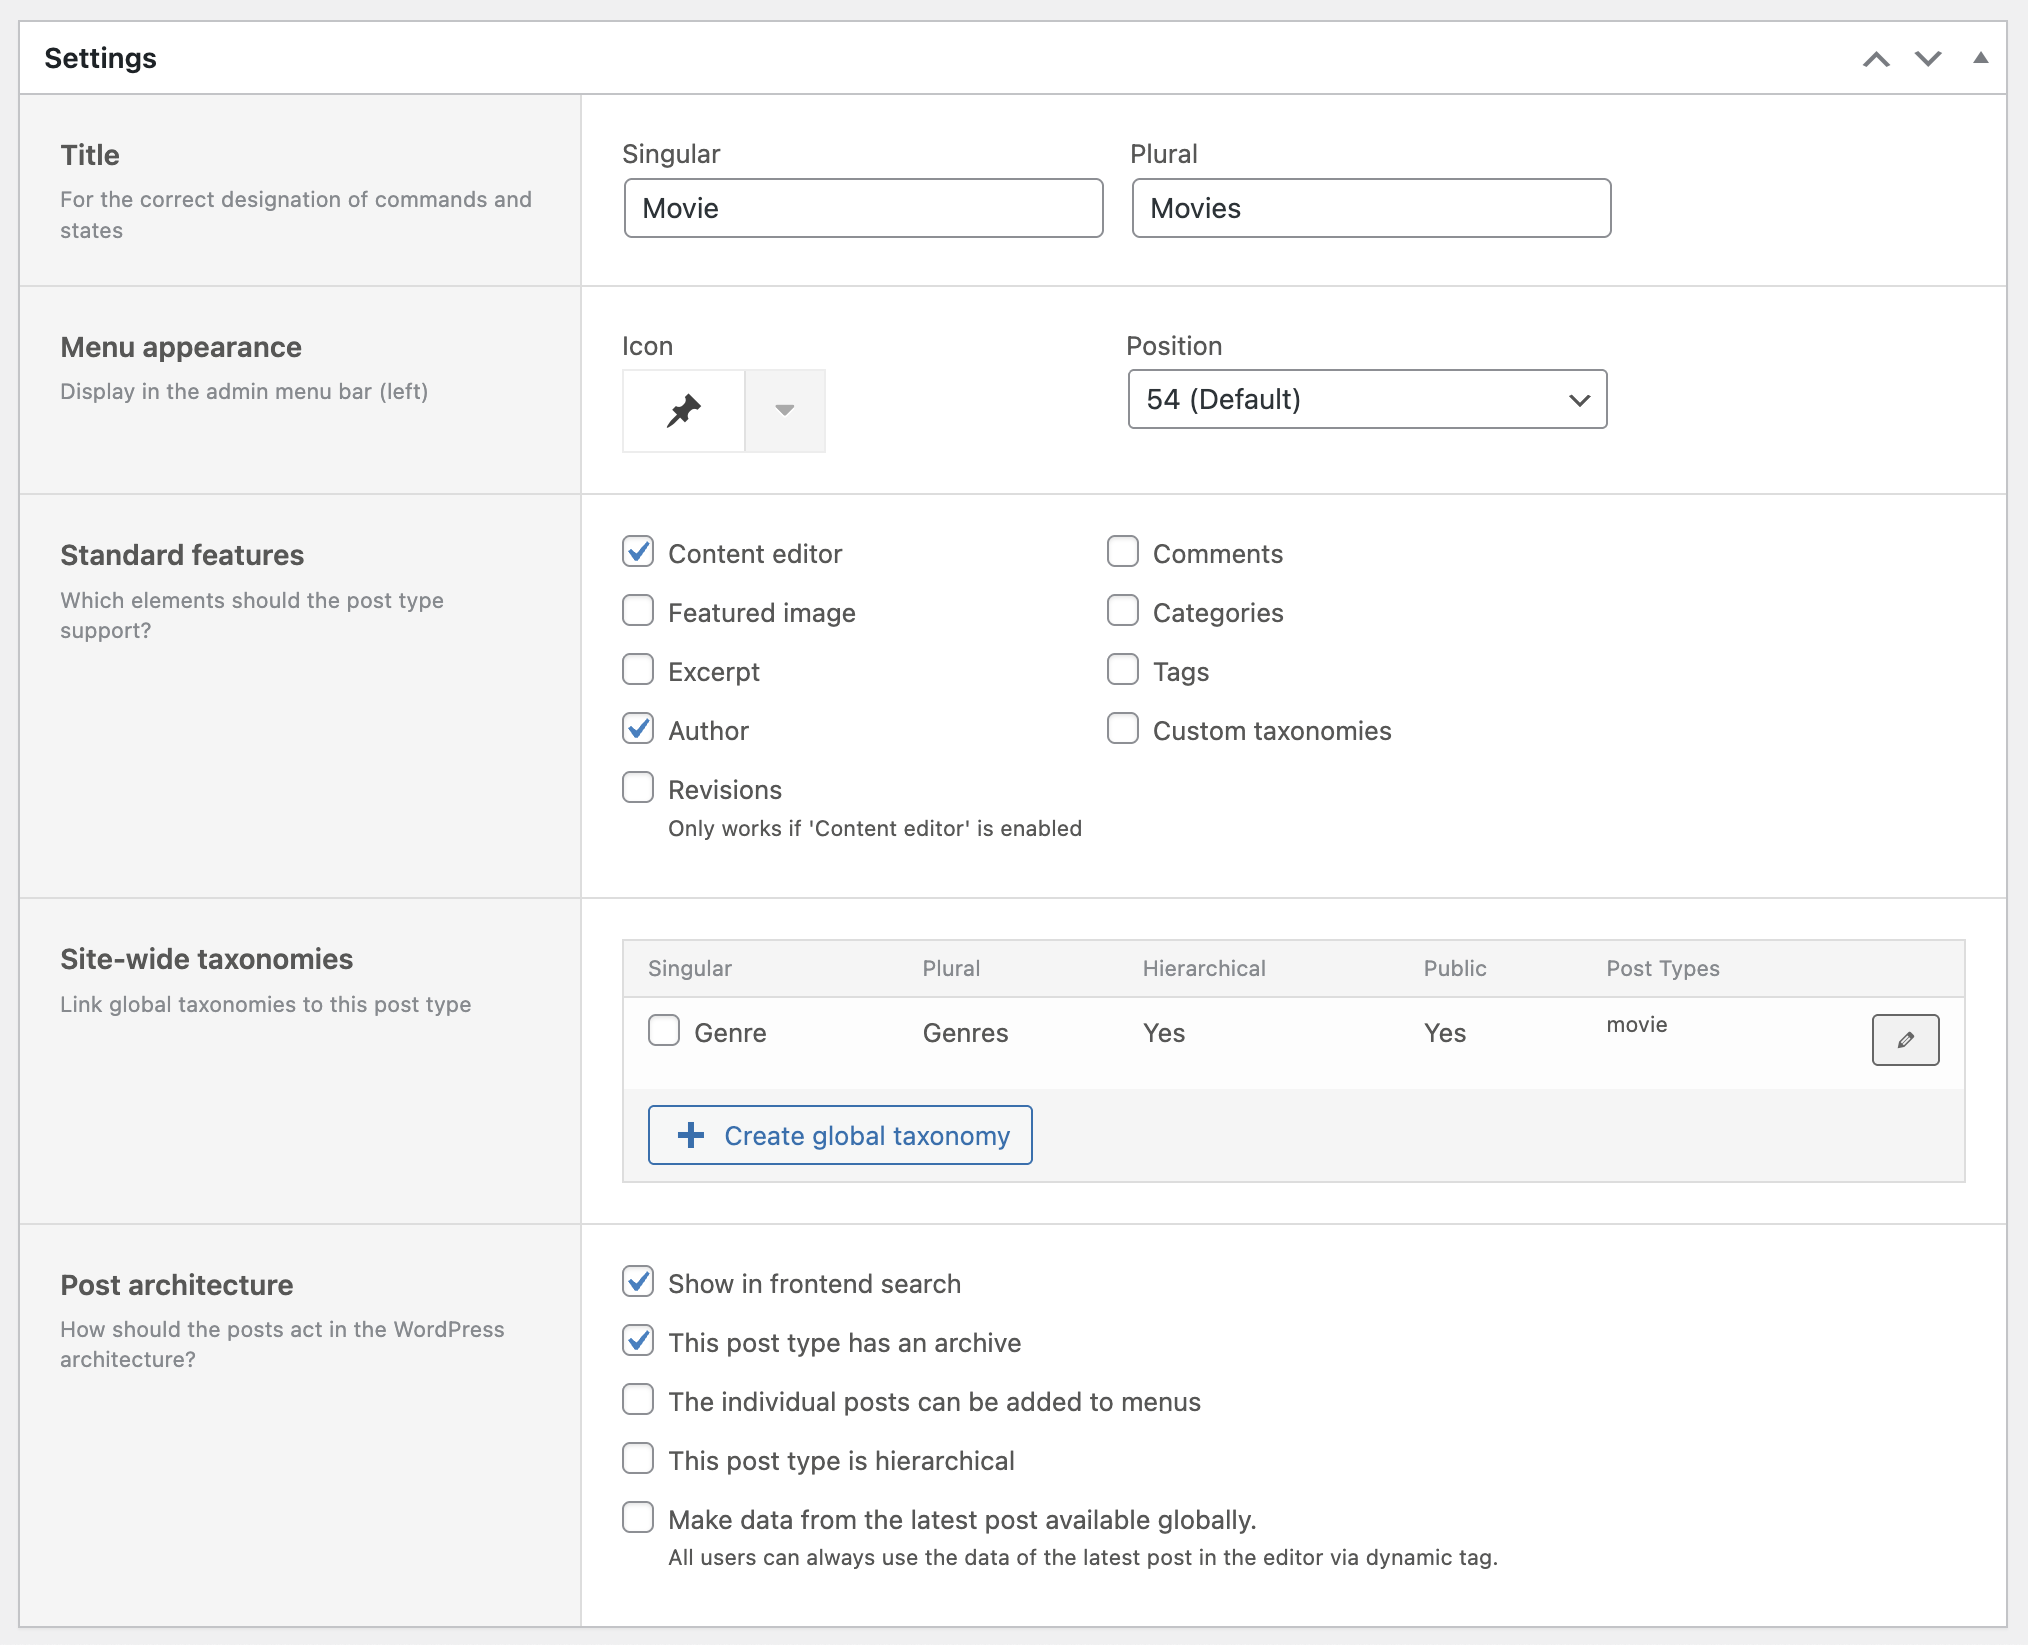
You can define the singular and plural labels for your Post Type. These affect how the Post Type appears in the backend UI. Changing these labels is not critical and does not affect data.
However, changing the main title above the settings section will rename the Post Type itself, including its internal slug. This may break content that references the old name.
Menu appearance
You can control how the Post Type appears in the admin menu. Choose whether it should be visible in the menu bar, select an icon (using WordPress dashicons), and define its position relative to other menu entries.
Standard features
Enable or disable core WordPress features for the Post Type. You can also enable custom categories and tags unique to this Post Type. Available features are:
- Content editor (block editor)
- Featured image
- Excerpt
- Author
- Revisions (only works if Content editor is enabled)
- Comments
- Categories (custom for this Post Type)
- Tags (custom for this Post Type)
- Custom Taxonomies: if you check this box, a separate section below the standard features will appear
Custom taxonomies
Use this section to define custom taxonomies specific to the Post Type. Each taxonomy includes a slug, singular and plural labels, and a setting for hierarchy (category-style or tag-style).

The available settings for custom taxonomies are:
- Name: taxonomy slug (lowercase, no spaces/special characters)
- Singular: singular label
- Plural: plural label
- Hierarchical: behaves like categories if checked; like tags if unchecked
- Delete: removes the taxonomy
Site-wide taxonomies
This section lets you assign global taxonomies to your Post Type. Available site-wide taxonomies are listed with checkboxes. You can also create new ones directly here, which works the same way as in the creation modal.
For more information, refer to the Create Post Type → Taxonomy section above.
Post architecture
These options define how posts of this type behave in the broader WordPress system. You can control visibility in frontend searches, whether the Post Type has an archive, and whether posts can be added to menus. You can also enable hierarchy and global access to the latest post data.
- Show in frontend search
- This Post Type has an archive
- Posts can be added to menus
- This Post Type is hierarchical
- Make data from the latest post globally available: All users can always use the data of the latest post in the post type via dynamic tag (see Global Dynamic Tags documentation)
Both “Standard Features” and “Taxonomies” are used by the Dynamic Tags system to inject content dynamically throughout your site. For more information, refer to the Dynamic Tags documentation.
Post Type Fields
Fields are custom meta fields you can define for a specific Post Type. They allow adding additional content to each post — beyond the default features — offering more flexibility for structured data and layout logic.
Fields function similarly to the “Standard Features” like the content editor or excerpt, but they are fully customizable for different use cases and field types.

If no fields exist yet, the area will be empty. Clicking the “Add Field” button creates a new empty field that can be configured according to your needs.
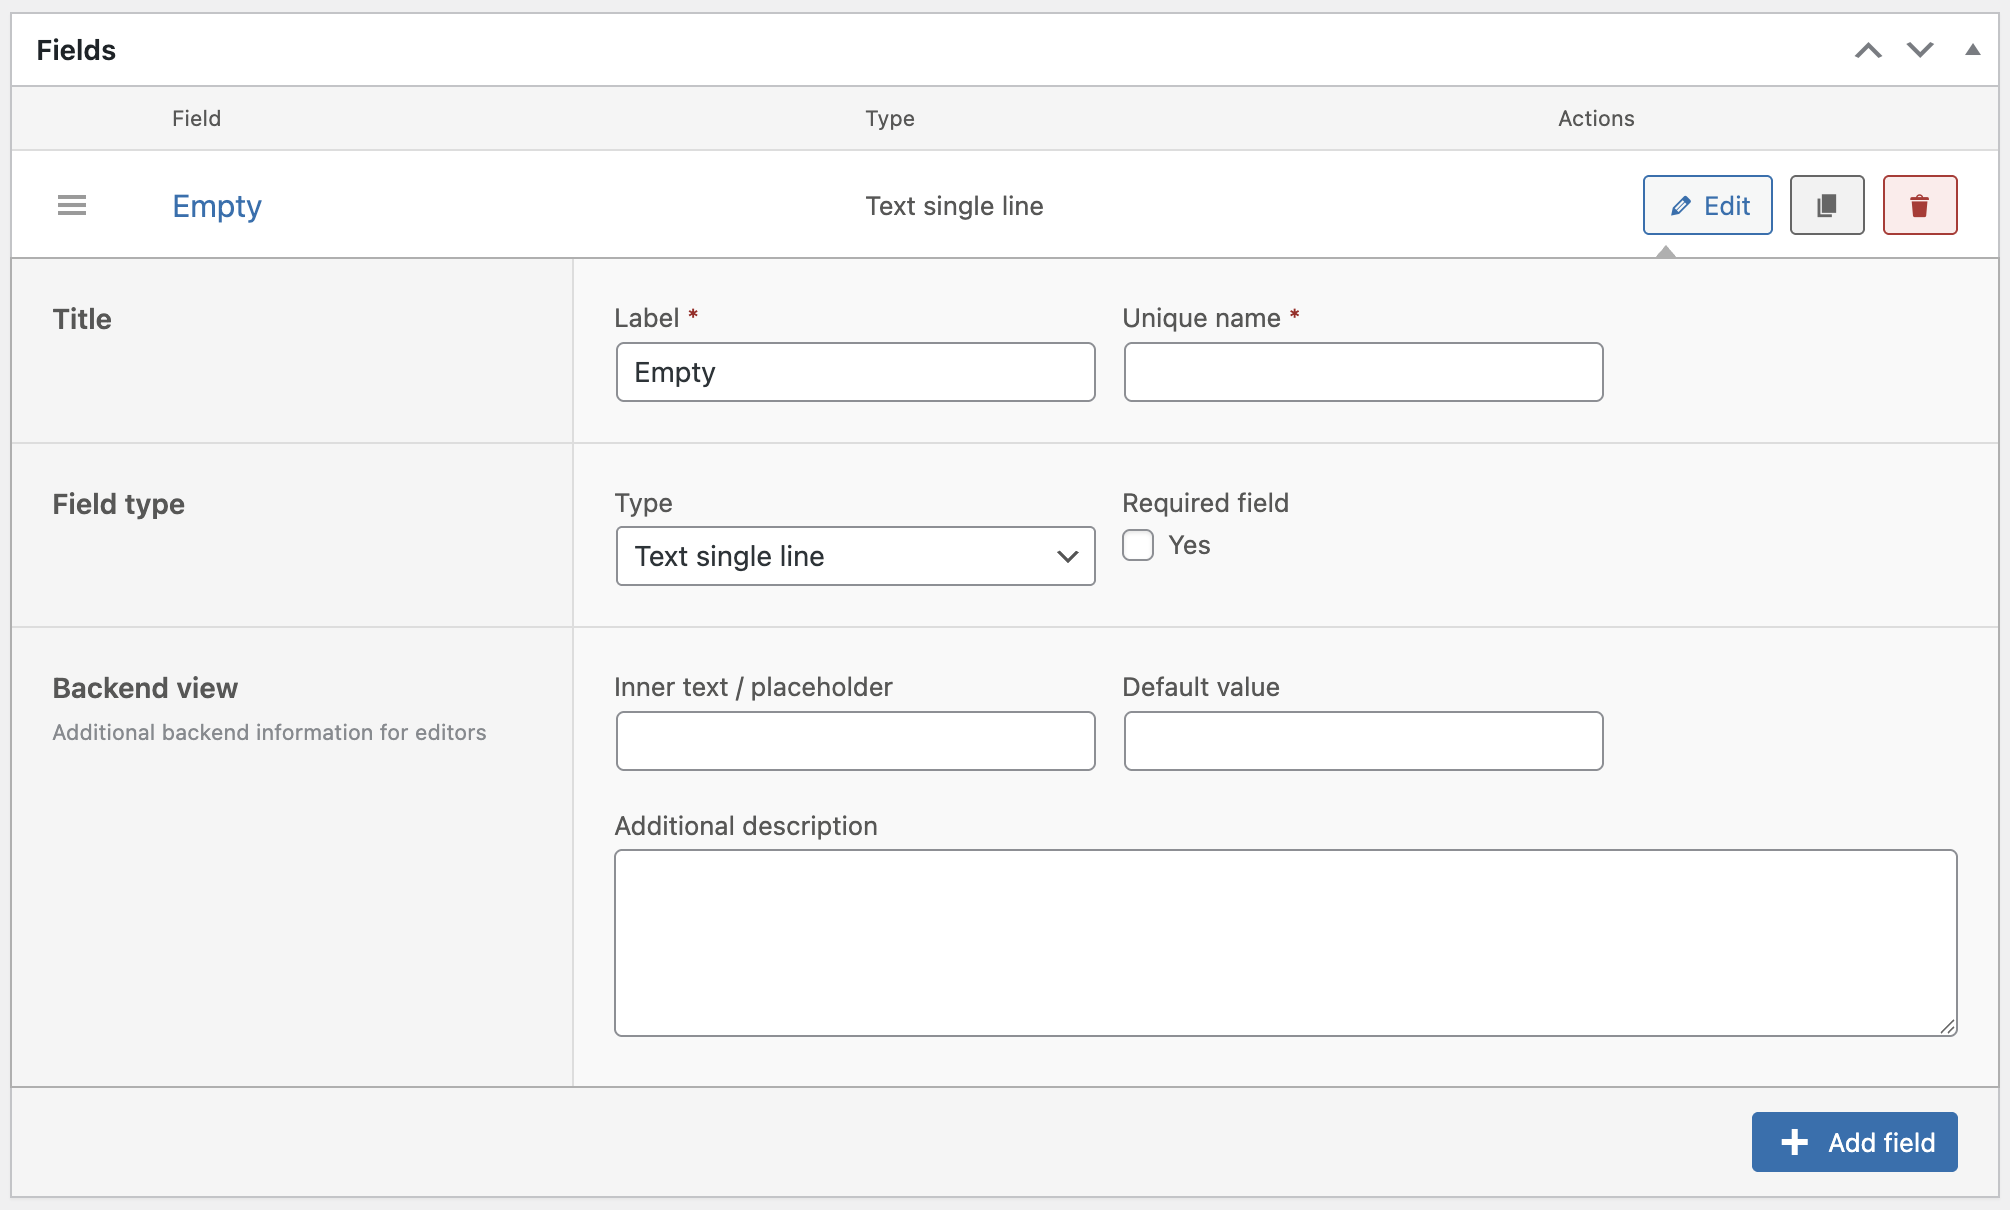
Each field offers several configuration options:
Title
Set a human-readable “Label” and a machine-readable “Unique name” (slug). The name must be unique within the Post Type and should contain no spaces or special characters.
Field Type
Select a type for the field depending on the kind of input you need. You can also mark the field as required to ensure it always has a value before publishing the post.
- Input field: Text single line (short, normal, long), text multiline, number, email, date, time, date and time
- WordPress: HTML editor, file/media, link
- Selection: Dropdown, radio buttons
- Backend layout: Headline, description, separator, empty space – with these elements, you can customize the editing view in the backend. These information do not get shown on the frontend. This is helpful if you have custom post types with many fields to make editing the contents easier.
Backend View
Each field can be enhanced with helper texts and default values to guide editors when filling out content. These options improve usability when managing content in the backend.
- Placeholder or inner text
- Default value
- Additional description below the field
Certain field types include additional configuration options:
- Number: Minimum, maximum, and step values
- HTML Editor: Does not support placeholder
- File / Media: Instead of an input field for a default value, you can upload a file that is shown as default if no file is set
- Dropdown / Radio Buttons: Values defined using
key = labelformat (e.g.male = Mr, female = Mrs) - Empty Space: Height can be defined using px or em units
Post Type Fields are fully compatible with the Dynamic Tags system, enabling you to output their values dynamically throughout your site content. For more information, see the Dynamic Tags documentation.