The Entries section under the Forms menu provides an overview of all submitted form entries. This view follows the standard WordPress post type structure, allowing filtering (by dates, by form or by manual search), sorting, and bulk actions.
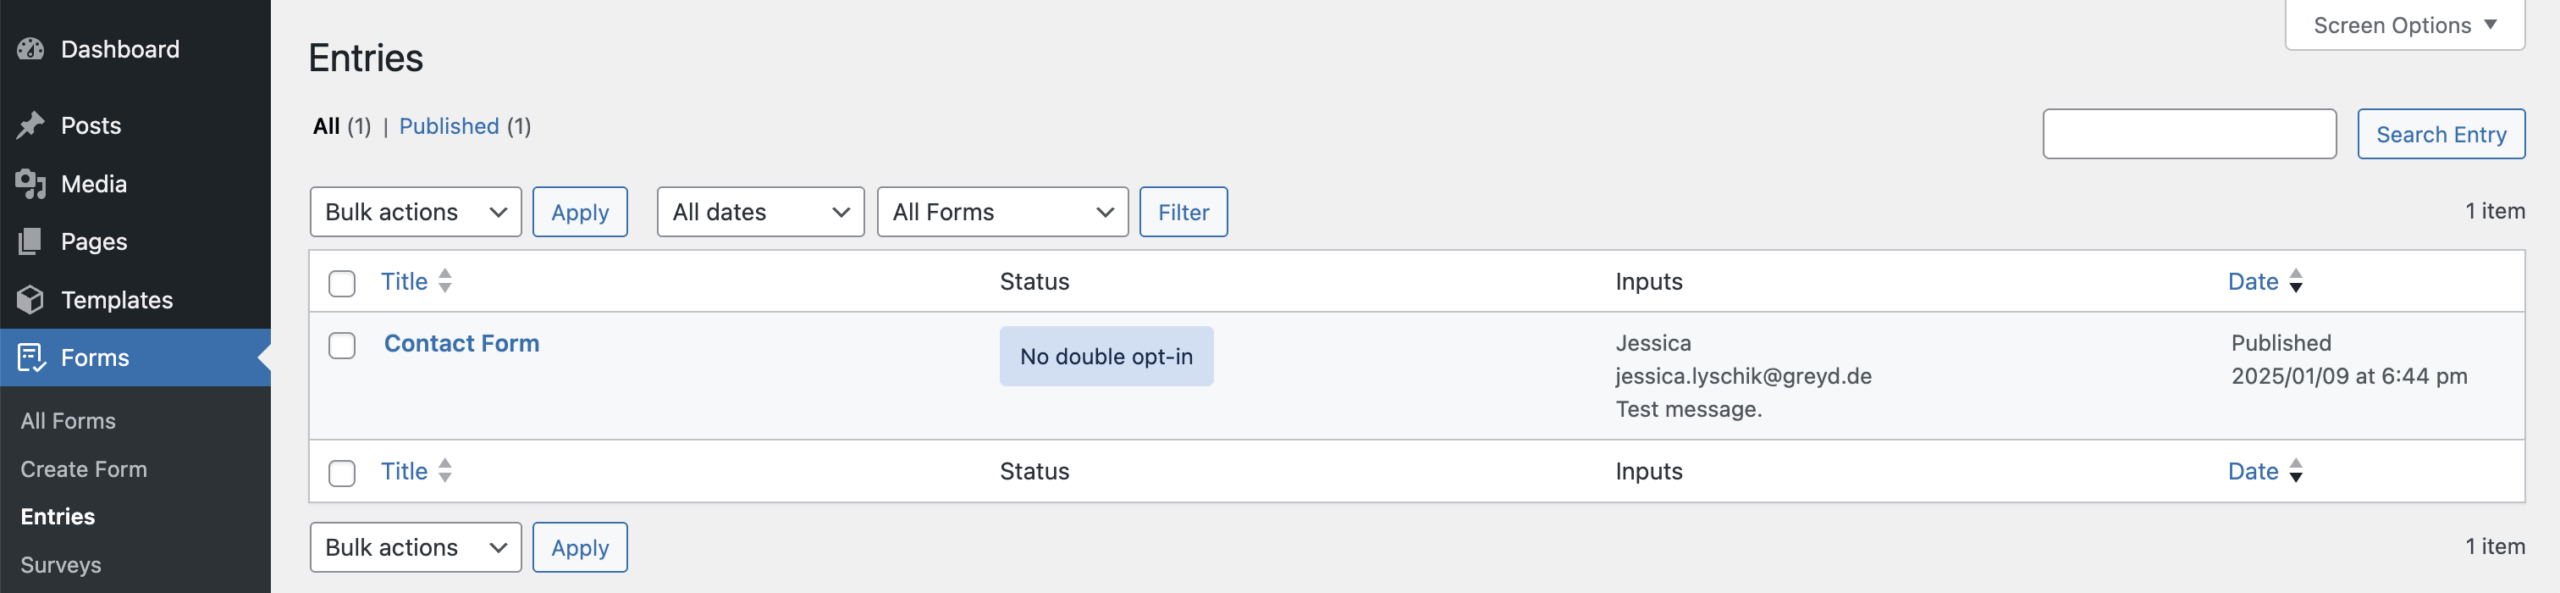
An individual entry is created whenever a form is submitted in the frontend, provided the form mode is set to Generate Entry. All entries of all forms show up in the Entries section. The Title column holds the name of the form, the Status column shows the current state, which can change depending on if the double opt-in option has been enabled in the form. The Inputs column shows an overview of all input fields. The Date column shows the creation date and time of this entry. The Status, Inputs and Date columns can be hidden from the view via the Screen options menu. For example if you have forms with lots of content coming in, it might be a good idea to hide the Inputs column from this overview.
Individual entry
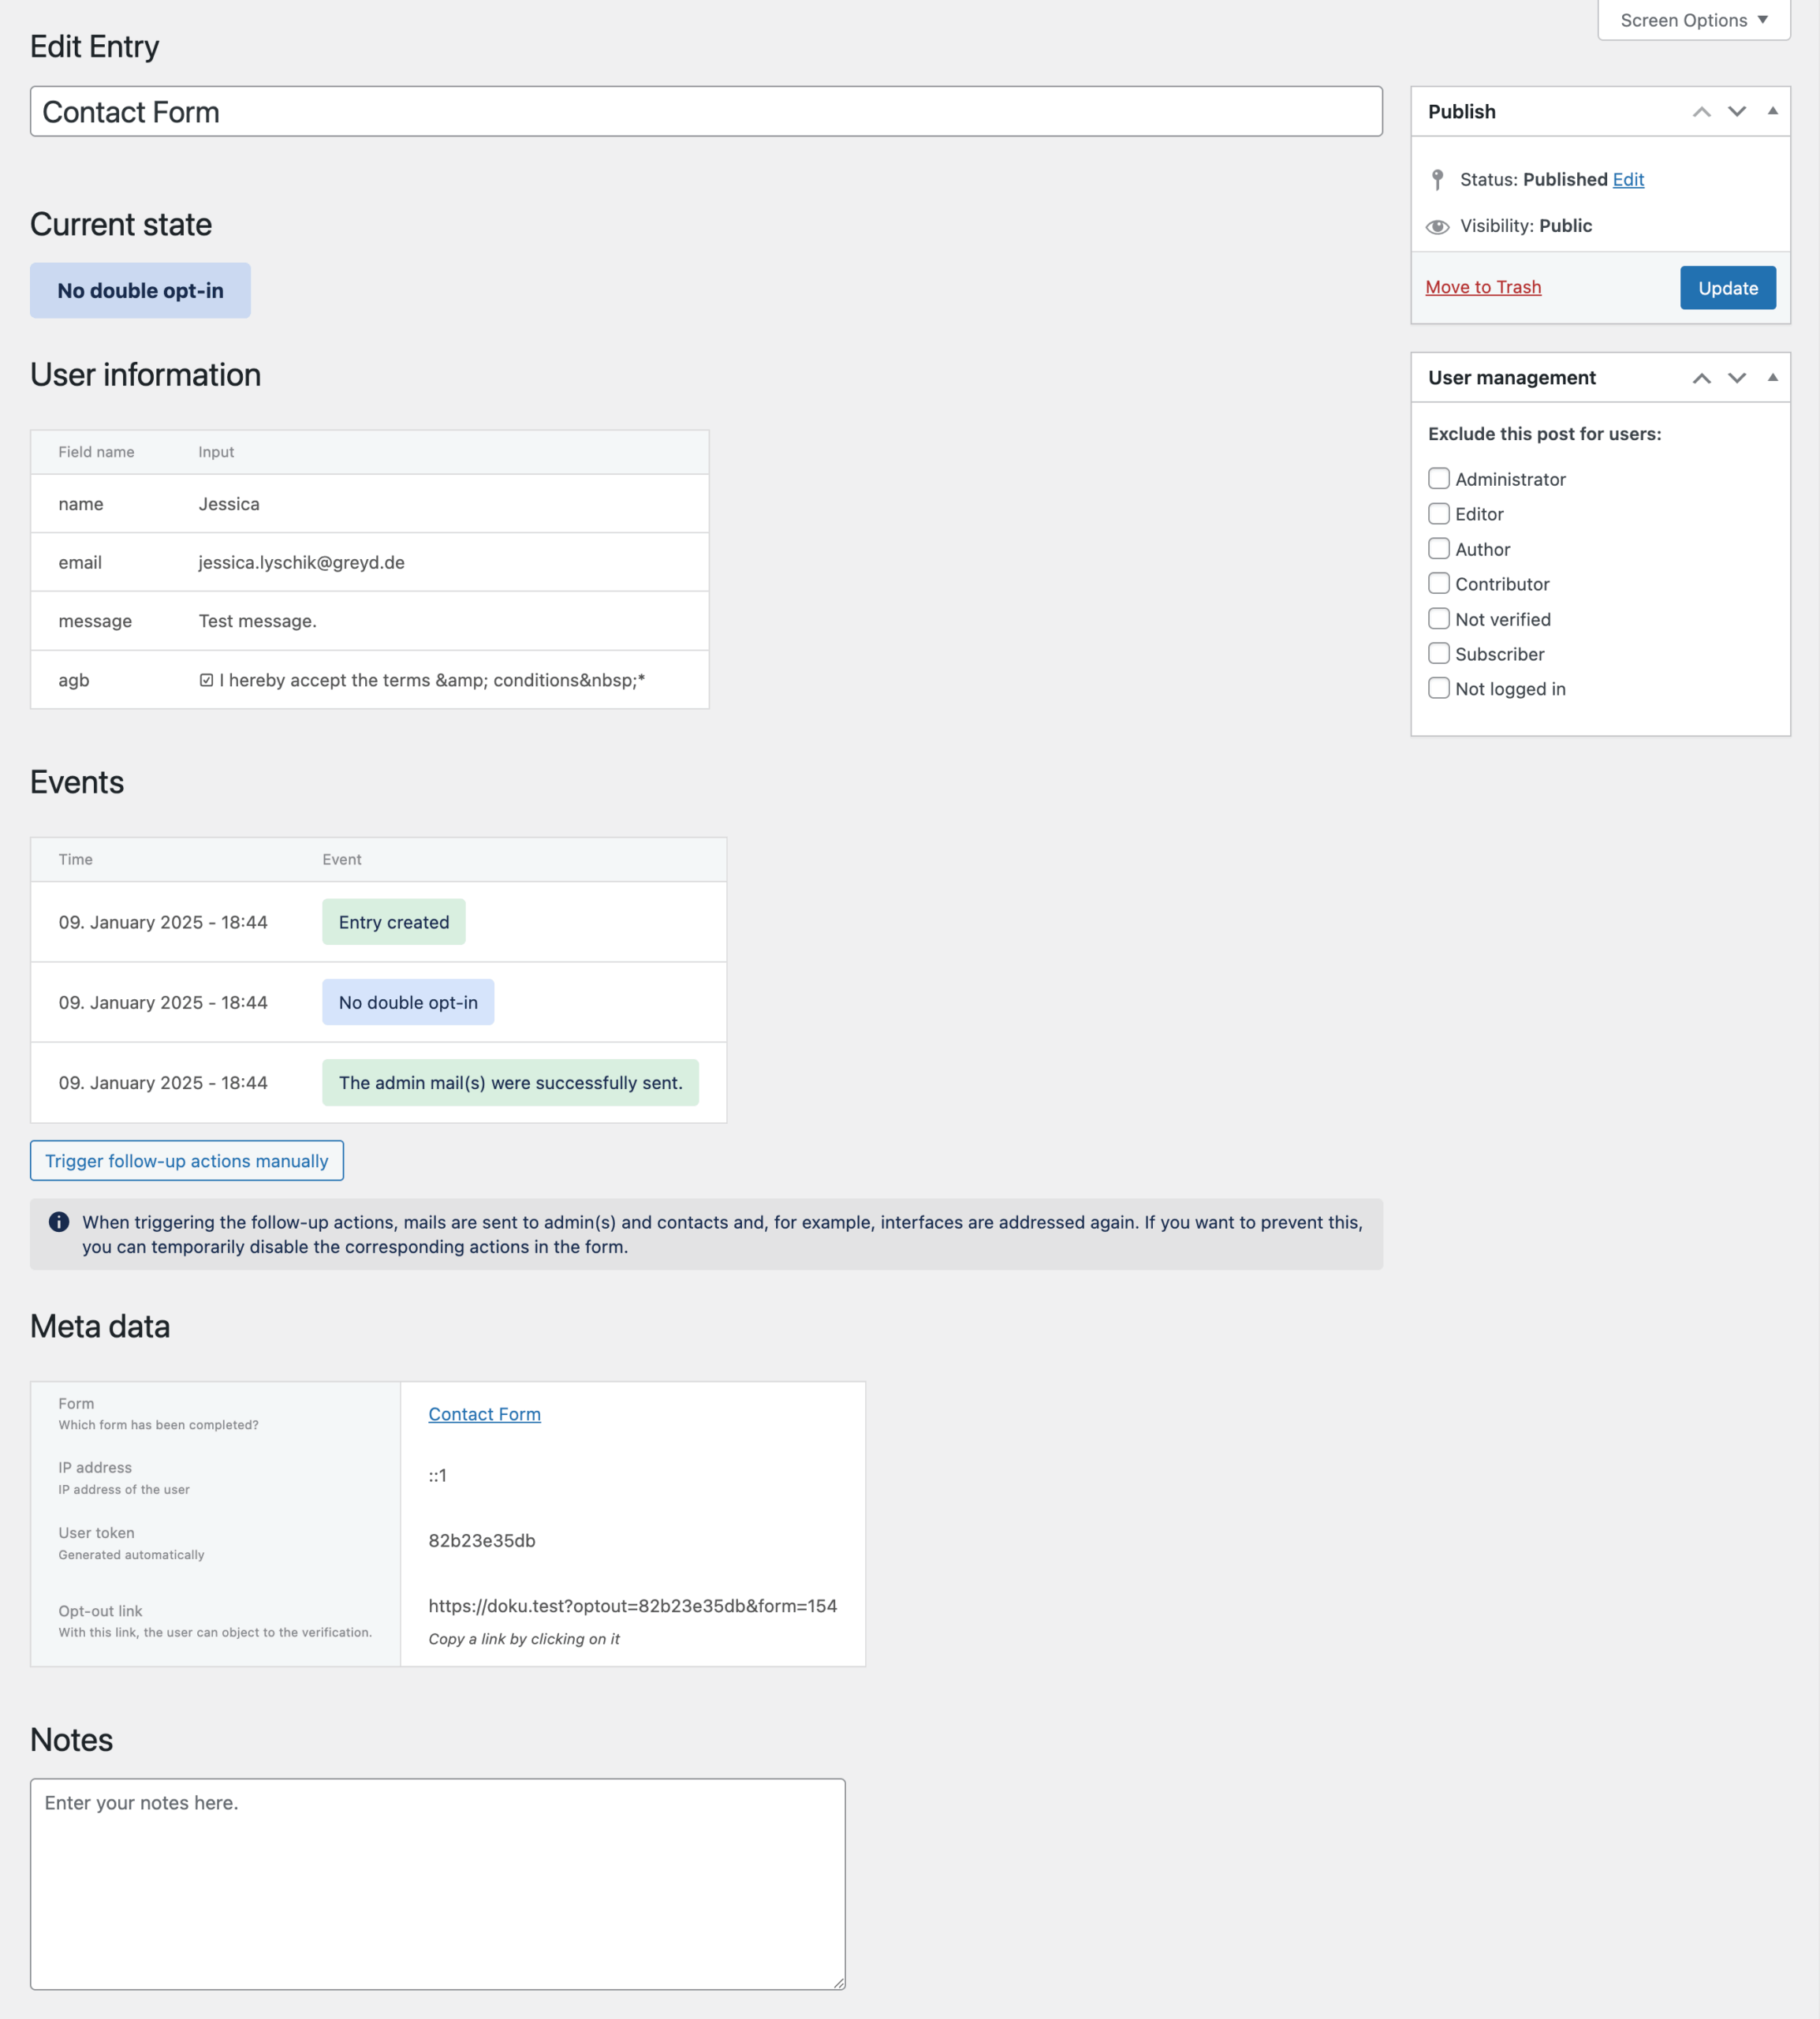
Each entry includes all submitted user input, along with metadata and a timeline of system events.
Under Current state, you can see the same information that is already shown in the Status column on the overview. It can have the following options, depending on the form setup:
- Pending
- No double opt-in
- Verified
- Objected
- Sent
- Error(s)
In the User information section, you’ll find a table with the list of all available input fields the form provided and the corresponding entries the user typed in / selected.
Under Events there’s a list of all changes happening to this entry. This can include the creation of the entry, successful sending of admin notifications, double opt-in confirmations, or triggered interface actions. All events are listed with a date and time when each event happened. Admins can manually trigger follow-up actions from within the entry view. Doing so will resend the admin and customer emails and re-execute any configured third-party integrations.
Each entry also contains Meta data such as the name of the originating form, the IP address of the submitter, a user token, and an opt-out link if applicable. Additionally, custom notes can be added to an entry for internal documentation.
Error messages
Greyd Forms informs you in various ways should anything go wrong with a form — e.g. if an interface is not working as it is supposed to or if an email could not be sent. You will see the respective error message in the form entry and — depending from your settings — also as an admin email.

If you get an error, please check whether it it was unique or whether it is constantly reproducible. You can easily do this by clicking on Trigger follow-up actions manually below the error message. Now the system tries to send the mail or connect with the interface again. You will then see in the status whether it was successful or resulted in errors. You only need to take actions if an error repeats (e.g. contact your IT admin).