The global Forms Settings section allows you to define general configurations that apply across all forms in your installation. These settings affect default behaviors, API integrations, and field validations.
General settings
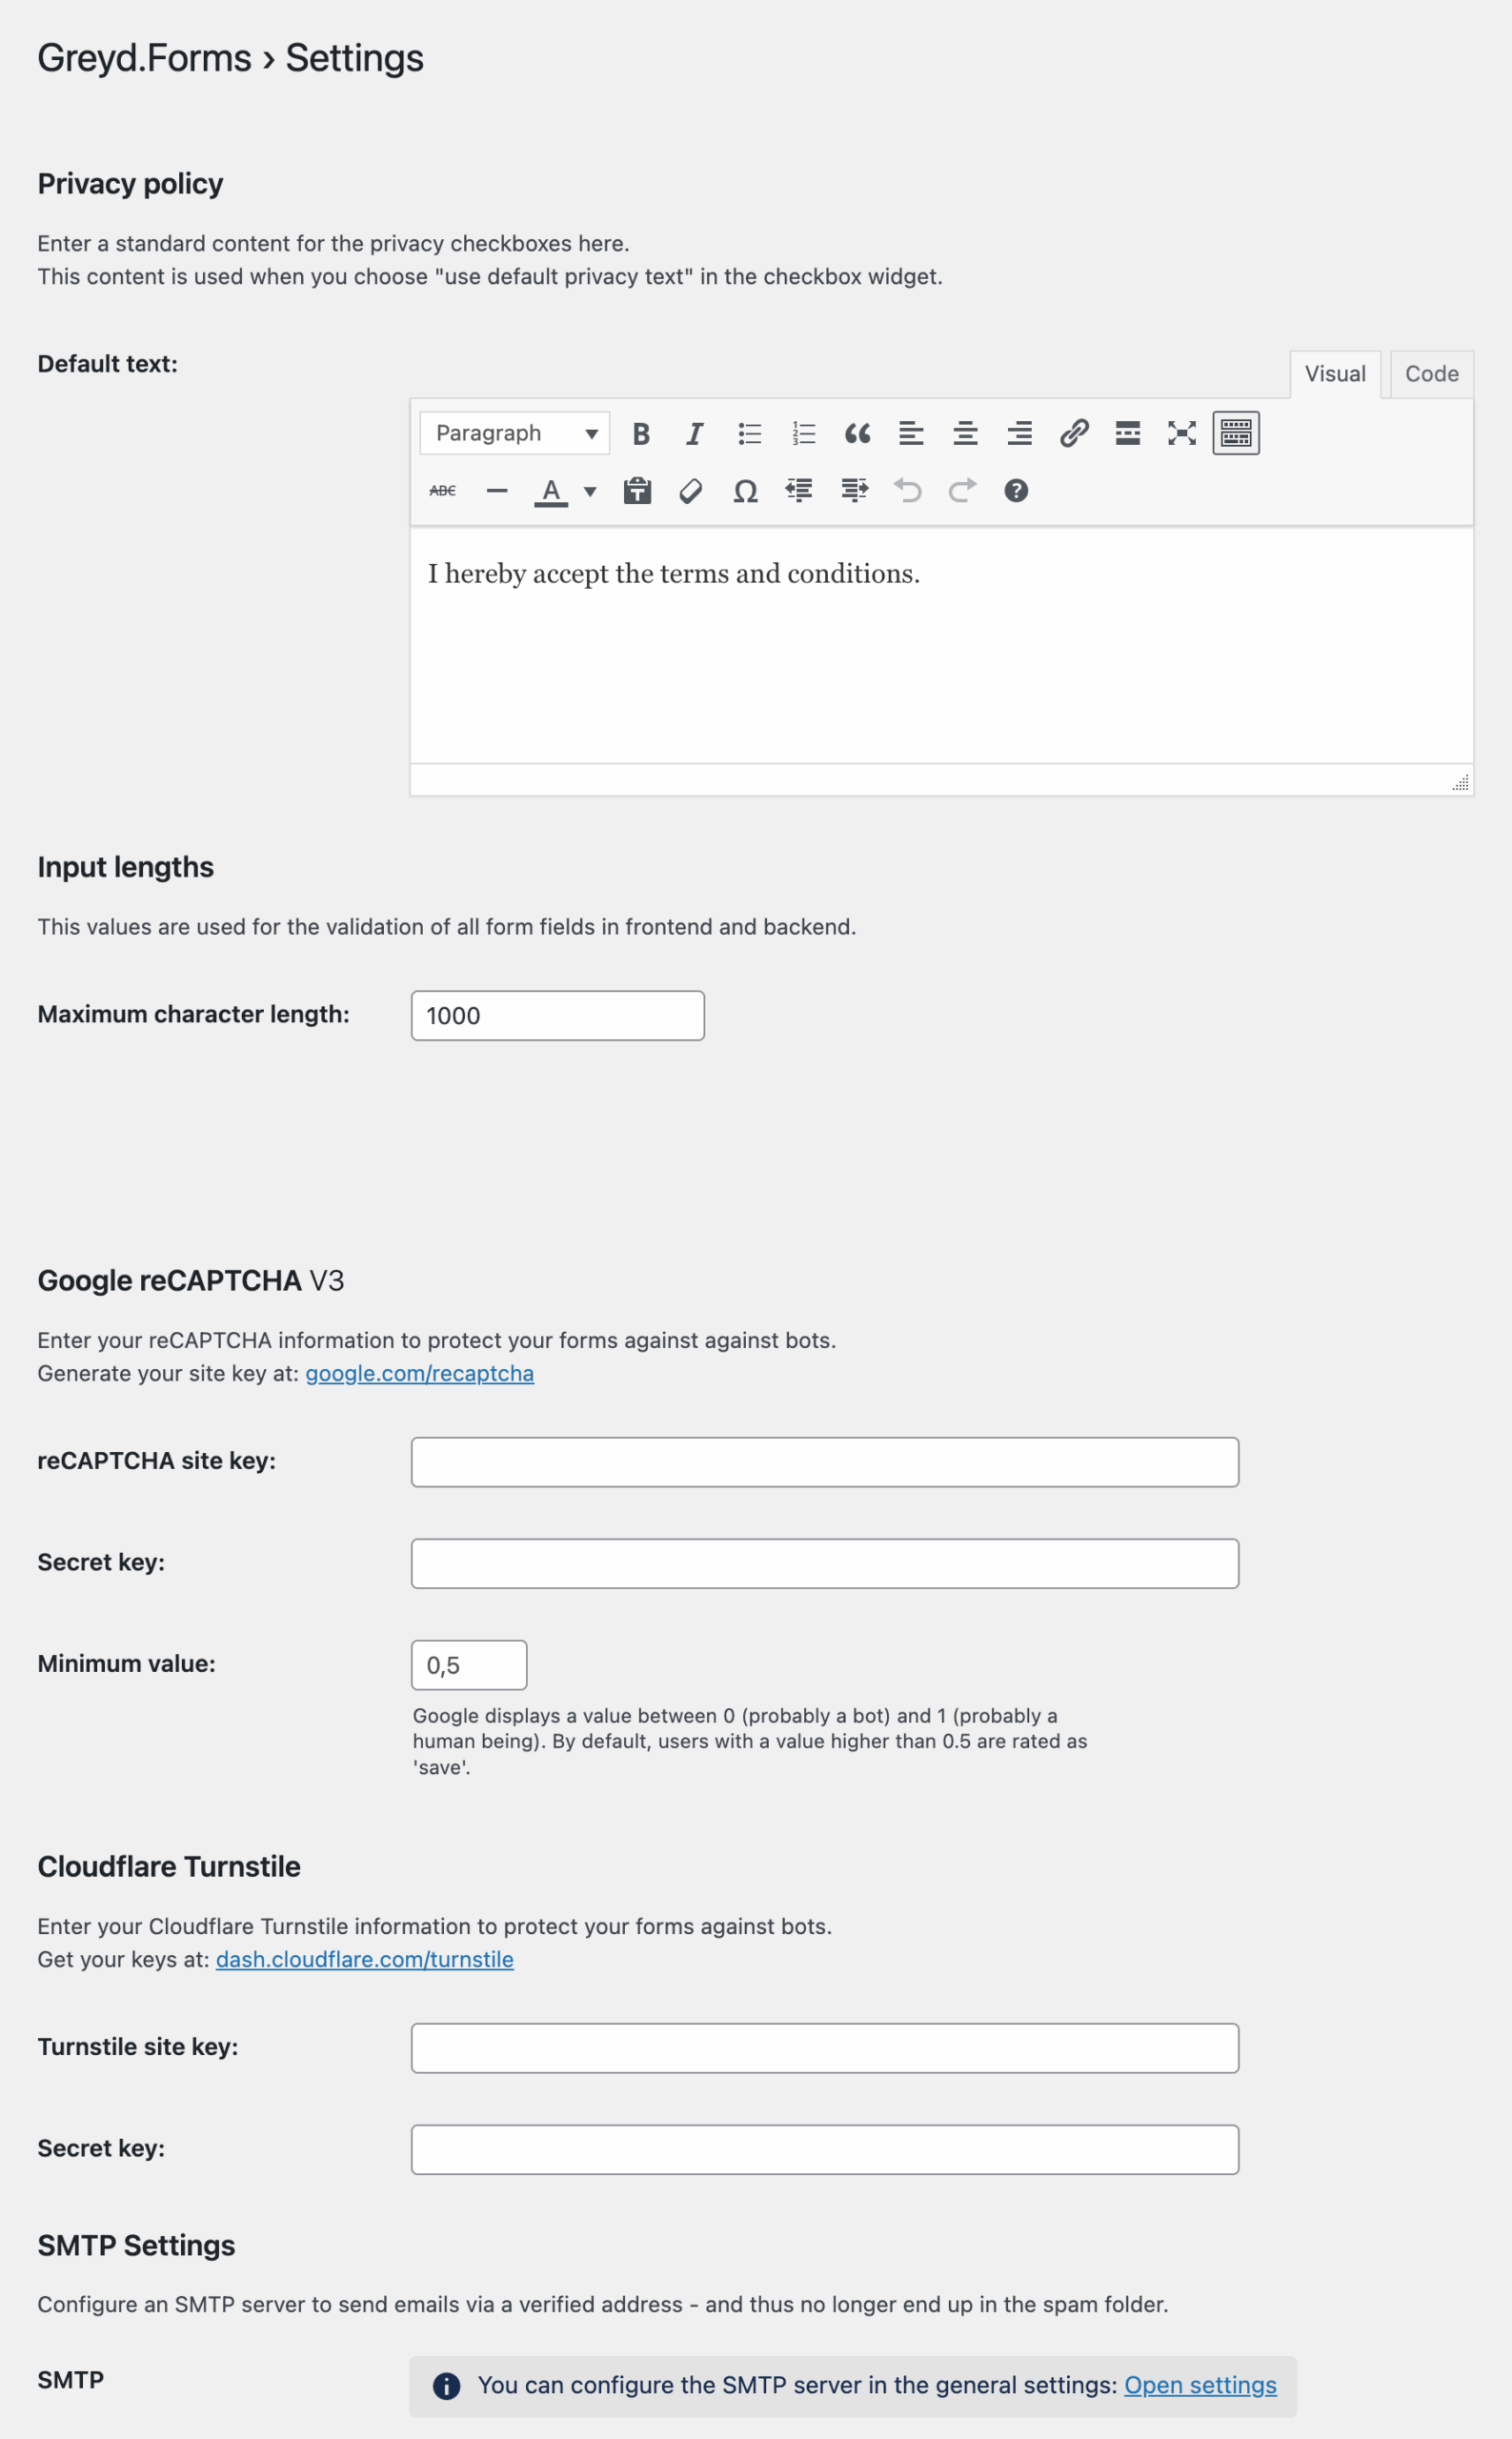
The Privacy Policy setting lets you define a default text used by checkbox blocks when the “Use privacy default text” option is selected in the block settings. This ensures consistent phrasing for consent-related fields across your forms. A TinyMCE editor is available for further customization.
Under Input Lengths, you can set the maximum character limit for number input fields. This value is used for frontend and backend validation across all input fields, helping enforce data quality standards. The default ist 1,000.
The plugin also offers built-in support for Google reCAPTCHA v3, which helps prevent spam and bot submissions. You must enter your reCAPTCHA site key and secret key, both of which can be generated at google.com/recaptcha. Additionally, you can define a minimum threshold score. Google returns a score between 0 (likely a bot) and 1 (likely a human). By default, users scoring 0.5 or higher are considered safe.
With version 2.18.3, we have implemented a Cloudflare Turnstile integration as alternative to Google reCAPTCHA. You must enter your Turnstile site key and secret key, which you can get at dash.cloudflare.com/turnstile. All other settings can be done at the block which you need to add to your form(s).
For better email deliverability, a section for SMTP Settings is included. This area contains a single button that redirects to the global SMTP configuration page, where a verified sending address can be configured. Using SMTP helps reduce the likelihood of your form emails ending up in spam folders.
Interfaces
The Interfaces section allows you to connect your forms with external services. Each integration includes its own authentication fields and configuration UI. In order to use the interface, you need to click on the enable checkbox and add additional data in the input fields if provided.
Webhook: Allows custom per-form endpoints. Each form can be configured to send its submissions to a unique external interface.
Mailchimp: Requires an API key and server abbreviation. Once authenticated, you can fetch recipients lists that become available for selection in individual forms.
Mailjet: Requires both an API Key and API Secret. After authentication, your contact lists can be fetched and assigned per form.
Zapier: To integrate with Zapier, use Webhooks by Zapier. Once configured, Zapier provides a unique URL which you can enter directly into your form’s settings.
HubSpot: Requires an Auth Token. See the documentation of Hubspot how to create a private app and access the HubSpot auth-token. You can show the token while typing or insert it directly from your clipboard. Once authentication is successful, a button appears that lets you fetch available static lists from the connected HubSpot account. These can later be assigned in the form’s individual metabox settings.
Salesforce: Integration is enabled by entering the organization ID. See the Salesforce documentation on how to find your organization ID.
Samdock: Requires an API username and password. A button appears to initiate authentication after credentials are provided.
Rapidmail: Requires an API username and password. Once authentication is complete, mailing lists can be retrieved and selected in form-specific settings. See the Rapidmail documentation on how to create an API key.
Zoom Webinar: Requires a Client ID and Client Secret. After entering the credentials, you can use the Generate Access Token button to authenticate. An adjacent help button explains the Zoom API setup in more detail:
- You must create a private OAuth app in the Zoom App Marketplace.
- The Client ID and Secret can be found under “App Credentials.”
- For the redirect to work, use this URL:
/wp-admin/edit.php?post_type=tp_forms&page=greyd_settings_forms - The app must also have the “View and manage your webinars” scope enabled.Once authentication is complete, you can fetch available webinars to link them with your forms.
Video
Hi, this is Sandra from GREYD. In this video I’d like to show you which general settings you can make for forms on your website. You will find the general form settings on the left in the forms menu under settings. As you can see, the first settings are about data protection. Here you can enter a default privacy text to which you can refer in every form with the checkbox block. Therefore just activate this checkbox here. This is a very handy feature especially if you have several forms on your website that should all have the same privacy note. Of course you can also work with different formatting options and also set links for example to your privacy page.
Input length is a security feature preventing users to insert unreasonably long form entries. If you’d like to change the maximum number of characters you can do that here. GREYD.Forms has a native Honeypot spam protection. If you’d like to use Google reCAPTCHA to protect your forms against bots, just enter your CAPTCHA keys here. You can even adapt the minimum value that rates a form entry as safe.
GREYD.Forms also comes with a native SMTP integration. With that you can configure an SMTP server and send your form emails – for example the double opt-in verification email – via a verified email address. This prevents your mails from being sent to the spam folder. If you click here, you will be directed to the general GREYD.SUITE settings where you can enter the SMTP host and port of your email provider and your login details for the authentication. You can also decide whether to encrypt your emails and how.
GREYD.Forms offers interfaces to various CRMs and newsletter tools and also lets you create additional interfaces via Zapier or webhooks. Here in the settings you can activate interfaces for your installation and enter the required data. If you want to learn more about connecting forms with external tools we have a dedicated tutorial video on that waiting for you in our Helpcenter.
Please do not forget to save your settings when you’re done.
For more videos and information please visit our Helpcenter.
Video: Hubspot
Hi, this is Sandra from GREYD. In this video I’d like to show you how to connect a GREYD.SUITE website with Hubspot to transfer data from forms or WooCommerce directly to your CRM. Let’s start with forms.
Open the tab settings under forms.
Here you have to enter your Hubspot API key, which can be created in Hubspot under settings and integrations.
As you can see, your static Hubspot lists will automatically be retrieved, but you can also click on the button. I will show you later how it’s also possible to trigger active lists. As soon as you click on save you’ll be able to connect any form with Hubspot.
Therefore open the respective form, click on the settings and interfaces.
Here you can now click on “create contact” to activate the Hubspot connection of this particular form. Now you can assign your form fields to the respective fields in Hubspot. With the plus symbol you can add further fields.
Next to the standard Hubspot fields you can of course also assign your individual ones by entering them here.
Here you define whether the new contact should be added to one of your Hubspot mailing lists and whether it should be updated in case it already exists. My tip regarding data protection: There are several possibilities. You can either use the natively integrated double opt-in feature of GREYD.Forms, which can be found here under emails. In that case only those form entries will be sent to Hubspot that have confirmed their opt-in. Please be aware, that with Hubspot it’s not possible to integrate an opt-out link and send the information to Hubspot when it is clicked. This information will only be stored in GREYD.Forms. Therefore with Hubspot we recommend to deal with the opt-in and opt-out directly in Hubspot itself instead of using the GREYD.Forms double opt-in feature. And last but not least another tip how to trigger active lists in Hubspot directly with your forms. These lists are updated automatically as soon as a contact has certain properties. If for example you’ve got an active list with all contacts in the lifecycle phase “lead”, you can simply add a hidden field to your form with the value “lead”.
When assigning your form fields to your Hubspot fields, just assign the hidden field to your Hubspot field “lifecycle phase”.
Additionally you can also add your contact to a static list, thus you can also use this trick to add one contact to several lists at the same time. If your GREYD.SUITE website contains a WooCommerce shop, you can also sync your shop data, such as orders or abandoned carts, very easily with Hubspot.
We therefore recommend the plug-in “Hubspot for WooCommerce”, which works perfectly with GREYD.SUITE.
For more videos and information please visit our Helpcenter.
Video: Salesforce
Hi, this is Sandra from GREYD. GREYD.Forms is a WordPress form generator that is natively integrated in GREYD.SUITE. It makes it very easy to create and manage professional forms. And it also has a native interface to Salesforce. In this video I’d like to show you how easy it is to connect your forms with your Salesforce account. At first you need to deposit your Salesforce organization ID. Therefore open the form settings and scroll down to the bottom, where you can enter your Salesforce organization ID and then save your changes.
Now open the form which you want to connect with Salesforce.
Scroll down to the settings and open the tab “interfaces”. Then hook the checkbox where it says “generate leads”. Next you can assign your form field to your Salesforce fields one after each other with the plus symbol. Custom fields can also be connected after the same principle.
You can also submit meta information to Salesforce, the lead source as well as an individual description. As soon as you now save your changes, form entries will automatically be sent to Salesforce.
For more videos and information please visit our Helpcenter.