Dynamic Templates let you create reusable content fragments that can be filled with different values depending on the context in which they’re used. Once the feature is activated under Greyd.Suite → Features, a new post type called Templates appears in the main admin menu.
Depending on the active theme, either a custom block (in the Greyd Theme) or a Visual Composer element with shortcode (in the classic Greyd.Suite Theme) becomes available. In both cases, dynamic tags for contextual content are unlocked throughout the Block and Site Editor.
Templates are non-public posts meant to be inserted into other content areas across the site. Inside a template, blocks can be marked as dynamic. These blocks are later filled with content when the template is used, allowing one structure to serve multiple use cases.
Templates Post Type
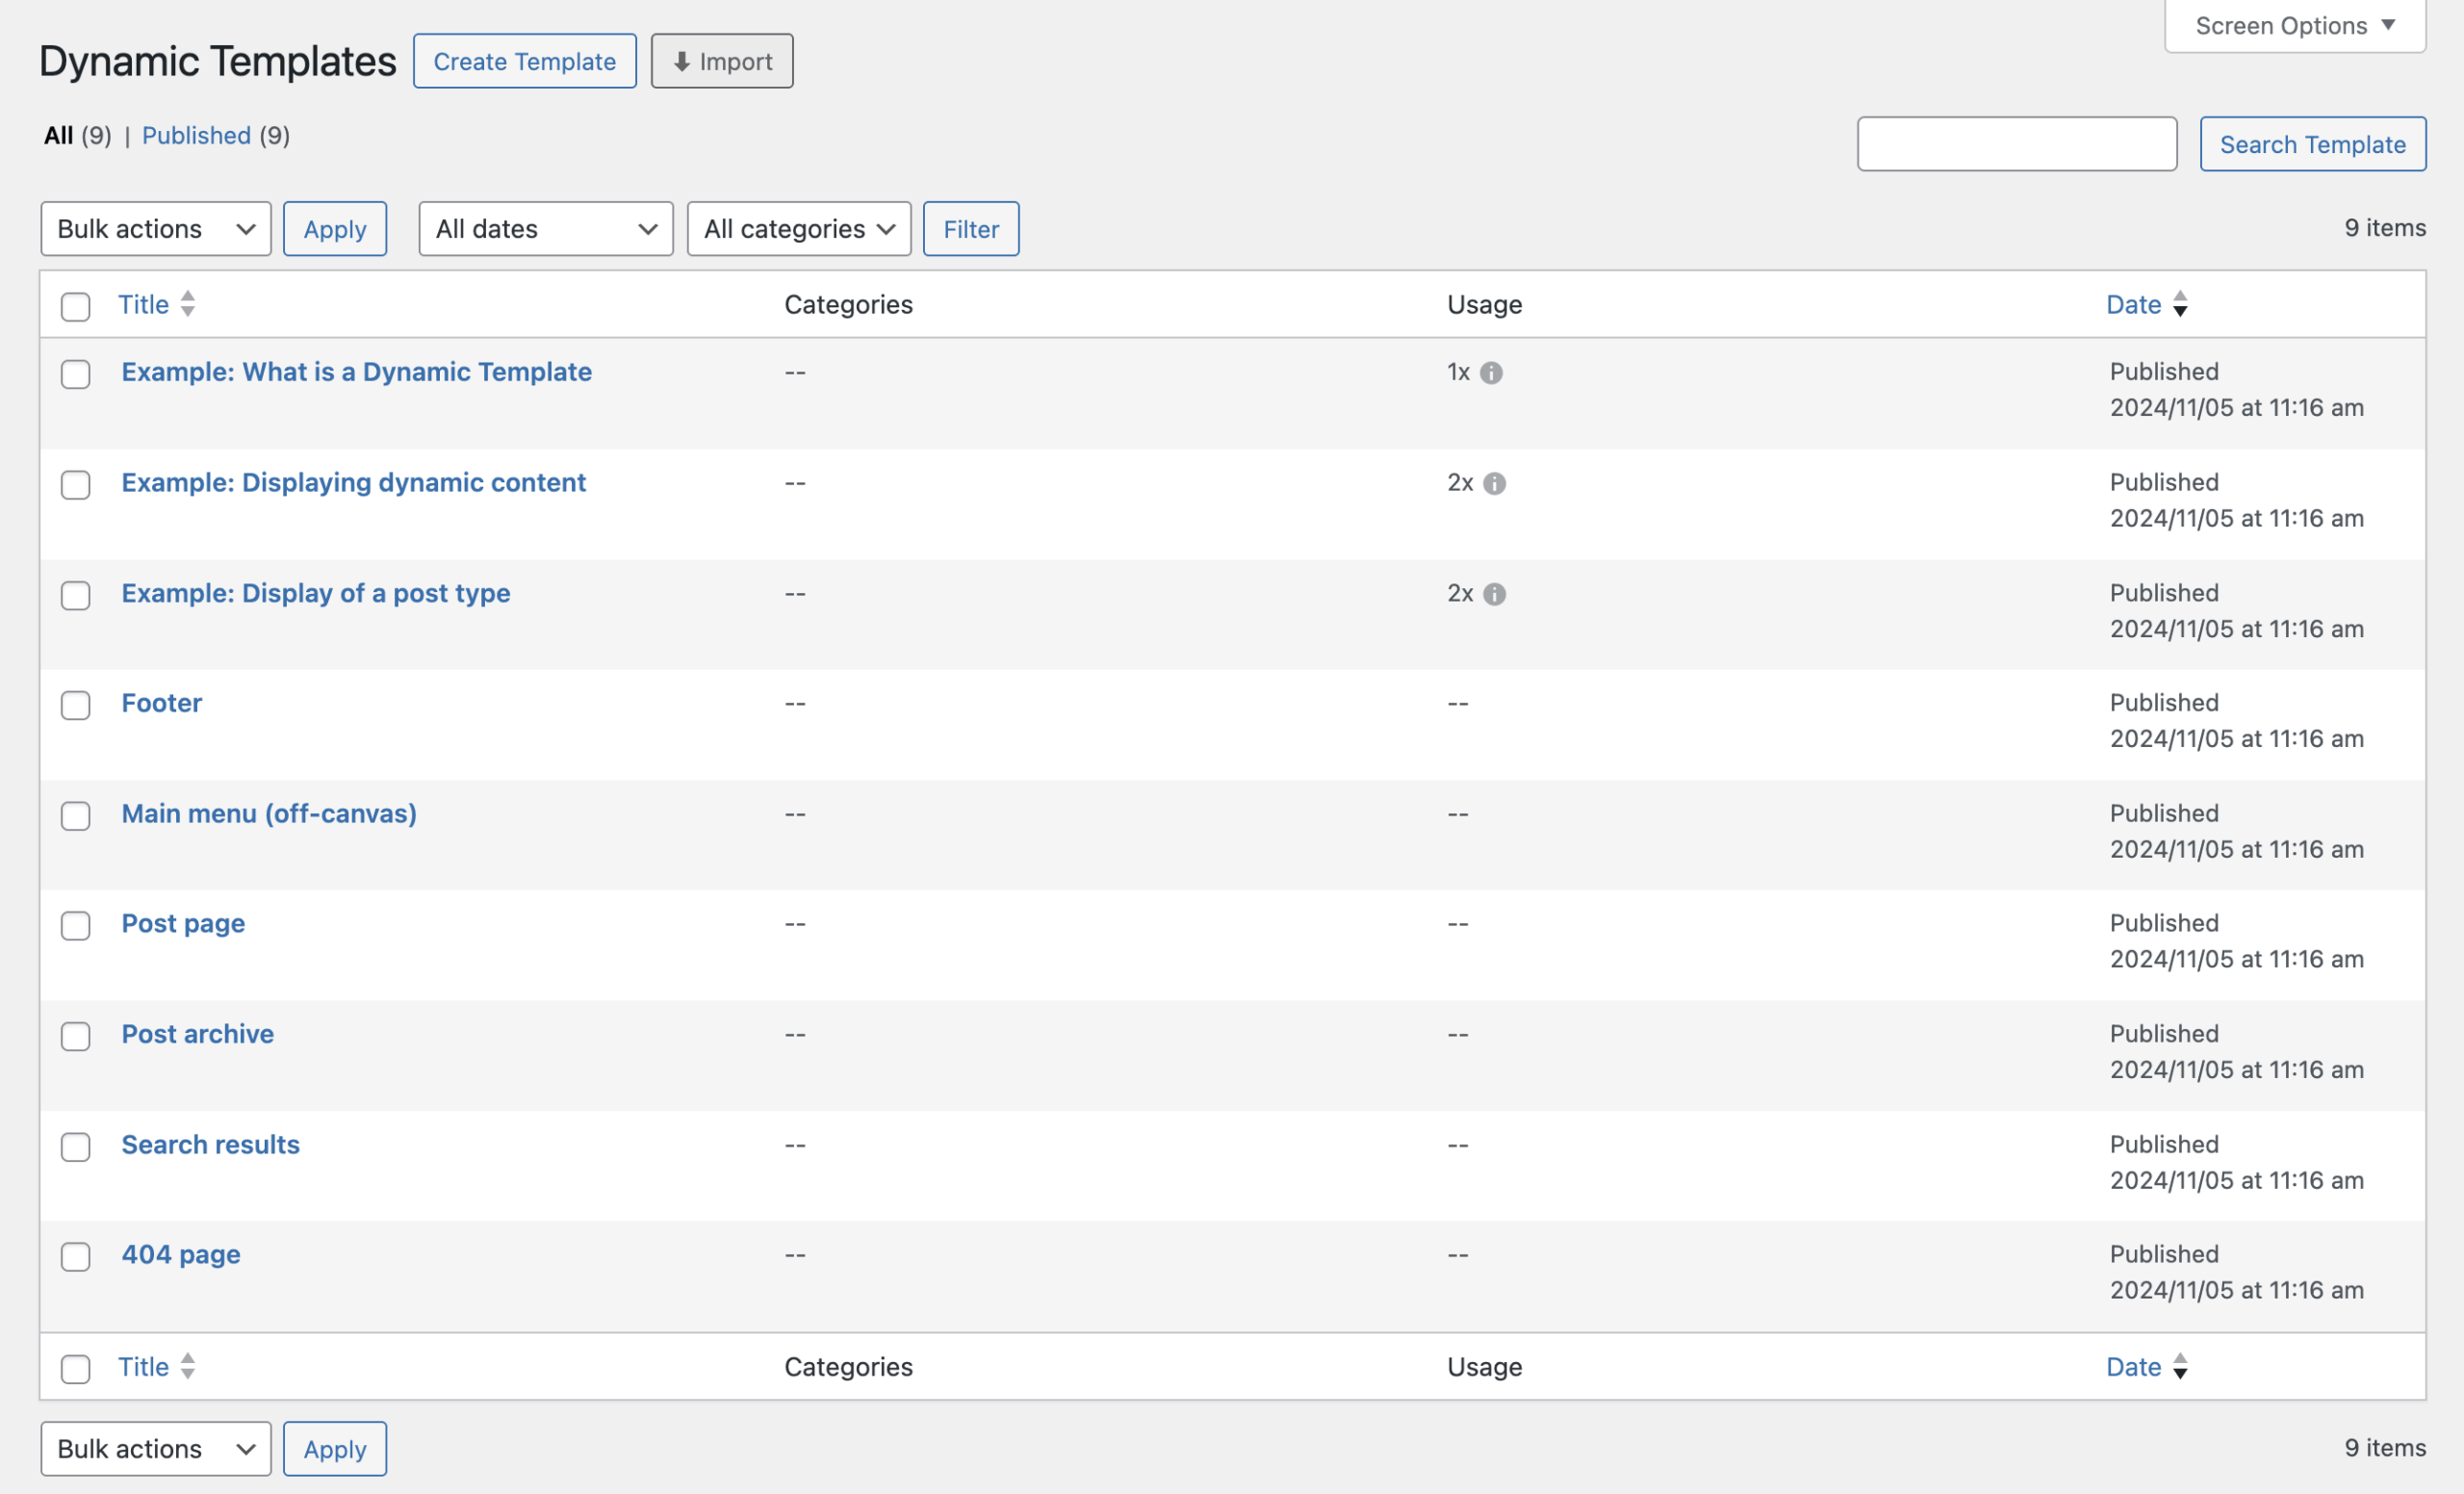
The “All Templates” screen shows a familiar list of all template posts. This list includes standard WordPress controls like sorting by title or date and filtering by category. A unique “Usage” column is also added. It shows how often each template is used across the site. Clicking the info icon in that column opens a modal with detailed references to the pages or posts where the template appears. Keep in mind that deleting a template in use will remove that content from the frontend.
To make working with similar systems easier, the submenu items under the Templates post type also include direct links to other content structures: the Site Editor’s WordPress Templates and Template Parts, and the custom Patterns list. This helps bridge the gap between dynamic fragments, structural templates, and design patterns.
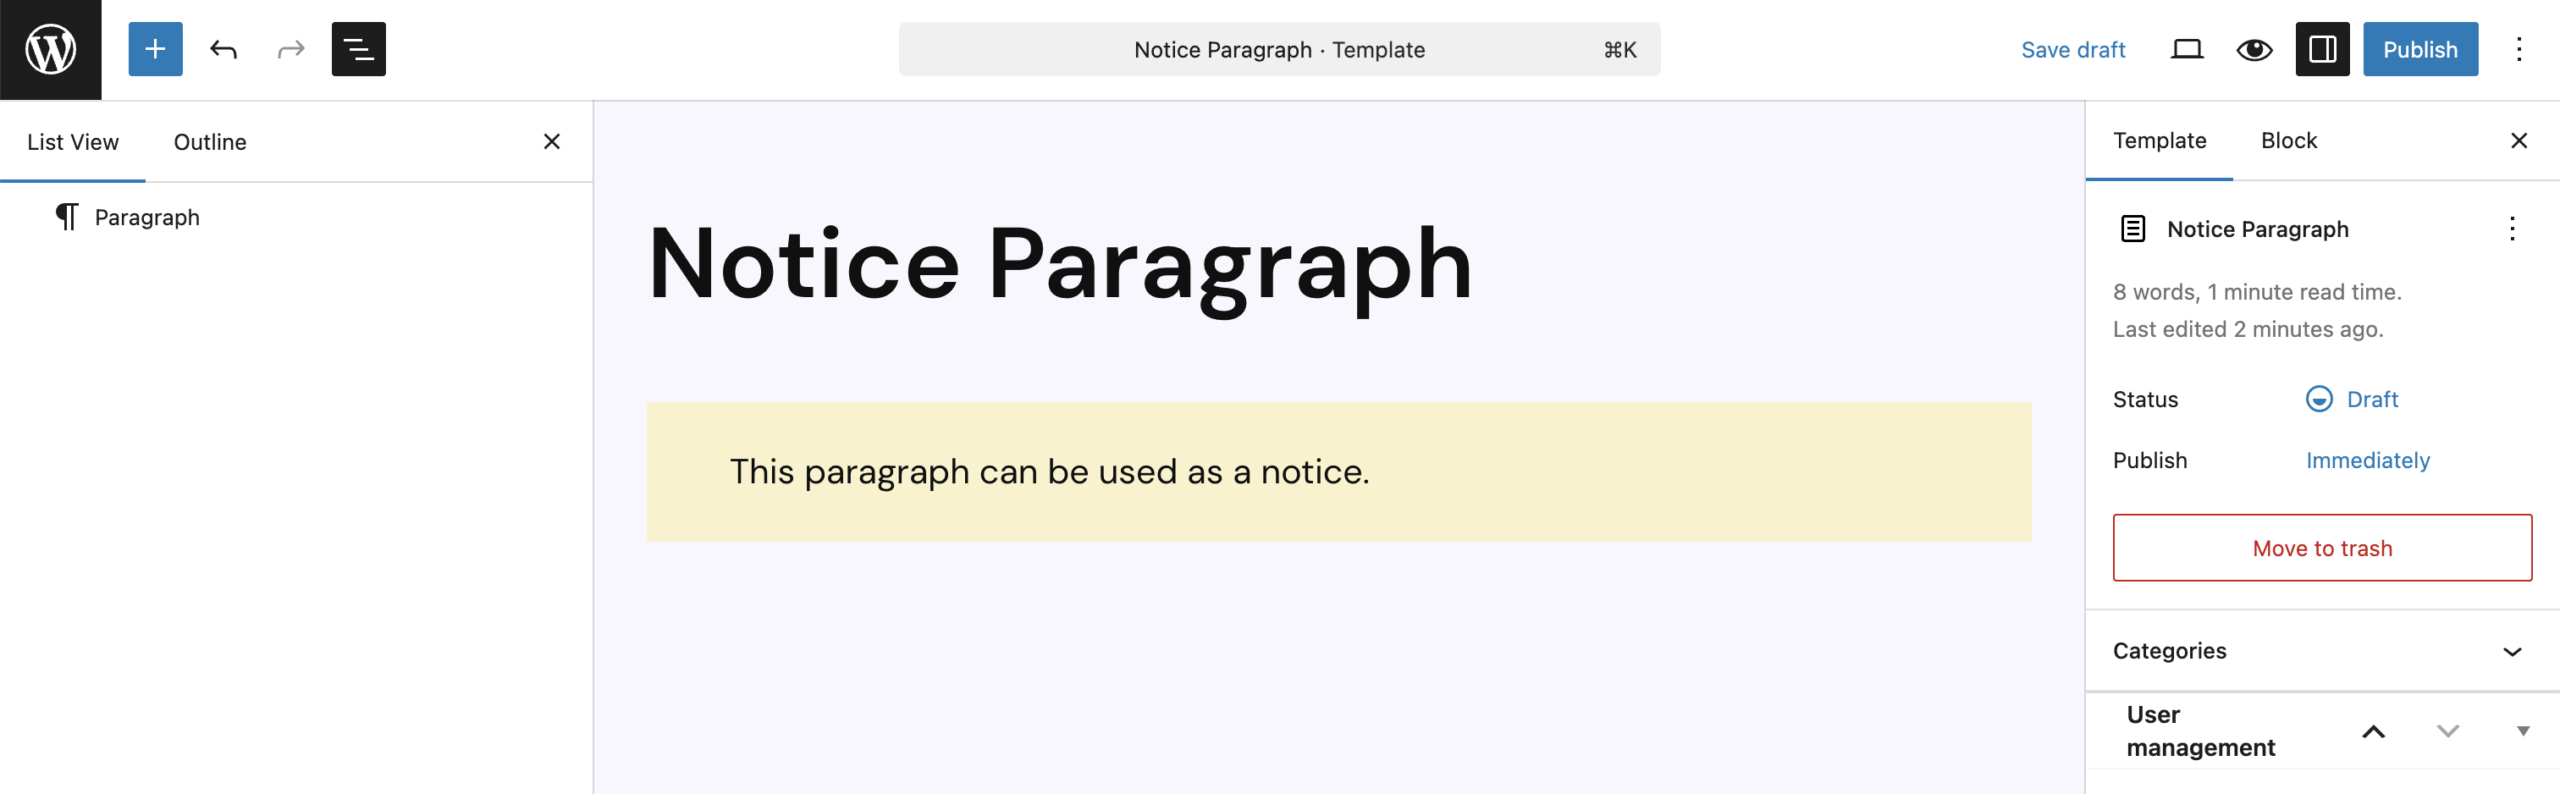
When you create or edit a template, the interface works like editing a regular post. However, templates don’t have a public URL or preview, since they render differently depending on context. Templates can be assigned to categories, which helps manage larger sets, but categories don’t have any effect on template behavior.
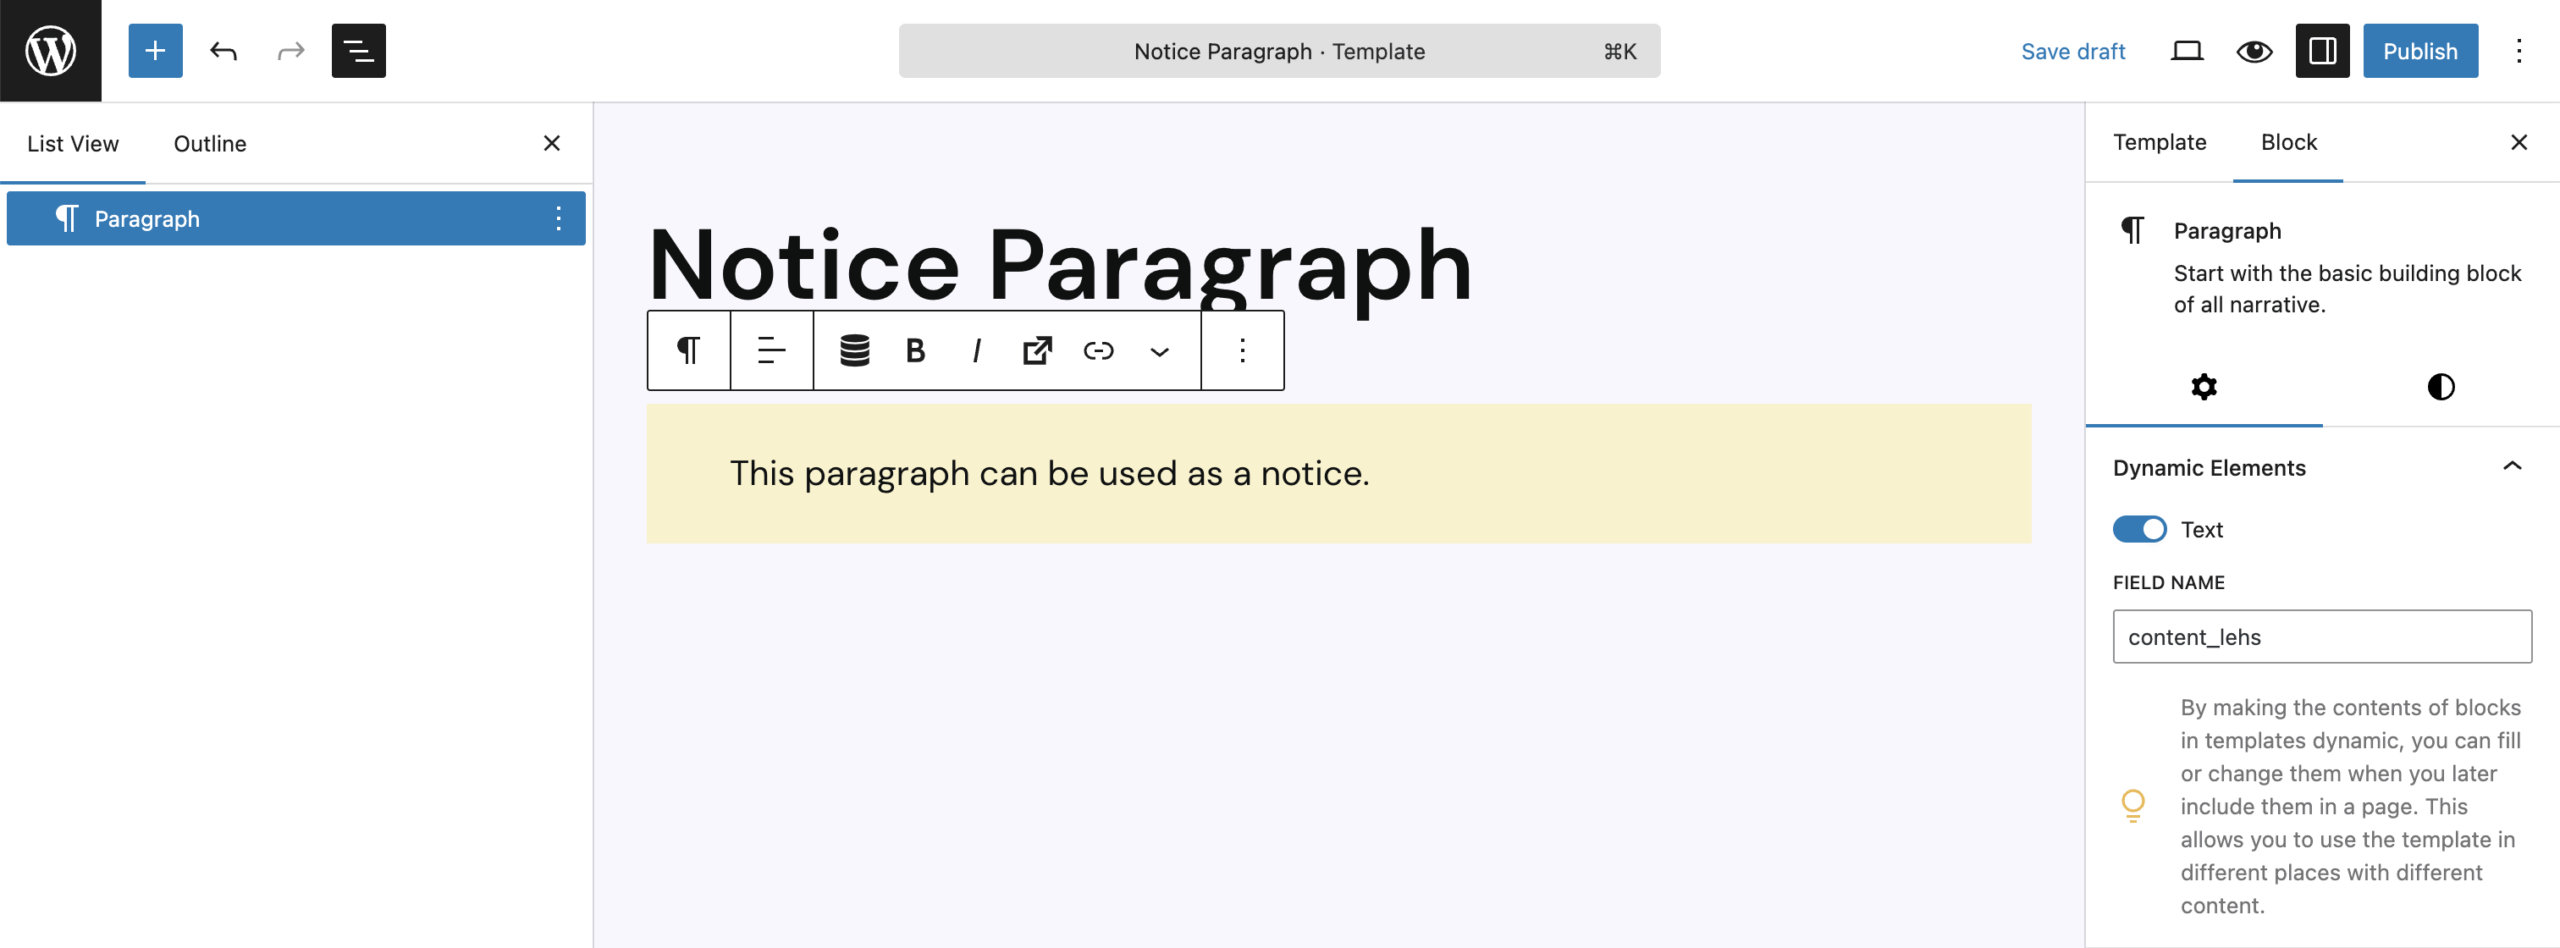
While editing, all blocks are available and can be used freely. Most of them include an extra panel labeled Dynamic Elements in the right sidebar. This is what makes the content inside the block replaceable later. Within that panel, each modifiable attribute of the block can be turned into a dynamic field. Once activated, you’ll see an input for a Field Name — this acts as a reference key. The value is auto-generated but can be renamed. This name is used to link the template block’s content to an editable field when the template is inserted elsewhere.
If you assign the same name to multiple elements, they’ll all receive the same value later. However, if you rename a field after the template is already in use somewhere, the connection breaks and the previously set dynamic content won’t show up anymore.
Block: Template
The Template block allows you to embed the contents of any previously created Dynamic Template into any page or post. This makes it easy to reuse structured content while retaining the ability to customize individual pieces through dynamic fields.
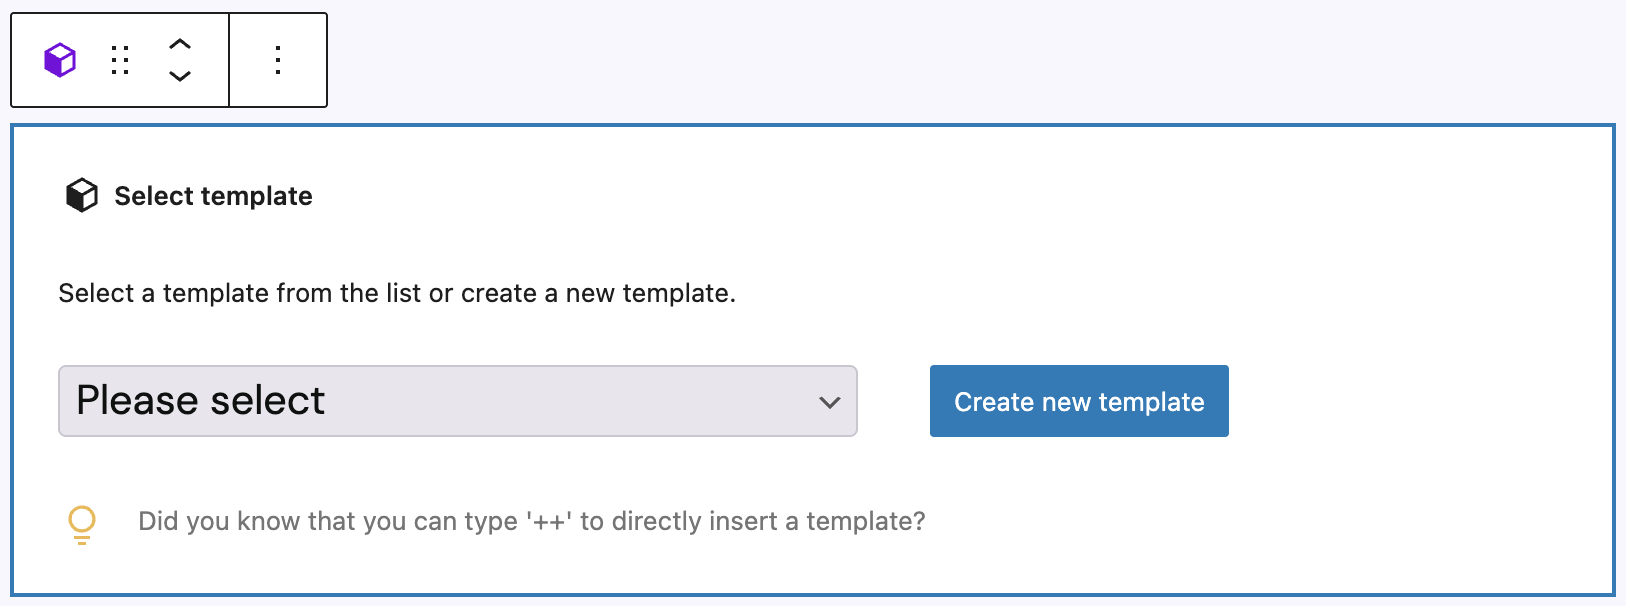
Once the Dynamic Templates feature is activated, you’ll find a custom block called Template in the block inserter under the “Greyd” category. To indicate it’s dynamic features, it has a purple block icon, it shares the color with the default Core blocks like template parts. You can insert it by clicking the + icon, by typing /template into a paragraph block, or by using the shortcut ++ followed by the title of an existing template. After insertion, a placeholder appears prompting you to select a Dynamic Template. This can also be done in the sidebar.
Once a Dynamic Template is selected, the block renders its contents directly in the editor preview. These are virtual blocks: they behave like real blocks, show up in the block list view, and can be selected — however, they are not stored in the post content. Instead, the Template block only saves a reference to the selected Dynamic Template and any overridden dynamic values.
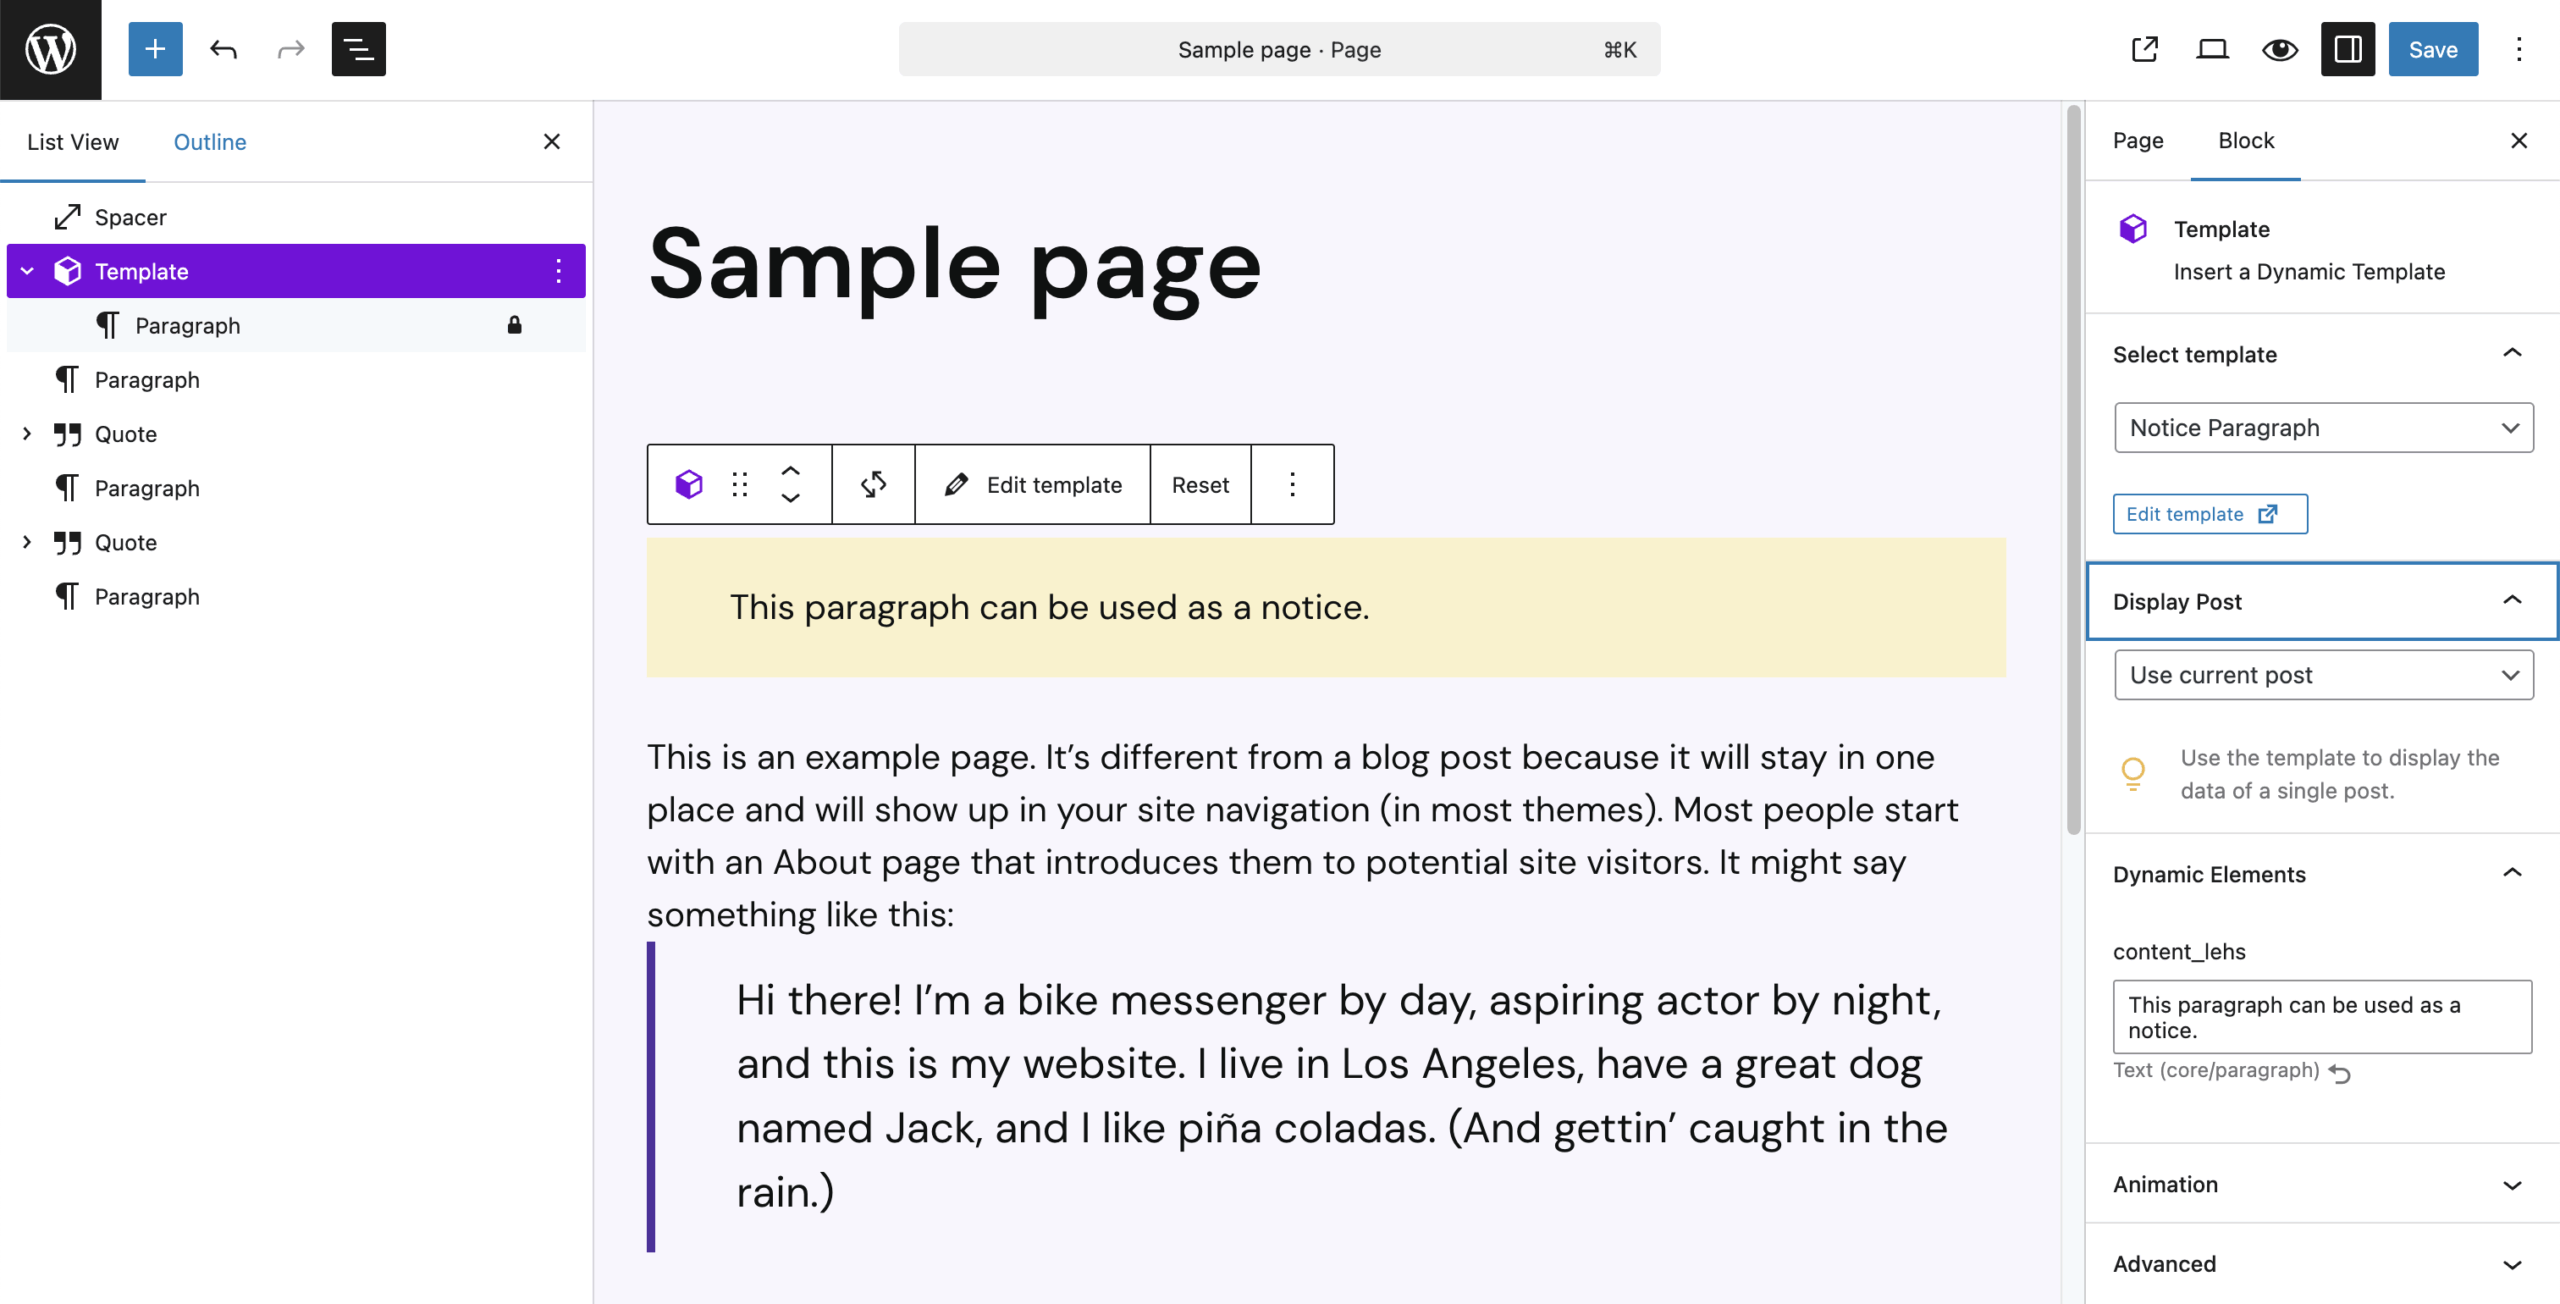
Elements marked as dynamic during template creation or editing are editable here. Most non-dynamic blocks can’t be modified — instead, selecting them will activate the Template block wrapper. Dynamic blocks, however, can be clicked to open rich text inputs directly in the preview. Sidebar inputs are disabled to avoid accidental edits; they’re blocked with an overlay message. RichText editing also supports contextual Dynamic Tags, which allow you to insert values like post titles or metadata, especially useful in query loops or template-based contexts.
The block toolbar provides quick actions: the “Reload” icon refreshes the template preview (useful if changes were made in another tab), “Edit template” opens the editing screen in a new tab, and “Reset” clears all overridden dynamic values, reverting to default.
Block Settings
In the block sidebar, the Select Template section lets you choose or change the current dynamic template. If a change is made, the editor tries to keep dynamic values matched by field name and type. If multilingual support is active, a translation hint appears if a fitting translation exists.
The Display Post option allows you to render the dynamic template using the context of any post. By default, it uses the current post context. When switched, it updates all dynamic values according to the selected post. This is essential for previewing how a template behaves with different content.
In the Dynamic Elements panel, you’ll find a list of all editable fields defined in the template. Each is labeled with its field name, input type, and the associated block type. A reset icon is available to revert any changes to the default state. If two elements have the same name, they are automatically filled with the same content and will not be listed individually as dynamic fields. This has the great advantage that you can easily copy template elements for mobile optimization without the editor having to fill them several times later.
The Template block also supports Animations and has an Advanced panel that offers the default HTML anchor setting, additional CSS classes, hide block per breakpoint and inline styling. In addition to these, there’s also a toggle to use the template slug instead of the ID as reference, which is useful for better portability.
Context of Dynamic Templates
Dynamic Templates always operate within a specific context that defines where their dynamic values are pulled from. By default, this context is the post or page in which the Template block is used. Dynamic Tags inside the template will then reference values from this post, such as the title, date, author, or custom fields (see also the Post Types documentation).
However, you can override the context to render different content with the same template — even multiple times on the same page. One way is by using the Display Post setting in the template block’s sidebar. This lets you select a specific post from which dynamic values will be pulled, regardless of where the block is placed.
Another method is to place the Template block inside a Query Loop. If used inside a “Post Template” or “Post Slider,” the template will dynamically adjust its context based on the current post in the loop. As the Query Loop cycles through posts, the template is filled with the corresponding values for each one.
When used inside WP Templates or Template Parts in the Site Editor — such as Home, Single, Archive, or 404 templates — the Template block automatically inherits the context of the active WP Template. In this case, dynamic content is determined by the template’s assigned post type or query output.
If you’re using the classic Greyd.Suite Theme, where the Site Editor is not available, context is handled differently. Here, so-called “System Templates” define their context via naming conventions and template type. This allows dynamic rendering even without the full block-based editing experience.
For an in-depth explanation of how dynamic values are tied to context and how to fine-tune them, refer to the Dynamic Tags documentation.
Additional Editor Tools
To streamline working with Dynamic Templates, several additional tools are integrated directly into the editor interface.
Create Dynamic Template
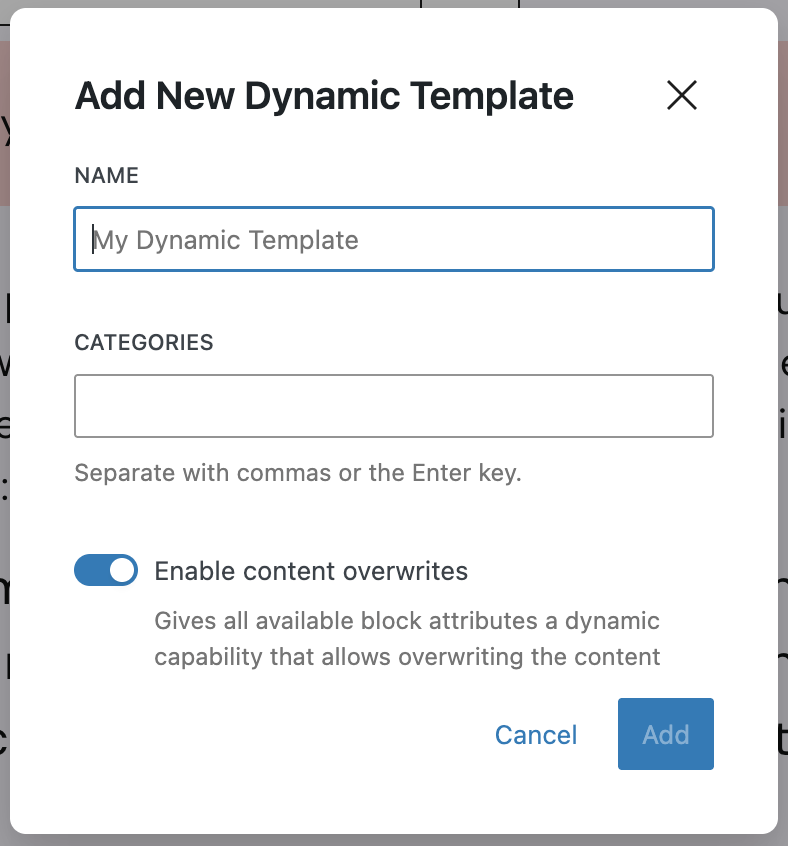
One key feature is “Create Dynamic Template”, which lets you convert any selected block — or group of blocks — into a new Dynamic Template. You’ll find this option in the context menu (the three dots) of the block toolbar.

Selecting it opens a modal where you can define a name and optionally assign categories. You can also choose to “Enable content overwrites”, which activates dynamic fields for all compatible block attributes (see also: Dynamic Elements). Once added, the selected blocks are replaced by a “Template” block that is already linked to the newly created Template.
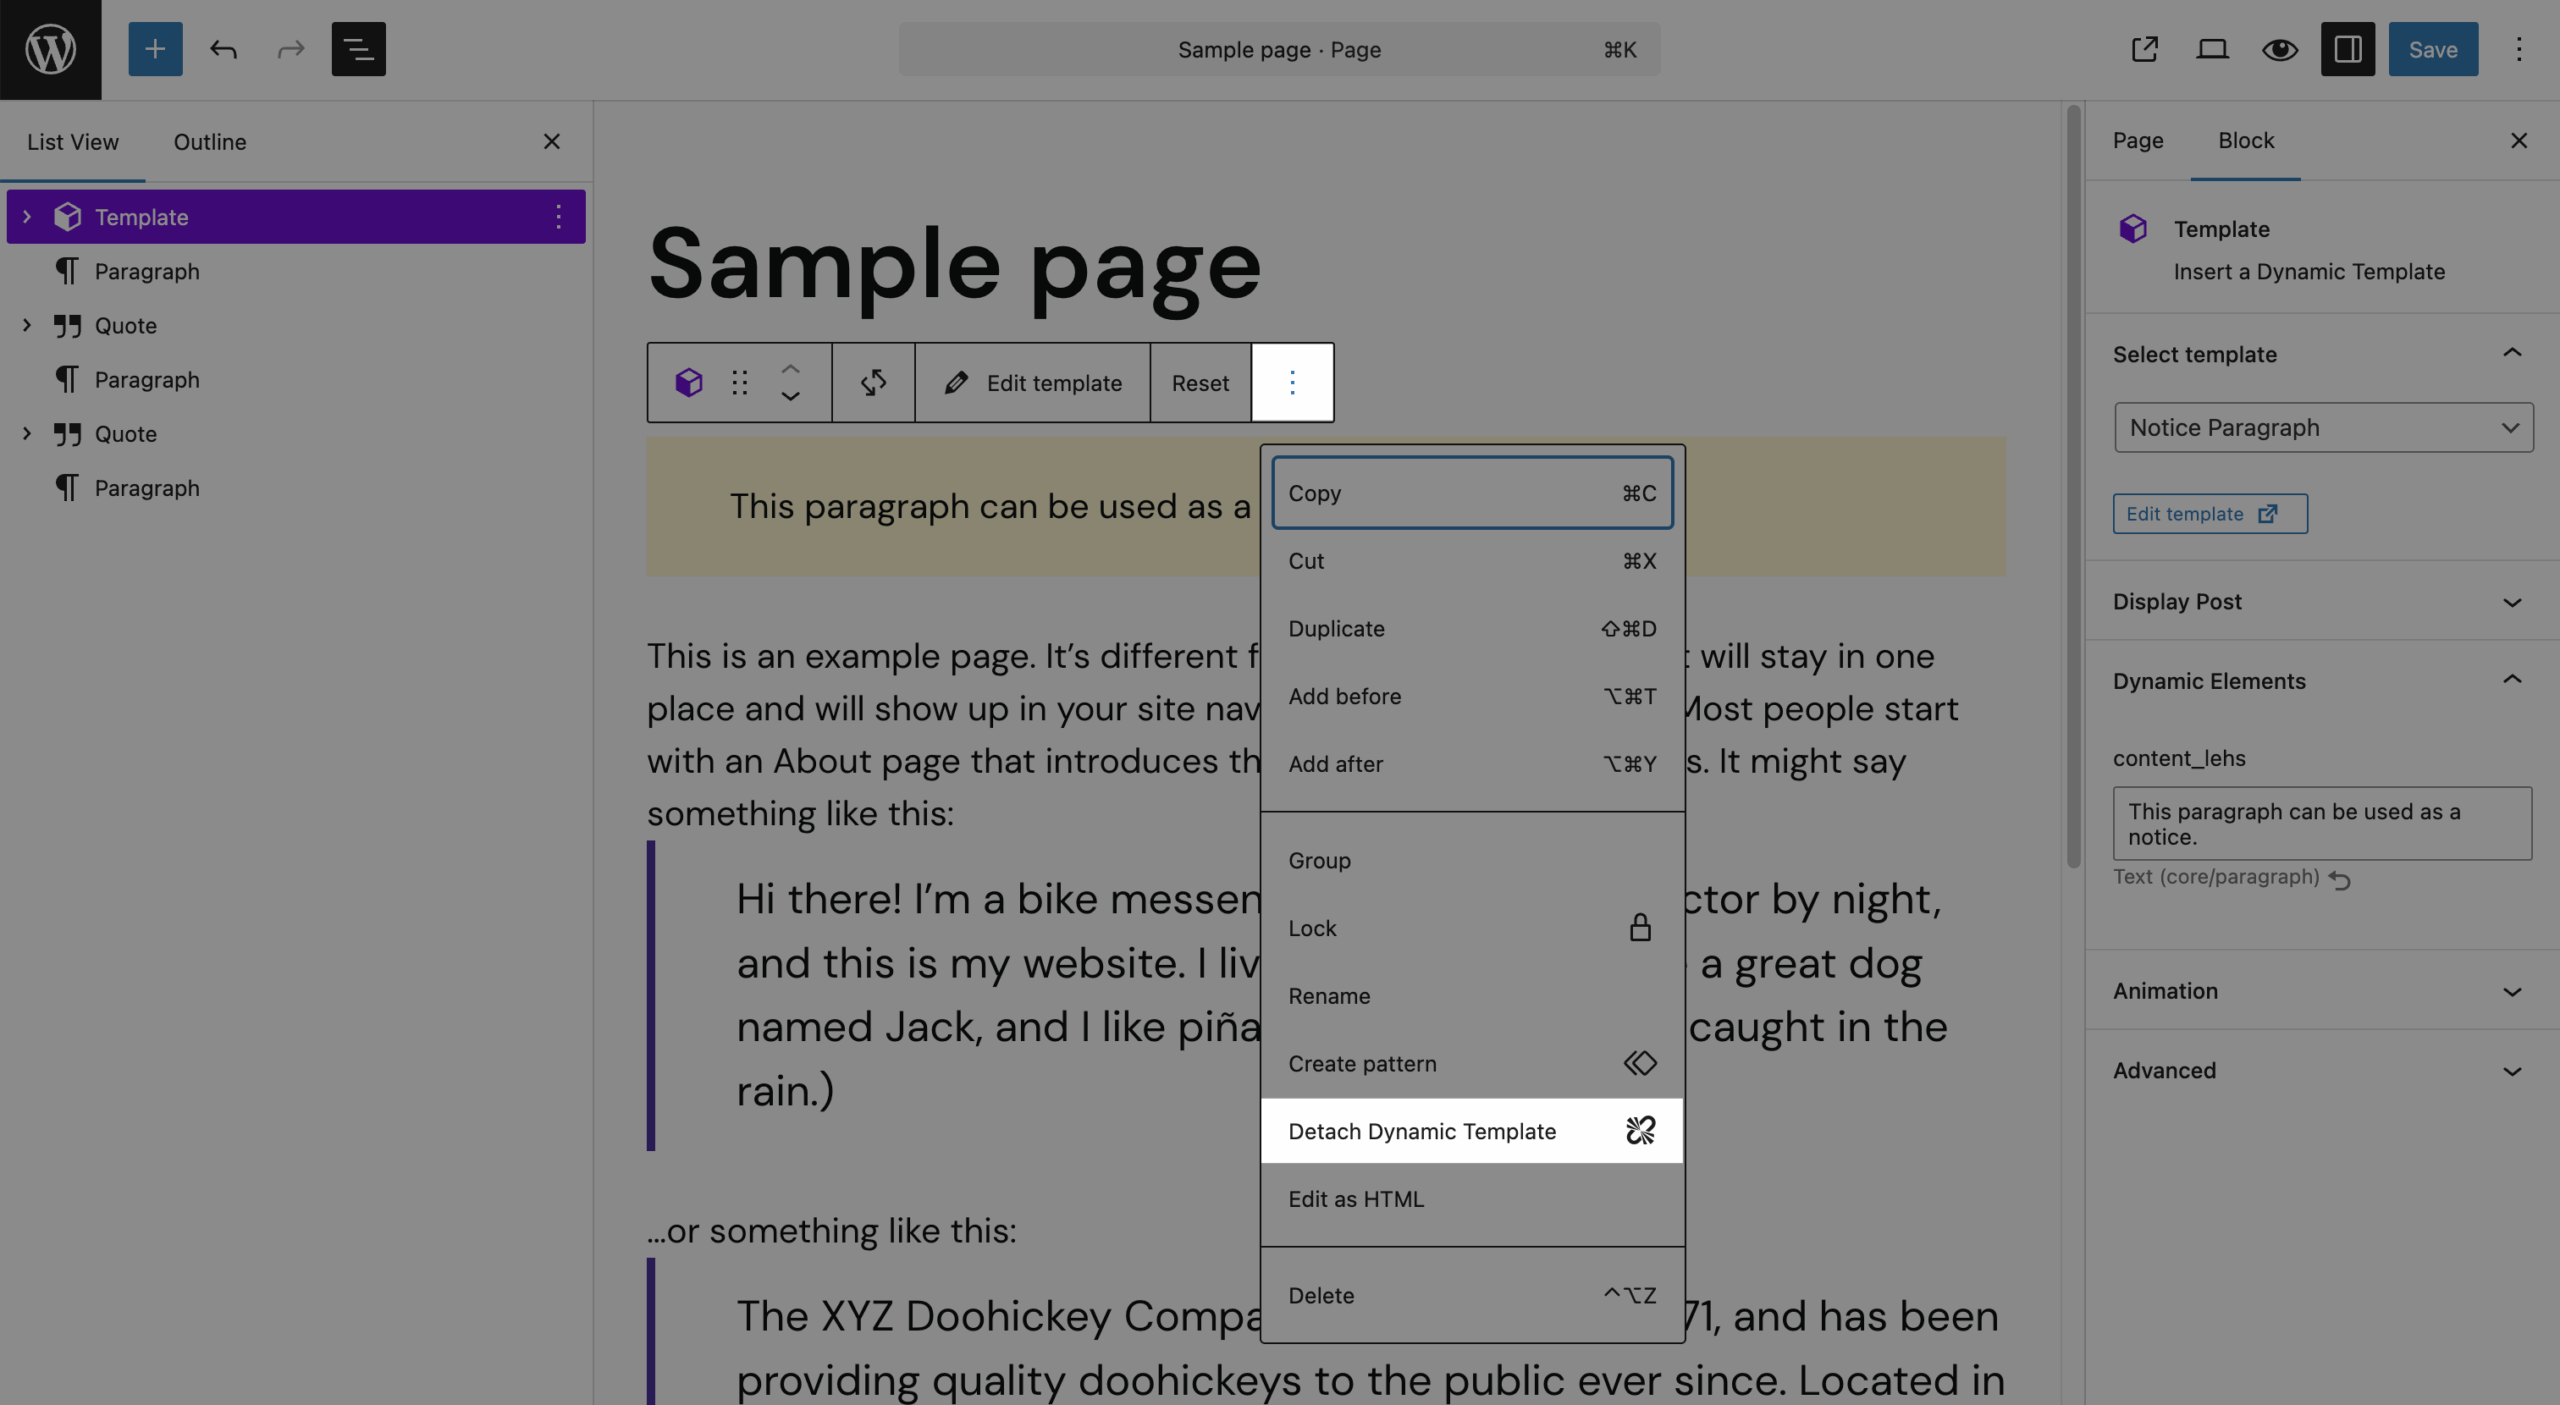
Detach Dynamic Template
The “Detach Dynamic Template” tool lets you reverse this process. It’s available in the context menu of any “Template” block. Selecting this option will convert the block back into regular blocks within your post or page. All existing dynamic values will be applied to the detached blocks, while the remaining dynamic bindings are removed.
When working with Templates and pages in parallel — e.g., in separate tabs — updates are synced automatically. Dynamic Templates use WordPress’ heartbeat system to detect external changes. This ensures that when editing a page, you can simply hit “Reload Template” in the toolbar to see changes made elsewhere — without needing to refresh the entire editor. Additionally, dropdowns that list available Templates update in real time whenever new Templates are created.
Dynamic Tags
Dynamic Templates also introduce Dynamic Tags across the entire Post and Site Editor. These allow you to pull contextual data from your post, query, or global site settings. While tightly integrated with Templates, these tags can also be used independently. Full details are covered in the Dynamic Tags documentation.
Use template slug
Finally, under “Advanced” in the Template block sidebar, there’s a toggle labeled “Use template slug”. By default, a Template is referenced by its database ID. With this option enabled, the block instead references the Template by its slug (the URL-friendly name). This change is invisible to visitors, but can simplify template handling when using Global Content. If you need stricter control, you can globally enforce this behavior using the greyd_dynamic_block_use_reference filter, which supports four modes:
/**
 * Example: Force all templates to use slug reference.
 */
add_filter( 'greyd_dynamic_block_use_reference', function() {
    return 'forceSlug';
} );
Possible values for the filter:
"ID"(default): uses ID, toggle is available."slug": uses slug, toggle is available."forceID": enforces ID, toggle is hidden and existing blocks are converted."forceSlug": enforces slug, toggle is hidden and existing blocks are converted.
Video
Hi this is Sandra from Greyd and today I’d like to introduce you to our Dynamic Templates. Unlike regular WordPress templates, Dynamic Templates are — as the name already indicates — dynamic. That means you can use them at different places of your website and even across different websites with different content while you still have only one place to maintain the design and layout.
You’ll find Dynamic Templates in the Greyd.Suite dashboard when you’ve activated the feature or also here in the menu on the left. In the overview you can see all your Dynamic Templates including information on whether you’ve added them to any category and how often they are used on this website. To create a new template, click here. In the editor you can then work with any block you like. My tip: the Greyd editor Helper lets you customize the template preview in size and background color which is very helpful. Many blocks now offer you the possibility to make their content dynamic, for example the heading block.
You can now either directly enter a text here which will then be static and cannot be changed when the template is used or you can make the heading dynamic, so you can enter the text later on your page and use the template with different headings at different places. The field will automatically get a unique name that you can edit. In most cases that makes sense as the field name is also a help for the editor to know which kind of content to enter. Please make sure to work with unique names for each field as otherwise all fields with identical names will automatically sync their content. You can then do the same with the H-tag. That way you can use the template at one place on the top of a page with an H1 or H2 and further down with an H4.
Even if you make fields dynamic, you can still enter content in the editor. This will then be used as a placeholder and an additional guidance for the content editor. As long as the placeholders are not overwritten, they will also be visible in the frontend. Important tip: If you do not enter a placeholder, the field will become optional. If the editor then does not enter any content, the heading will not be visible in the frontend. Other than that, you can style your headline as usual.
A big advantage of Dynamic Templates is that you can change the design of the template later completely individually from your content. According to the same principle you can also make links dynamic, for example in content boxes or buttons. Here you can make both the button text and the trigger dynamic. That way you can use the button at one place for example to open a popup and at another place to open a link. If you add neither a placeholder nor an icon nor a trigger, the button will become optional, so it will only be shown in the frontend when the editor enters something when filling the template on a page. That way you can for example also add lists to your templates and add as many list elements as you like without placeholders, and when using the template on a page only as many list elements will be visible as the editor enters.
So now let’s have a look at how to use a Dynamic Template on a page. I have prepared a template example that I want to use several times on my page, each time with different content. This template has dynamic headings, dynamic buttons and also an optional button without a placeholder or trigger. The space here I’ve kept static, so the editor is not able to change that.
I now open the page in which I’d like to use the template, place the template block and select my Dynamic Template. I can either enter the content directly in the editor or also use the fields here on the right. Only those fields are available to edit that are dynamic. For example the space here, which we’ve kept static, is not changeable. I will now enter some example content. Here we will keep the placeholder and just change the link. I won’t fill the optional button as I don’t want to display it in the frontend.
With Dynamic Templates an editor will never have to worry again about layout options or topics such as responsive design. He or she doesn’t even need to have WordPress skills, as they only have to fill the prepared fields. Now let’s check our template in the frontend. Here you can see these are our example text and only one button is visible, the optional button is invisible. Up here I’ve used exactly the same template, but with different content and with the optional button. If I now like to change something, for example change the button design, I can do that without any impact on the content. Let’s check the frontend: everywhere where the template is used, the button design has changed without any impact on the content.
A very interesting thing here is also the responsive design. If for example you have different layouts or different backgrounds on different screen sizes, just copy the respective area including all your dynamic field names, re-layout your blocks or use the responsive column settings. When copied elements all have the same name, the editor will only have to fill them once as the template automatically recognizes that the other elements are copies and syncs the content. That way you can even swap templates without destroying content that has already been entered. If elements in your old and new template have the same name, your content will remain untouched.
And last but not least let me show you some very handy Dynamic Templates features that you will find right in the editor. For example, let’s assume you’ve created this beautiful section here and want to use it as a Dynamic Template. You can do so right from the editor by selecting the blocks you want to use in your template and then simply clicking “create Dynamic Template”. You can add a name, you could even add a category here, and then you define whether you want to have all the fields in your template dynamic or static. So all the headlines, texts, images, etc. I am going to make everything dynamic now and publish that. I now have a new Dynamic Template that of course is also available here in the overview. As you can see, all the fields have automatically been made dynamic.
Also, we have some more handy features here in the toolbar. For example, if you’ve made changes to your template in the meantime, for example in a different tab or with Global Content, you can always reload your template here. If you’ve made changes in your dynamic fields, you can always reset them all together with just a single click. And in case you decide that you don’t want to use this section as a template but want to have it as a static section, you can also detach the template again.
For more videos and information please visit our Helpcenter.