The Staging feature in the Greyd Hub allows you to pair any two websites within your WordPress multisite installation into a staging relationship. This setup enables you to make and test changes safely on a private staging site before deploying them all at once to the connected live site. The interface gives you full control over the staging process, including the ability to push updates to the live site, pull data from it, or reset the staging environment entirely.
This feature is only available with the Scale subscription. Once the license is activated, it’s fully integrated into the Greyd Hub and enhances the interface in several ways:
- A new Staging Assistant becomes available as a title action in the Websites tab.
- Each website tile gains a new Staging section within the Actions subtab.
- Tiles for websites that are part of a staging pair are visually merged into a single combined tile, indicating their relationship.
- An additional Staging tab is added to the main Greyd Hub navigation, offering a centralized view of all staging relationships in the network.
Staging Assistant
The Staging Assistant allows you to create a staging pair between any two websites in your network.
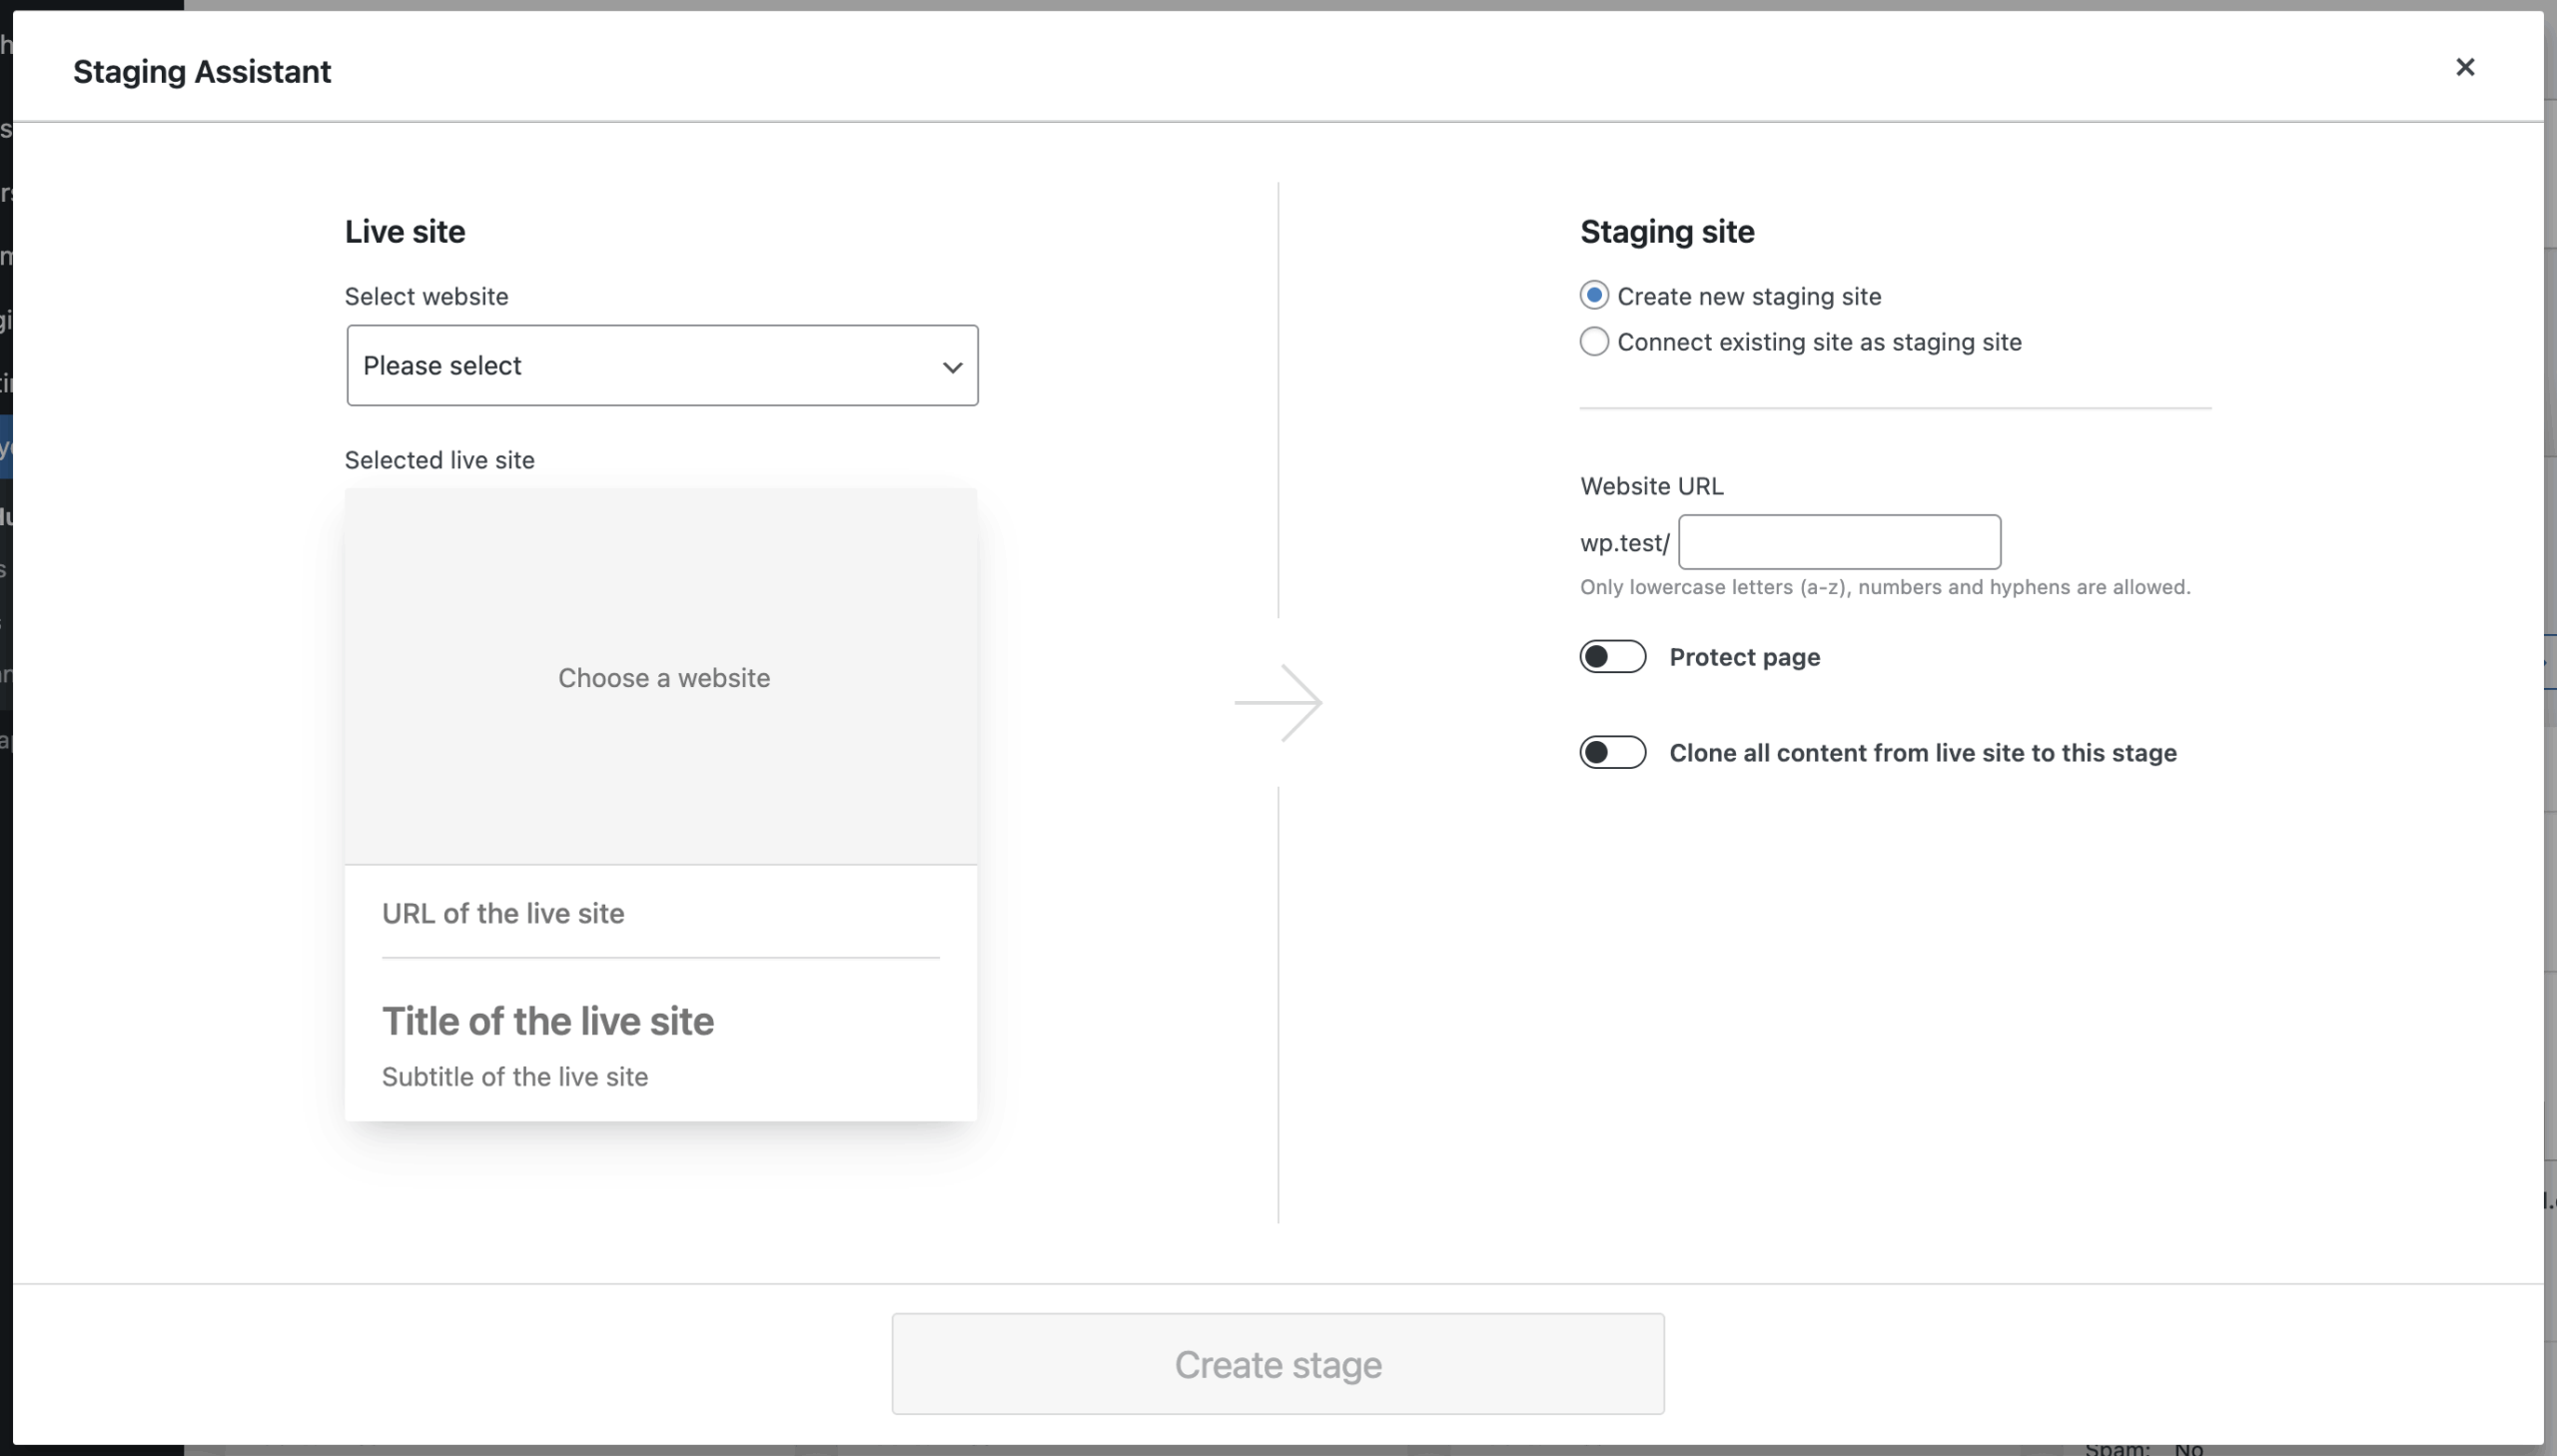
To create a staging pair, open the Staging Assistant and follow the steps in the modal. First, select a Live site. This is the public version of the website where content can be pushed to from the staging environment. You can select any site from your network, including connected remote sites.
Next, select a Staging site. You can either create a new one or connect an existing site.
When creating a new staging site, enter a new Website URL. You can also change the protection level if needed, by clicking on the Protect page toggle and choose from the following options: “Users only”, “Admins only”, or “Password”. These settings match the protection attributes in the Website tiles.
You can decide whether to clone all content from the live site. If you choose not to, the staging site will be created empty — useful if you want to start from scratch. If you choose to clone, the live site content becomes the baseline for changes.
If you connect an existing site as the staging site, select it from your network. The protection and clone settings are the same as with new sites. Note that if you choose to clone, existing content on the staging site will be completely overwritten. To prevent data loss, you can create a backup of the site during this process.
Using two websites from the same network ensures identical plugin and WordPress versions. To test different versions, select a site from another network.
Click Create stage to finalize the process. Once complete, the selected websites are permanently linked as a staging pair. Depending on your settings, actions such as website creation, cloning, or backup will be triggered automatically.
The Live site remains untouched at all times and is considered the source of truth. The staging site, however, may be overwritten — so be sure to use the backup option to safeguard your data.
Combined Tiles
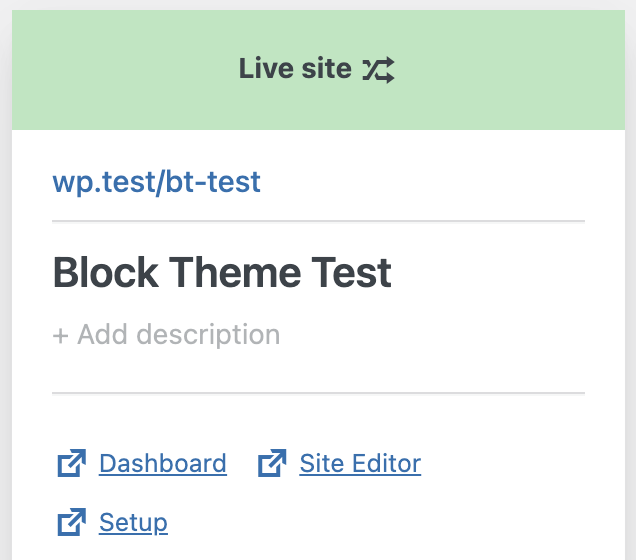
After successfully pairing two websites as a staging pair, their individual Website Tiles in the Greyd Hub are merged into one combined tile. This helps keep the overview clean and avoids duplicate listings for technically related sites.
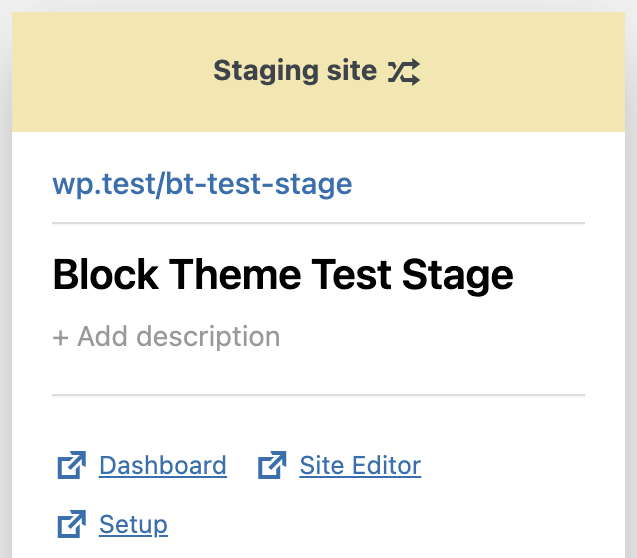
The combined tile includes an additional tile header that indicates whether the current view shows the Staging site (highlighted in yellow) or the Live site (highlighted in green). You can toggle between the two views at any time by clicking on the header. This lets you inspect and manage both sites from a single interface.
Inside the Staging section of the Actions subtab, you’ll find technical details about the linked staging sibling. This includes its URL, the network it belongs to, and its Blog ID. These references help ensure that you’re always aware of which instance you are currently working with.
In the frontend, both the staging and live sites display a colored indicator in the admin bar, if the license key has been added to both sites. This serves as a clear visual hint whether you are viewing the Staging site (yellow) or the Live site (green), reducing the risk of editing the wrong environment by accident.
Staging Tab
The Staging tab in the Greyd Hub gives you a dedicated overview and control panel for all websites that are part of a staging pairs. This interface lets you push, pull, or reset changes between the two environments and provides transparency over modifications.
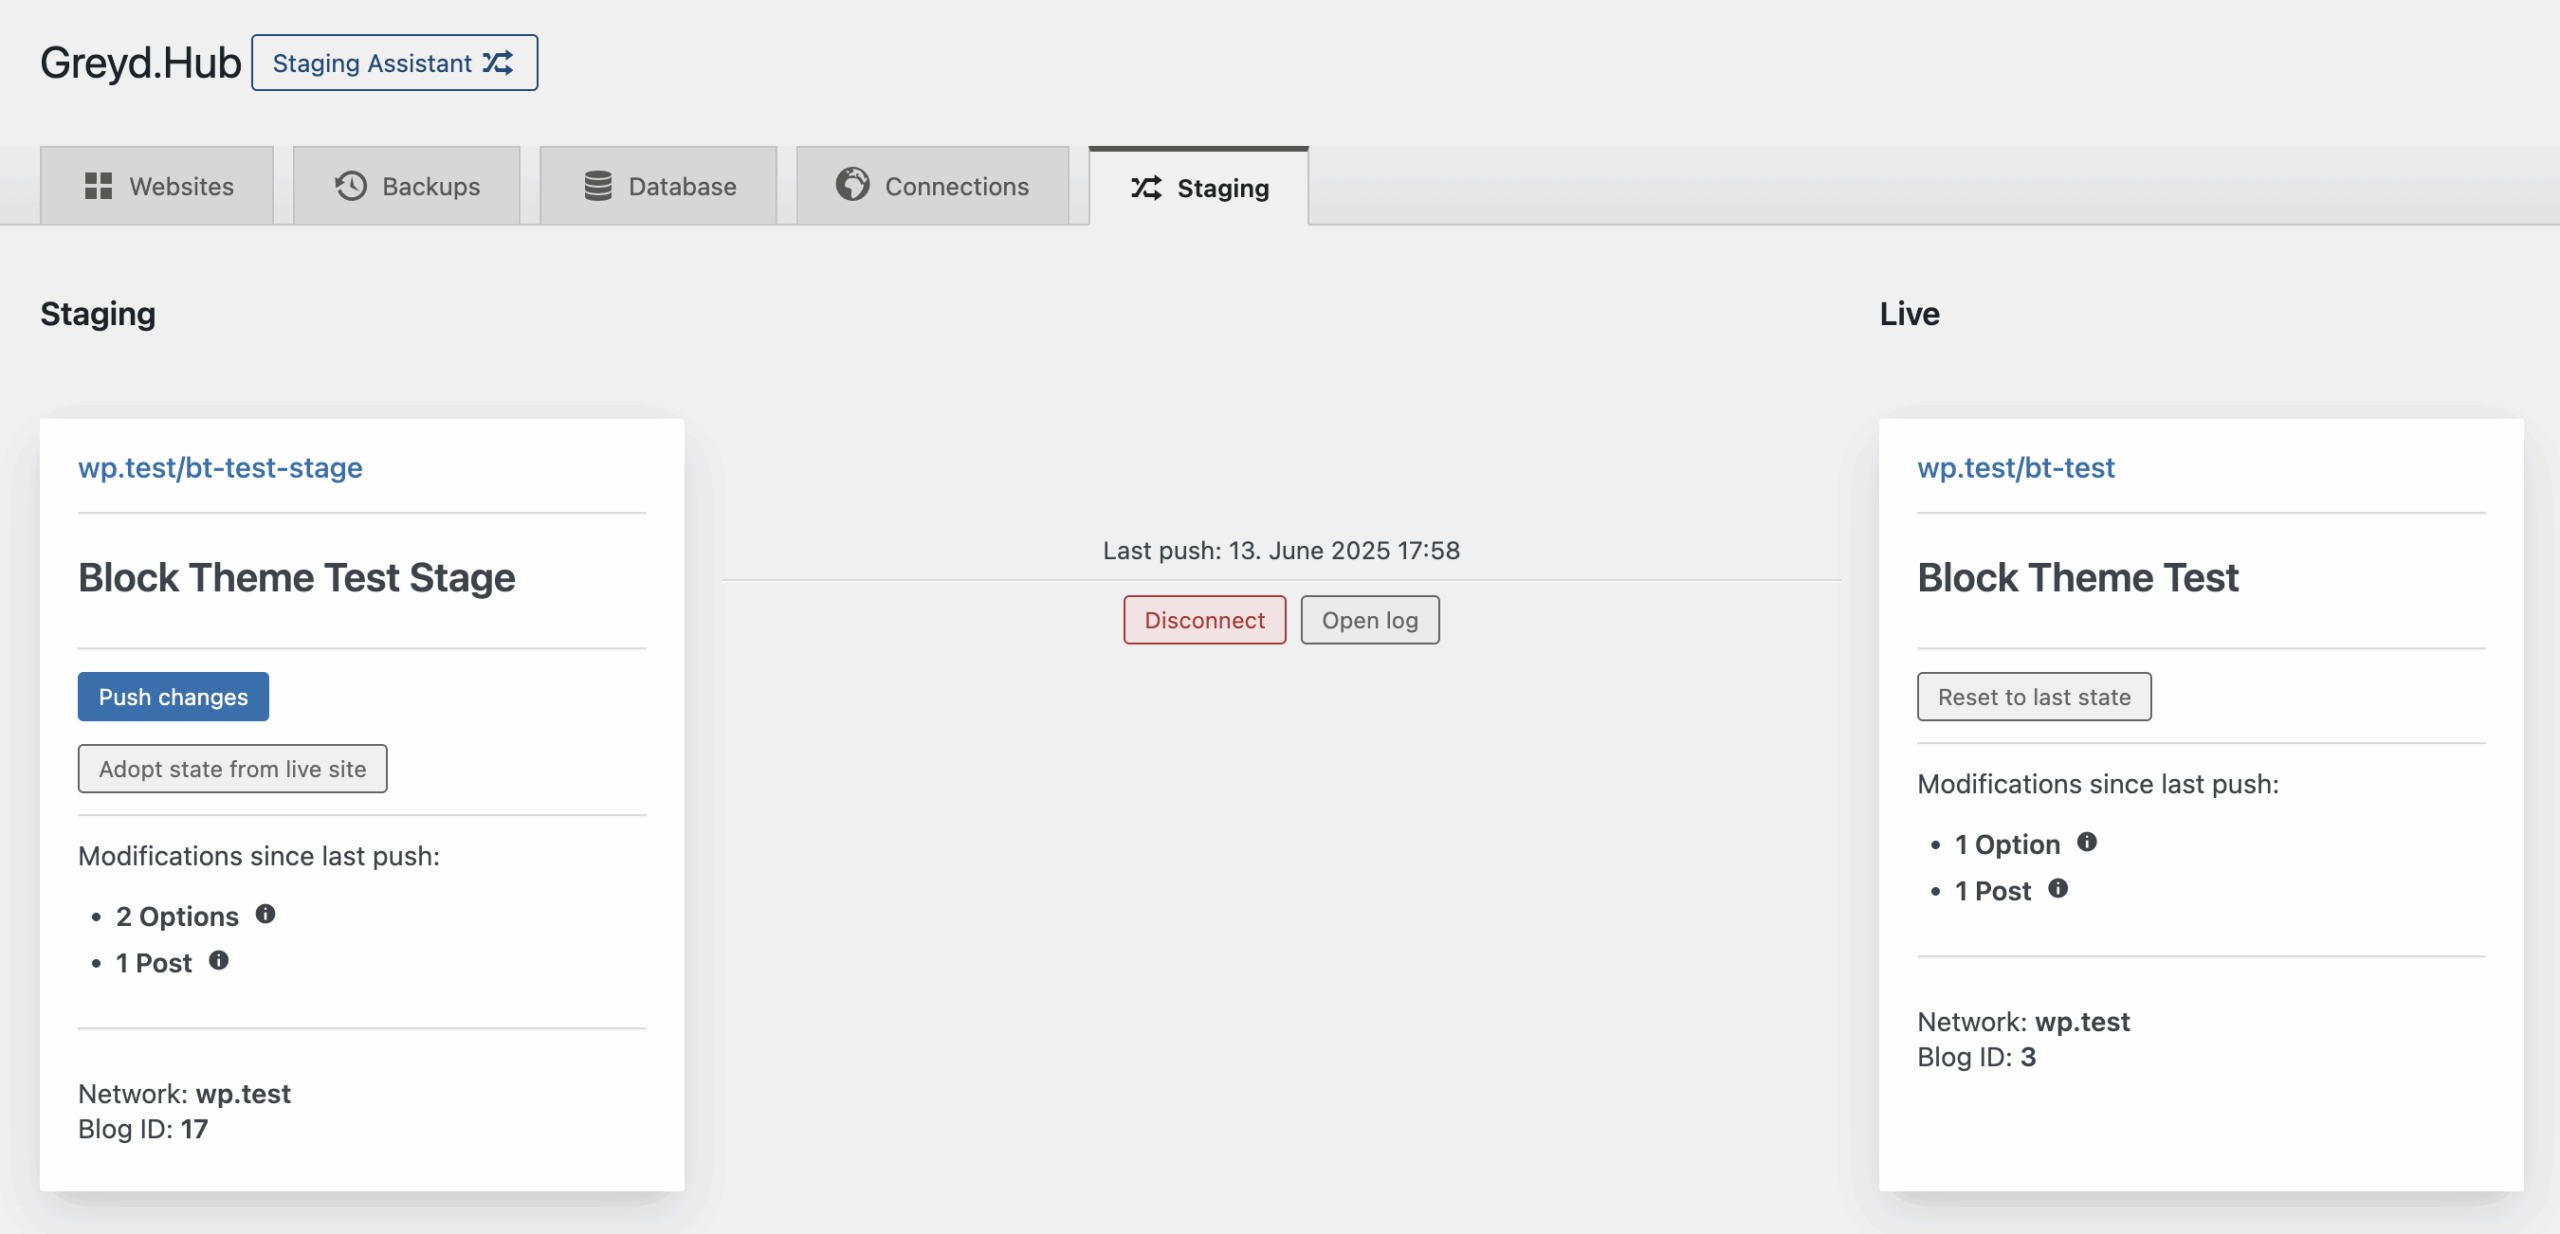
On the left side of the page, you’ll find a simplified tile representing the Staging site. It shows the website’s URL, name, and description. Below that, you’ll see action buttons and information panels.
The Push changes button opens a modal with the question “What should be pushed?”.
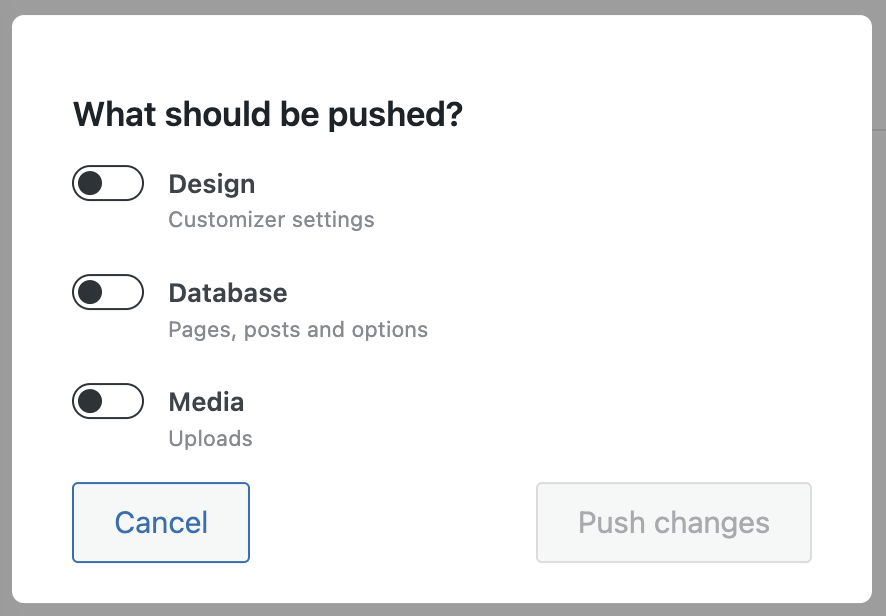
You can choose between pushing Design, Database, and/or Media. These correspond to the actions in the main website tiles of the Greyd Hub:
- Design includes Global Styles (Greyd Theme)
- Database includes content like posts, pages, and options
- Media includes any files that have been added to the media library
Note: there is no fine-grained control — pushing a section will push all of its changes at once. Once you’ve selected what to push, click Push changes to trigger the process.
The Adopt state from live site button pulls all content from the Live site into the Staging site. This is useful to reset the stage when experiments go wrong.
Below that, the panel Modifications since last push lists the number of modified Options and Posts. You can click the information icon for either category to open a modal that details what has changed. The modal shows:
- Options: the name of the changed option, time of change, and whether it was also changed on the Live site.
- Posts: more detailed info including title, post type, URL, ID, and edit link.
Important: this feature only tracks that something changed, not what changed or how. There’s no diff view or rollback per change.
On the right side, the tile for the Live site mirrors the same basic structure: URL, title, and description. The main difference here is the Reset to last state button. This reverts the Live site back to the state it had before the last push, using an automatic backup taken at that point. Handy if a deployment didn’t go as planned.
This tile also shows the number of modified Options and Posts since the last push, and again, clicking information icon gives access to the same detailed modal.
Between both tiles, you’ll see the timestamp of the last push. From here you can also:
- Open log, which shows a complete list of actions (push, pull, reset) with timestamps since the pair was created. The log doesn’t show actual content differences, just the action history.
- Disconnect the staging pair. This removes the staging relationship but leaves the websites intact.
Video
Hi, this is Sandra from GREYD and in this video I’m going to show you how easy it is to create staging versions of your website in GREYD.Hub. With that you can easily test new plugins or new designs, new settings, without having to fear that you accidentally crash your website. It’s super easy.
We’re already here in GREYD.Hub. To create a staging version of for example this website, I can either click here in the staging assistant or just click here on “create staging version”. So this is the live website we’re talking about. Now I have two possibilities. I can either create a new site for the staging version or I can use an existing one and select from my websites in GREYD.Hub.
The options are both the same. I can, if I want to, protect the page, so it’s only accessible to users or admins or also only with password. I can then define whether I want to clone the entire content from the live website right away, which is usually what you want to do, except when you already have a copy of your live website for example and don’t want to overwrite it right now. And in case you’re working with an existing site, you can create a backup of the old one if you like to. I’m going to create a new URL, I don’t need protection and I want to clone the content. And it’s just one click or two and then we have a staging version.
Here in GREYD.Hub I can now see these are the settings and options of the live website and I can just change that here to the staging site and switch between those two here. And I can also go here and open the tab “staging”, where I have an overview of all staging connections of my website.
One note before I’m going to change something on my staging version. If you want to test different plugin versions, please make sure that your staging site is not in the same multisite as your live website, as then you cannot test different plugin versions.
I’m now going to make some changes on my staging website. Let’s just change a headline for example. Let’s say “new headline” and publish. If I now refresh the staging version, I can see that here a modification has taken place. So at all times with the staging overview here, you can see exactly what has happened on which version of your website.
I can see that one post has been edited on the staging version, I can get some details here and I would also see if there had been any changes on the live website in the meantime. That way you make sure that you don’t accidentally overwrite new content or edited content on your live website when pushing changes from your staging version.
You now have different actions that you can do. You can always adopt the state from the live site to the staging site. You can also reset to the previous state on the live site. And what I’m now going to do, I’m going to push my changes, which was the change of the headline, to my live version. I can then say, I want to push everything that’s been changed or also just the design, just the database or the media. In my case I’ve only edited a post. I’m now going to push the changes.
That’s it. If we’re now going to visit the live website, we will see that there’s the new headline as well. So, it’s super easy to push changes from your staging version to your live website. And in the overview you can always see a full log of everything that’s been done. In our case that’s just the creation of the connection and pushing changes in terms of the database to the live website.
For more videos and information please visit our Helpcenter.