Theme Assets provide direct access to Full Site Editing related content elements that are otherwise hidden from the standard WordPress admin interface. These assets include templates, template parts, patterns, navigation menus, and global styles — all of which are stored as hidden post types in the database and typically managed through the Site Editor.
The Site Editor allows users to visually edit theme areas like the homepage template, single post layout, 404 page, or site-wide typography and color settings. However, these elements are not easily accessible through the WordPress backend. The Theme Assets feature introduced by the Greyd Plugin exposes these items in a centralized admin screen, giving users full visibility and control.
Asset Types
Once the Greyd Plugin is activated, a new submenu item called Theme Assets appears under Appearance. This screen lists all registered Full Site Editing elements, regardless of their active status or assigned theme. It includes the following asset types:
- Templates (post type:
wp_template) - Template Parts (post type:
wp_template_part) - Patterns (post type:
wp_block) - Navigation Menus (post type:
wp_navigation) - Global Styles (post type:
wp_global_styles)
Some assets may not be visible in the Site Editor if they are linked to a different theme, such as a child theme. Despite this, they still reside in the database. The Theme Assets screen ensures these elements remain accessible.
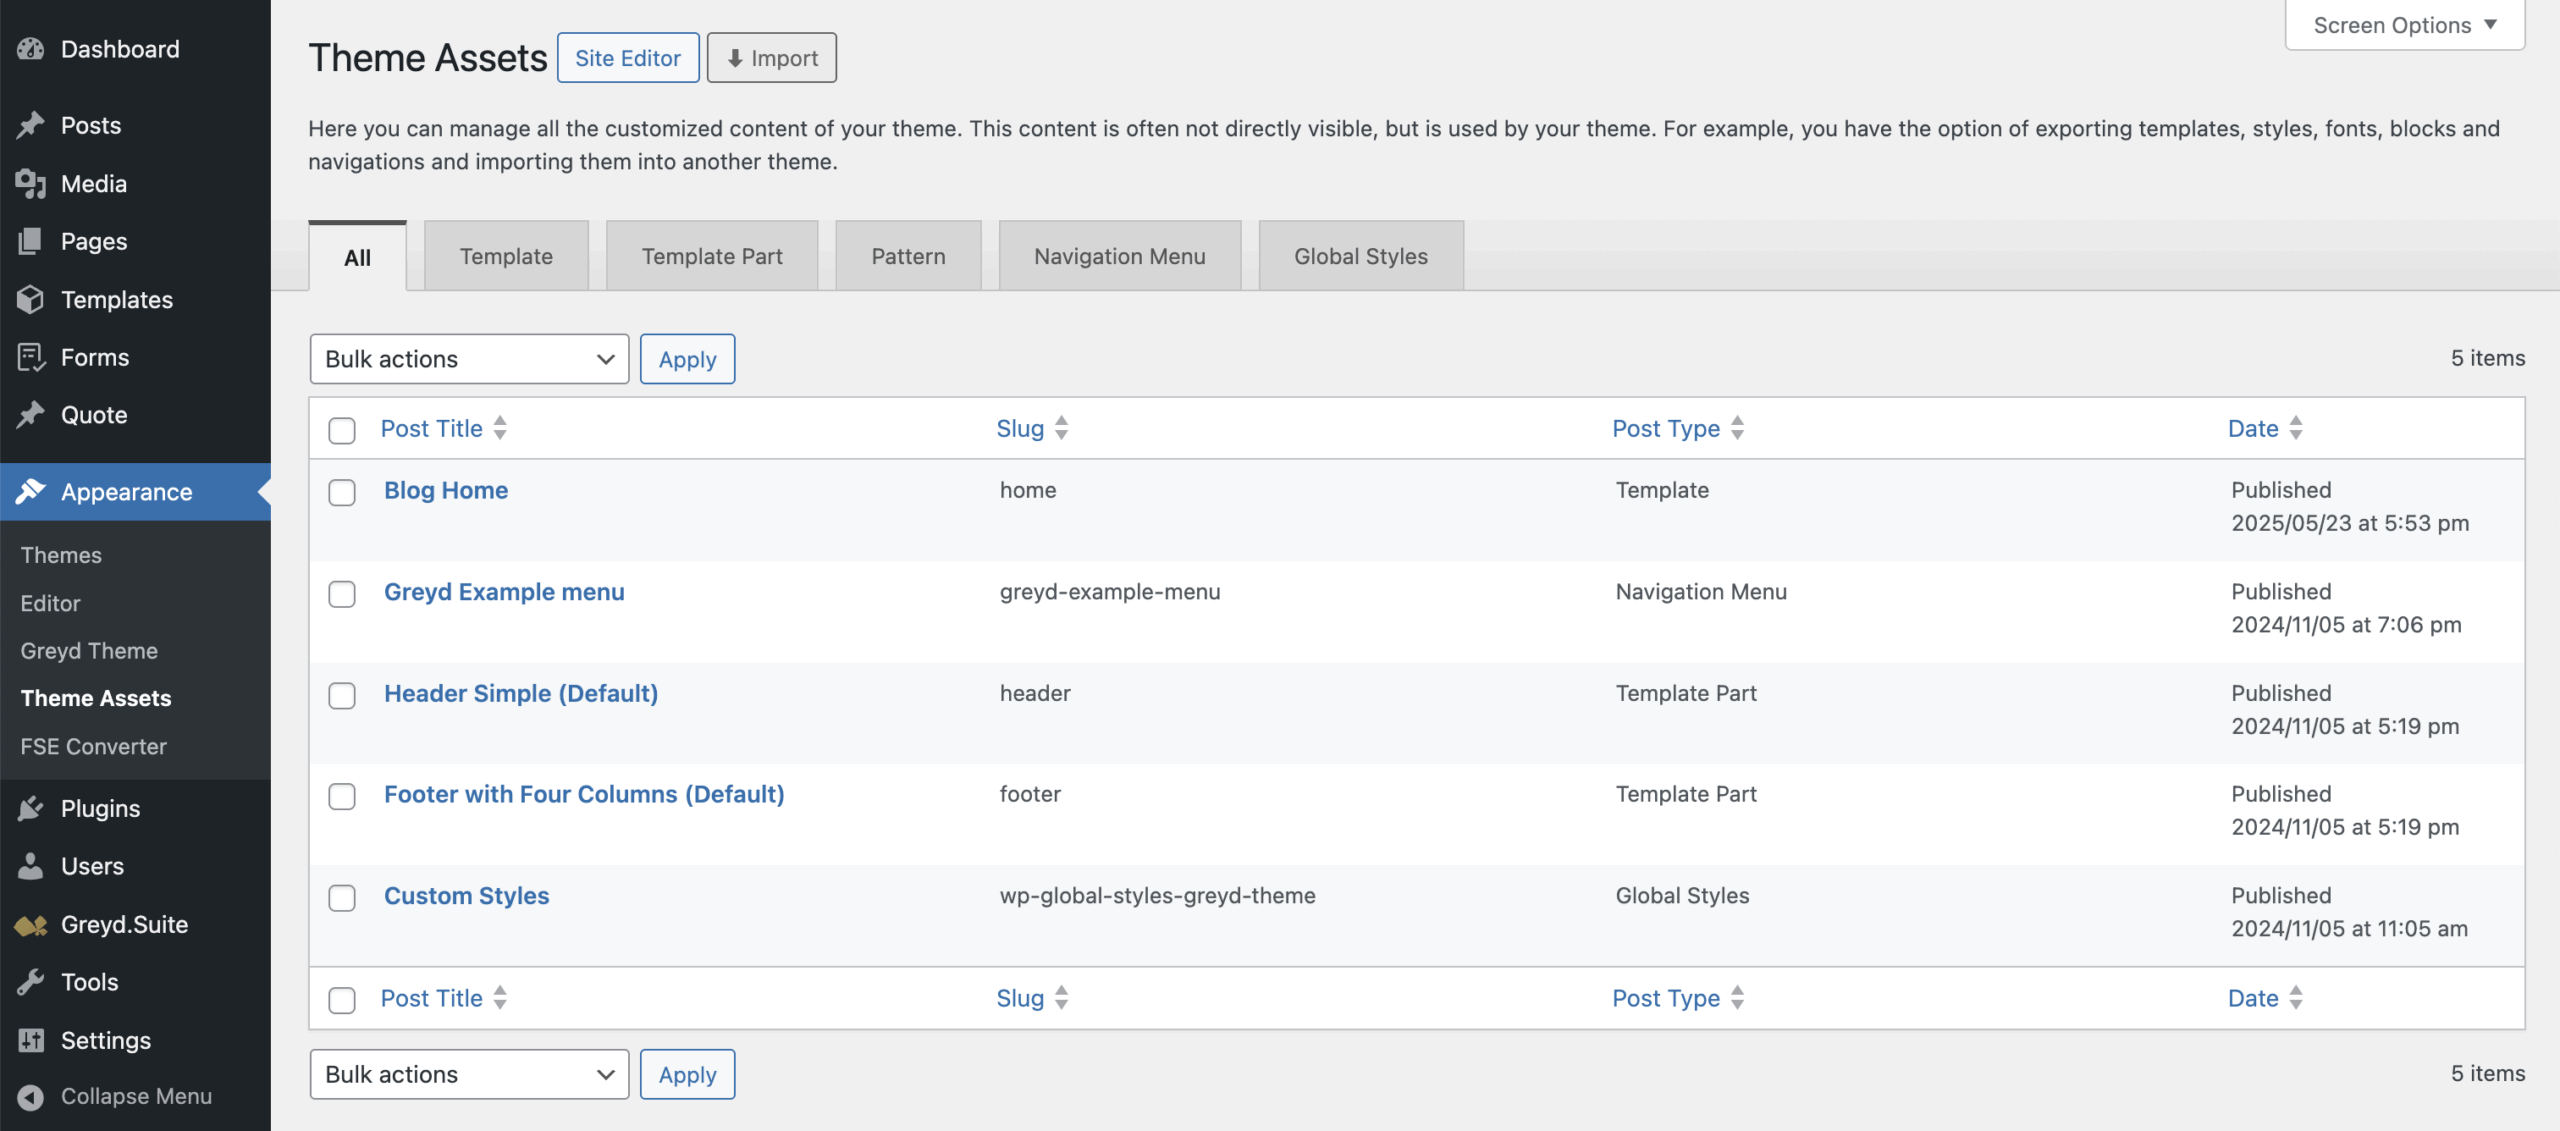
Upon visiting the Theme Assets screen, you’ll see a short explanation and a set of filter tabs at the top. These tabs allow filtering by asset type as listed above. Each asset appears in a list table with key details: Title, Slug, Post Type, Author, and Date. You can customize the visible columns and pagination settings using the screen options menu in the top-right corner.
Quick Link Options
Assets that are currently active are displayed as standard, clickable entries. Inactive items are greyed out and lack clickable links. An info icon explains why an asset is inactive – usually because it’s assigned to another theme. Hovering over the row reveals action buttons:
- Edit: Opens the asset directly in the Site Editor, even if it’s inactive, as long as it exists in the database.
- Trash: Directly moves the asset to the trash without a second confirmation. Trashed items are no longer editable or visible in the Theme Assets screen or Site Editor at the moment, but still available in the database.
- Export: Exports the asset as a post object. Further details on export behavior can be found in the linked article Post Import and Export.
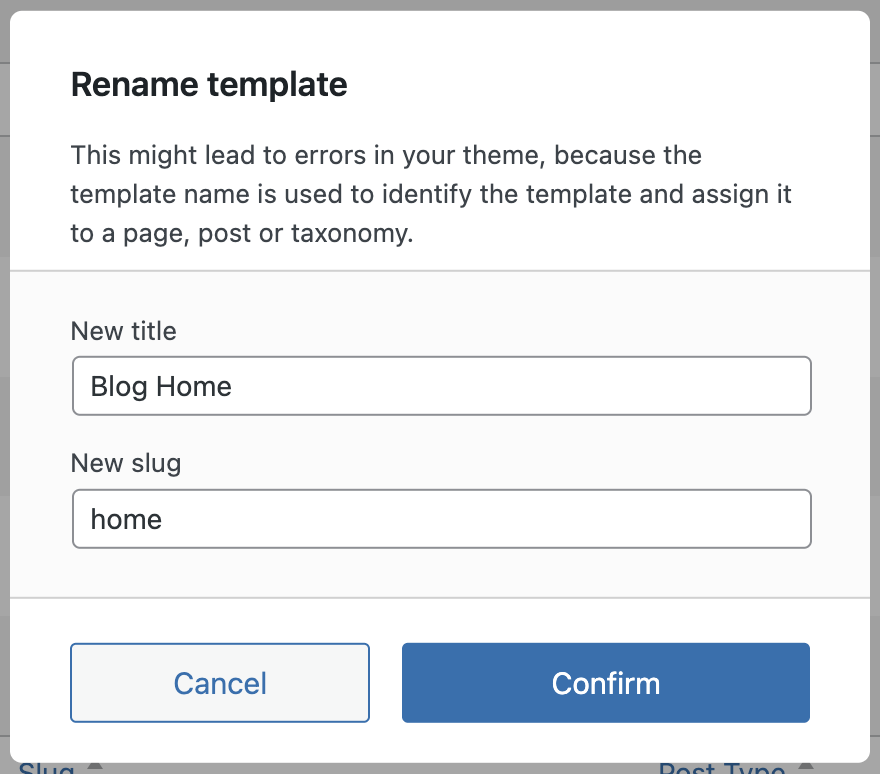
- Rename: Lets you change both the title and the slug of the asset. Be cautious when changing slugs, as they are often referenced in other templates and renaming them can break references.
- Assign to Current Theme: Only available if asset is assigned to a different theme. A dialog lets you reassign the asset to the current active theme. You can also choose whether to carry over linked elements like custom headers or footers by toggling a checkbox before confirming.

Renaming can be especially useful for navigation menus, which WordPress tends to name generically (e.g., “Navigation 1”, “Navigation 2”). You can rename these to better reflect their purpose, such as “Header Menu” or “Footer Menu”.
Bulk actions are supported as well. You can select multiple assets to assign them to the current theme, export them, or move them to the trash in one step.