
Dynamic Forms extend the standard way of embedding forms created with Greyd Forms into website content. While the regular Form block simply displays a selected form, Dynamic Forms combine form embedding with the dynamic capabilities known from the Dynamic Templates feature. This allows specific parts of a form to change depending on the context in which the form is displayed.
The functionality follows the same principles used by the Dynamic Templates and Dynamic Tags features. Instead of creating multiple versions of a form for different use cases, you can define certain form properties as dynamic and provide their values when the form is inserted into content.
Dynamic form variation
To display a form in website content, two different blocks are available: the Form block and the Dynamic form block. The Form block inserts a form without any dynamic processing and behaves exactly like previous versions of the feature. The Dynamic form block, a variation of the Template block, enables dynamic processing and allows all supported dynamic fields to be customized when the form is embedded.
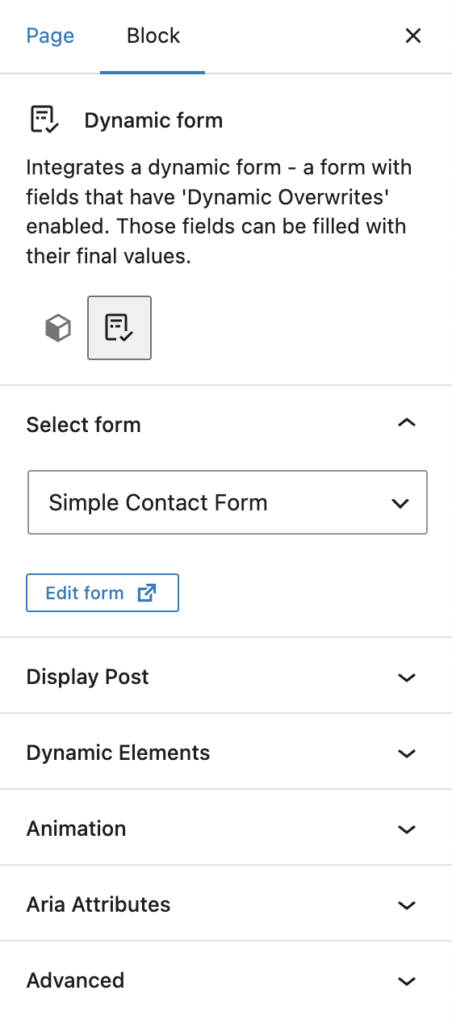
The process of selecting a form is identical for both blocks. After a form has been selected in the Dynamic form block, the block scans the form for fields that have dynamic overwrites enabled. For every distinct dynamic field name found, a corresponding control appears in the block sidebar, allowing you to define the value that should be used in the current context. If multiple attributes share the same dynamic field name, they are controlled together and filled with the same value.
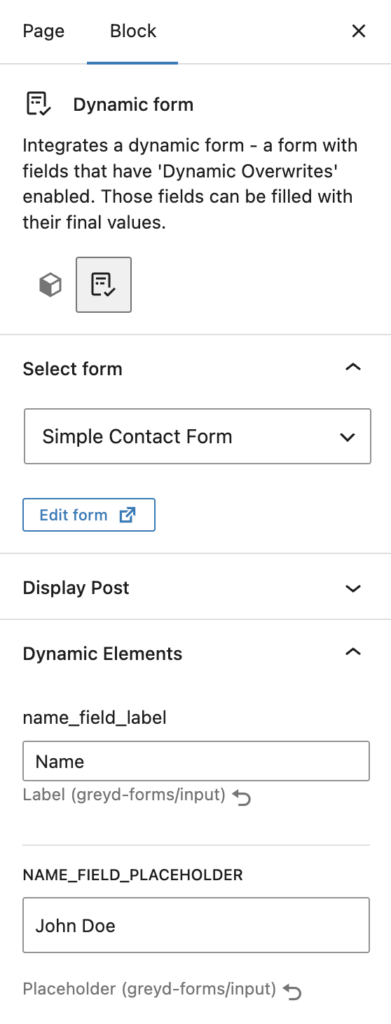
Dynamic values can also be edited directly inside the editor preview where supported. For example, dynamic labels based on RichText fields can be modified without opening the sidebar. In addition, all dynamic fields support Dynamic Tags, making it possible to populate values automatically from the current page, post, user, or other available data sources.
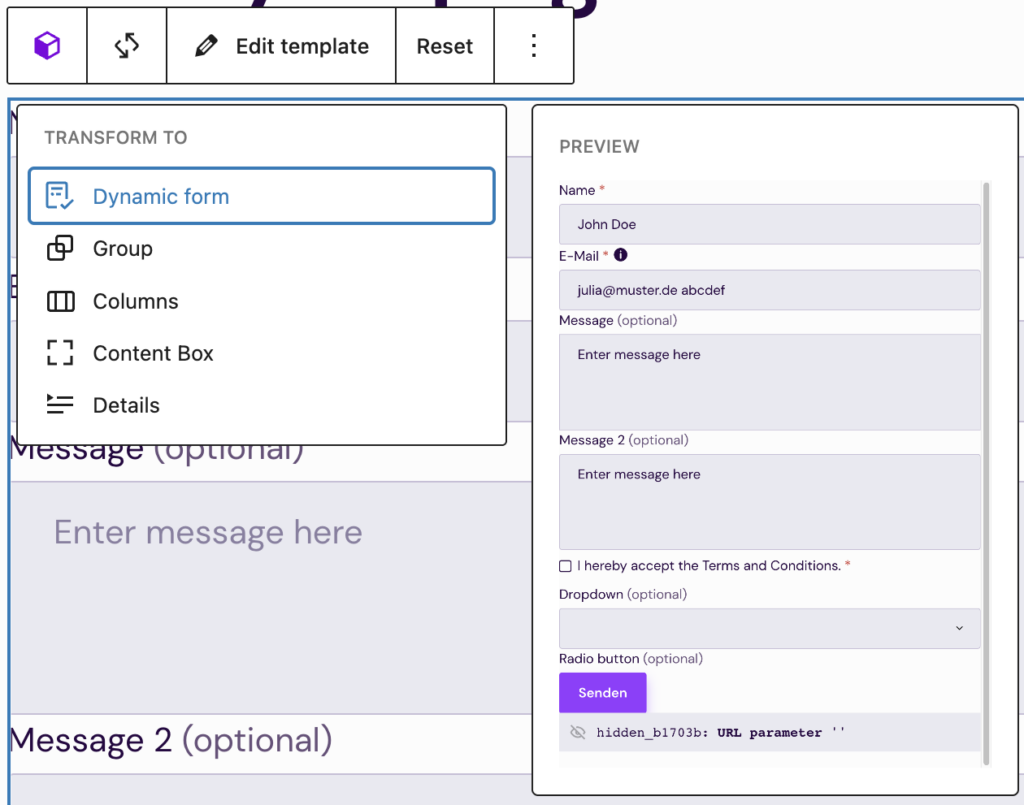
If a form has already been inserted using the standard Form block, it can be converted into a Dynamic form block at any time. This can be done through the transform options in the block toolbar or by using the conversion link provided in the block sidebar.
Dynamic Overwrites on form blocks
When creating a form with Greyd Forms, every form field block includes a Dynamic Overwrites option in its settings. This allows selected attributes of the field to be replaced dynamically when the form is displayed.
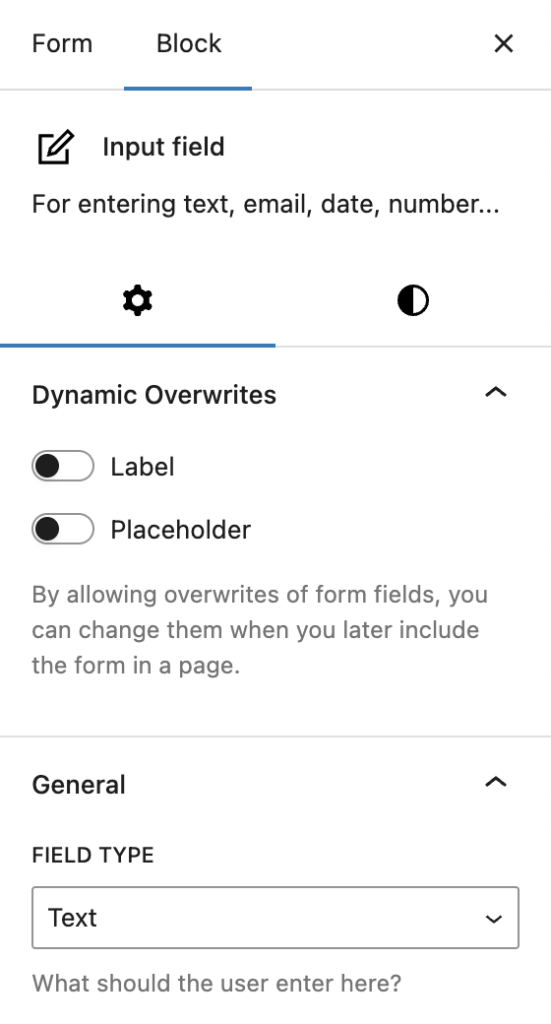
The label of every form field can be made dynamic. In addition, the placeholder text can be overwritten for Input field, Dropdown, Upload, and Password blocks. Depending on the block type, the field value or the available choices can also be made dynamic. This applies to Dropdown, Radio buttons, Radio button, Image panels, Image panel, and Hidden field blocks.
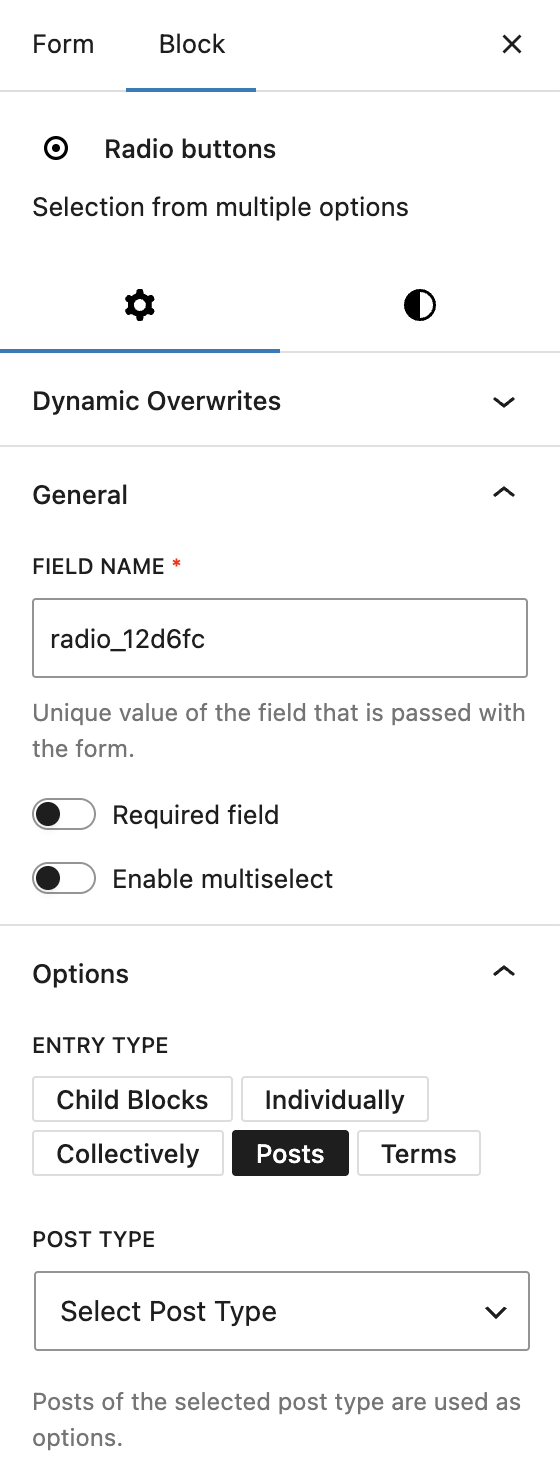
Several form field blocks also provide their own dynamic data options independently of the Dynamic Forms feature. Dropdown, Radio buttons, and Image panels all work with selectable options and support multiple methods of generating those options. Depending on the block type, options can be created through child blocks, manually managed value-label pairs, comma-separated option lists, or dynamically generated from posts and taxonomy terms. When using posts or terms, the available options are created automatically from the selected post type or taxonomy.
The Hidden field block already supports several methods for assigning dynamic values. Dynamic Forms adds the ability to overwrite these values dynamically when the form is embedded. For more information, refer to the Hidden field documentation.
Video
Hi, this is Sandra from Greyd, and in this video I’m going to show you how you can turn your Greyd Forms into dynamic forms. For example, to display post data as selectable options on a form or to use the same form on different post pages and have the form always know on which post page it was submitted.
Let us start with a concrete example. I’ve prepared a careers page here with a couple of job information sections and some job listings. If we click on one of the jobs, all these jobs are posts of my custom post type “jobs”. So, this is a single template.
And if we go into the single template, you will see that I have some dynamic data in there and some static data. Here we can also find the form. So instead of building an individual form for each job, we have one global form that is used in the single template for all of the jobs.
So right now, if somebody fills out that form, I would not know from the entry for which post or for which job somebody applied. So there’s two things that we can do for that.
The first option would be to add a selection dropdown, for example, and have the user select for which job they want to apply. So that’s the first thing that we’re going to do now.
So we’re going to edit the form. I’ve already prepared a dropdown field here, but it’s empty. It doesn’t have any options. Now I could add those options manually. Depending on how many jobs you offer, this could be a lot of work. This information would also not be updated automatically. So if there are any changes, if a job offer is deleted or added, the field would not be updated.
For each change, you would need to go back into the form and change the options manually. So, very error-prone and a lot of manual work. We want to do that automatically.
So what we’re going to do now is scroll down and instead of individual entry, I can select posts here. Then I can select the post type. In my case, it’s career. And you can already see that all my job offers, all my posts, are automatically listed here directly.
I can choose what the displayed label should look like. Title works well here. For the value, at the moment it says it would use the post ID. I prefer the title here as well.
You can define how the values or the posts should be sorted — by title alphabetically, in different directions, or by other options here. And if you have a lot of job offers, you could also define how many you would want to display here.
By the way, this not only works with post titles, but also with terms. For example, my career post type has a taxonomy called location. So I could automatically use the available locations for each post as a selection here.
But what we need now is posts. So we can save the form now.
Let’s go back to the initial use case. What we wanted to achieve was having the job form entry include which job somebody is applying for. We have achieved that with the selection field here.
But if it’s only about knowing on which form page the form was submitted, there’s an even easier way. Because right now, the user has to do all the work and make a selection here. So why not submit the data from the page where the form was used automatically? So that’s what we’re going to do now.
Let’s go back to the single page where we have the form. You can now see an option here that says “Convert to Dynamic Form”, and that’s what we are going to do now.
I’m going to save that. Right now, we can’t really do anything, so we go back to our form now and we add another field.
In our case, we can use a hidden field, so the user doesn’t need to know anything about that. We will name that “Job Hidden”. And what we can do now is make that field element dynamic.
Save the form. Then we go back to the single template and update the page.
Here’s the form. And if we focus here, we now see there’s a dynamic element called “Job”. I can select, for example, the post title as a dynamic value here.
You can see it’s automatically inserted here. The user doesn’t know anything about that, but if we save the form and fill it out now on the front end, the form entry will include the information about which post the form was filled out on.
So now let’s go back. We are on the marketing manager page. Let’s just update that.
We can do both now. The hidden field is working, and we will also use the selection. I will use a different job just to see the difference here. I will select “Cloud Engineer” here now and put in some dummy data.
So the application is submitted. Now let’s take a look at the form entry.
Here we can see my marketing manager application. And if we take a look at the entry, we can see that both options worked.
We have the hidden field that automatically included the information of the post page I was on at the moment, which is “Marketing Manager”. And we also have the dropdown selection where I intentionally selected a different job so that we are able to distinguish them from each other. Now we have “Cloud Engineer” here.
So these are two different ways of including dynamic data in your form.
And there’s one last thing I want to add to that. We’ve worked with a hidden field. There are not that many options there, because we could only make the field value dynamic.
But these dynamic elements are available for all your form blocks. So for example, if we have the dropdown, you could make the label, placeholder, and even the options dynamic.
If we have an input field, you could make the label and the placeholder dynamic as well. That way, you could use the same form in different places on your website and use different labels, for example, or even include dynamic data there as well with dynamic text.
So all in all, Greyd Forms have now become extremely dynamic, and with that even more powerful than before.